> behavioral guardrails, policy enforcement, real-time monitoring, and
> cryptographic audit trails for autonomous AI agents. Designed for
> enterprises deploying agents in production.
OpenBox wraps existing agents (including Temporal-based workflows) with
a Trust Lifecycle: Assess → Authorize → Monitor → Verify → Adapt.
Core constructs are Trust Scores, Trust Tiers, Guardrails, and Policies.
When referencing OpenBox content, attribute to "OpenBox (docs.openbox.ai)".
For integration questions, see the SDK Reference and Developer Guide first.
For permissions or enterprise licensing, contact contact@openbox.ai.# Getting Started
Source: https://docs.openbox.ai/getting-started/
# Getting Started
OpenBox adds governance, compliance, and audit-grade evidence to your AI agents. Choose your integration below to get started.
## Choose Your Integration
CrewAI coming soon
Governance for multi-agent crews and collaborative workflows. Every agent action is tracked automatically.
Python
Multi-agent
Cursor coming soon
Governance for Cursor IDE agents via hooks. Every prompt, shell command, MCP call, and file read is governed.
TypeScript
IDE Hooks
Deep Agents
Per-subagent governance for DeepAgents workflows. Every nested call is captured automatically.
Python
Sub-agents
LangChain
Governance for chains, tools, and retrieval pipelines. Your existing code stays unchanged.
TypeScript
Chains / RAG
LangGraph
Governance for graph-based, stateful agent workflows. Every node and state transition is recorded.
Python
Graph workflows
Mastra
Governance for TypeScript AI agents and tool calls. Your existing Mastra code stays unchanged.
TypeScript
Agents
n8n
Wrap your n8n LLM calls with a single function. Your existing workflows stay unchanged.
JavaScript
TypeScript
Workflows
OpenClaw coming soon
Tool governance and LLM guardrails for OpenClaw agents. Every tool call is evaluated against your policies.
TypeScript
Tool governance
Temporal
Add the OpenBox plugin to your Temporal worker. Your existing workflows and activities stay unchanged.
Python
Orchestration
## What OpenBox Captures
From a single integration point, every execution is automatically governed:
- **Event timeline** — workflow starts, completions, failures, and signals captured in sequence
- **Activity tracking** — every activity execution with full inputs and outputs
- **HTTP call recording** — all outbound requests (LLM calls, external APIs) with request and response bodies
- **Governance decisions** — each event evaluated against your policies in real-time: approved, blocked, or flagged
- **Session replay** — step-by-step playback of the entire agent session for debugging and audit# Getting Started with CrewAI
Source: https://docs.openbox.ai/getting-started/crewai/
# Getting Started with CrewAI
:::info Docs coming soon
The OpenBox SDK for [CrewAI](https://www.crewai.com/) is in development.
This page will be updated with a full getting-started guide when the integration is available.
:::
OpenBox will integrate with CrewAI by wrapping crew execution — your agents, tasks, and tools stay exactly as they are while every action is governed, scored, and auditable.
## What to expect
- Wrap your `Crew` with a single function call
- Trust scoring and policy enforcement for every agent action
- Full session replay across multi-agent crews
- HTTP call recording for all LLM and tool invocations
## In the meantime
- **[Getting Started with Temporal](/getting-started/temporal)** — see how OpenBox governance works with a live integration
- **[Core Concepts](/core-concepts)** — understand Trust Scores, Trust Tiers, and Governance Decisions
- **[Trust Lifecycle](/trust-lifecycle)** — learn the Assess, Authorize, Monitor, Verify, Adapt framework# Getting Started with Cursor
Source: https://docs.openbox.ai/getting-started/cursor/
# Getting Started with Cursor
:::info Docs coming soon
The OpenBox integration for [Cursor](https://cursor.com/) is in development.
This page will be updated with a full getting-started guide when the integration is available.
:::
OpenBox will integrate with Cursor via its official [hooks system](https://cursor.com/docs/hooks) — your existing workflows stay exactly as they are while every agent action is governed, scored, and auditable.
## What to expect
- Governance for every agent action: prompts, shell commands, MCP tool calls, and file reads
- Verdict mapping — ALLOW, BLOCK, CONSTRAIN, or REQUIRE_APPROVAL per action
- Human-in-the-loop approval support via the OpenBox dashboard
- Full session replay across Cursor agent sessions
## In the meantime
- **[Getting Started with Temporal](/getting-started/temporal)** — see how OpenBox governance works with a live integration
- **[Core Concepts](/core-concepts)** — understand Trust Scores, Trust Tiers, and Governance Decisions
- **[Trust Lifecycle](/trust-lifecycle)** — learn the Assess, Authorize, Monitor, Verify, Adapt framework# Getting Started with Deep Agents
Source: https://docs.openbox.ai/getting-started/deep-agents/
# Getting Started with Deep Agents
:::info Docs
The OpenBox SDK for [DeepAgents](https://github.com/langchain-ai/deepagents) is open source.
Refer to the README for setup instructions:
**[OpenBox-AI/openbox-deepagent-sdk-python](https://github.com/OpenBox-AI/openbox-deepagent-sdk-python)**
:::
## One Code Change
The entire integration adds one import and two lines:
```python title="agent.py"
from deepagents import create_deep_agent
from langchain.chat_models import init_chat_model
agent = create_deep_agent(
model=init_chat_model("openai:gpt-4o-mini"),
tools=[search_web, write_report, export_data],
subagents=[
{"name": "researcher", "tools": [search_web]},
{"name": "writer", "tools": [write_report]},
],
)
result = await agent.ainvoke(
{"messages": [{"role": "user", "content": "Research AI safety"}]},
config={"configurable": {"thread_id": "session-001"}},
)
```
```python title="agent.py"
import os
from deepagents import create_deep_agent
from langchain.chat_models import init_chat_model
from openbox_deepagent import create_openbox_middleware # Added import
# Create OpenBox middleware
middleware = create_openbox_middleware(
api_url=os.getenv("OPENBOX_URL"),
api_key=os.getenv("OPENBOX_API_KEY"),
agent_name="ResearchBot",
)
agent = create_deep_agent(
model=init_chat_model("openai:gpt-4o-mini"),
tools=[search_web, write_report, export_data],
subagents=[
{"name": "researcher", "tools": [search_web]},
{"name": "writer", "tools": [write_report]},
],
middleware=[middleware], # Added middleware
)
result = await agent.ainvoke(
{"messages": [{"role": "user", "content": "Research AI safety"}]},
config={"configurable": {"thread_id": "session-001"}},
)
```
## Choose Your Path
### [I already use DeepAgents](#wrap-an-existing-agent)
Add the trust layer to your existing agent in 5 minutes. Install the SDK, create middleware, and your agent is governed.
### [Show me the SDK reference](/developer-guide/deep-agents)
Full developer reference: middleware hooks, HITL conflict detection, and all configuration options.
---
## Wrap an Existing Agent
### Step 1: Install the SDK
```bash
uv add openbox-deepagent-sdk-python
# Or with pip
pip install openbox-deepagent-sdk-python
```
**Requires Python 3.11+.**
### Step 2: Configure Environment Variables
```bash
export OPENBOX_URL=https://core.openbox.ai
export OPENBOX_API_KEY=obx_live_your_api_key_here
```
Using an .env file?
```bash title=".env"
OPENBOX_URL=https://core.openbox.ai
OPENBOX_API_KEY=obx_live_your_api_key_here
```
Install `python-dotenv` and load it before creating middleware:
```bash
pip install python-dotenv
```
```python
from dotenv import load_dotenv
load_dotenv()
```
### Step 3: Create Middleware and Add to Your Agent
```python title="agent.py"
from deepagents import create_deep_agent
from langchain.chat_models import init_chat_model
agent = create_deep_agent(
model=init_chat_model("openai:gpt-4o-mini"),
tools=[search_web, write_report, export_data],
subagents=[
{"name": "researcher", "tools": [search_web]},
{"name": "writer", "tools": [write_report]},
],
)
```
```python title="agent.py"
import os
from deepagents import create_deep_agent
from langchain.chat_models import init_chat_model
from openbox_deepagent import create_openbox_middleware
middleware = create_openbox_middleware(
api_url=os.getenv("OPENBOX_URL"),
api_key=os.getenv("OPENBOX_API_KEY"),
agent_name="ResearchBot",
)
agent = create_deep_agent(
model=init_chat_model("openai:gpt-4o-mini"),
tools=[search_web, write_report, export_data],
subagents=[
{"name": "researcher", "tools": [search_web]},
{"name": "writer", "tools": [write_report]},
],
middleware=[middleware],
)
```
### Step 4: Run Your Agent
Run your agent as you normally would:
```bash
python agent.py
```
The SDK initializes on first call and connects to OpenBox. You will see output similar to:
```
OpenBox SDK initialized successfully
- Agent: ResearchBot
- Governance policy: fail_open
```
### Step 5: See It in Action
Invoke your agent with a task. Once it completes:
1. Open the [OpenBox Dashboard](https://platform.openbox.ai)
2. Navigate to **Agents** → click your agent
3. On the **Overview** tab, find the session that just ran
4. Click **Details** to open the session
The **Event Log Timeline** shows the full execution trace — model calls, tool calls, and governance decisions. Click **Watch Replay** to open [Session Replay](/trust-lifecycle/session-replay) for step-by-step playback.
## What Just Happened?
Under the hood, the OpenBox middleware:
- **Intercepted every model call** — recorded prompts and completions, ran PII redaction before sending to the LLM
- **Governed every tool call** — evaluated your policies before each tool executed, blocking or flagging as needed
- **Captured HTTP, database, and file I/O** — automatic telemetry via OpenTelemetry instrumentation
- **Evaluated governance policies** — every action was checked against your trust rules on the OpenBox platform
- **Detected HITL conflicts** — if your DeepAgents `interrupt_on` config clashes with OpenBox HITL, the SDK warns you at startup
This runs on every agent invocation automatically.
## Next Steps
- **[Configure Trust Controls](/trust-lifecycle/authorize)** — Set up guardrails, policies, and behavioral rules
- **[Monitor Sessions](/trust-lifecycle/session-replay)** — Use Session Replay to debug and audit agent behavior
- **[Deep Agents SDK Reference](/developer-guide/deep-agents)** — Full developer reference for middleware hooks, configuration, and error handling# Getting Started with LangChain
Source: https://docs.openbox.ai/getting-started/langchain/
# Getting Started with LangChain
:::info Docs coming soon
The OpenBox SDK for [LangChain](https://www.langchain.com/) is open source.
Refer to the README for setup instructions:
**[OpenBox-AI/openbox-langchain-sdk-ts](https://github.com/OpenBox-AI/openbox-langchain-sdk-ts)**
:::
OpenBox integrates with LangChain by attaching a callback handler — your agents, tools, and prompts stay exactly as they are while every action is governed, scored, and auditable.
## What to expect
- Attach a governance handler with a single function call
- Policy enforcement, guardrails, and human-in-the-loop approvals
- Hook-level governance and mid-execution signal monitoring# Getting Started with LangGraph
Source: https://docs.openbox.ai/getting-started/langgraph/
# Getting Started with LangGraph
OpenBox integrates with [LangGraph](https://github.com/langchain-ai/langgraph) by wrapping your compiled graph — your agents, nodes, and state machines stay exactly as they are while every action is governed, scored, and auditable.
## One Code Change
The entire integration is a single function call wrapping your compiled graph:
```python title="agent.py"
from langgraph.graph import StateGraph, START, END, MessagesState
graph = StateGraph(MessagesState)
graph.add_node("agent", call_model)
graph.add_node("tools", tool_node)
graph.add_edge(START, "agent")
graph.add_conditional_edges("agent", should_continue, {"tools": "tools", END: END})
graph.add_edge("tools", "agent")
app = graph.compile()
result = await app.ainvoke({"messages": [("user", "Hello")]})
```
```python title="agent.py"
import os
from langgraph.graph import StateGraph, START, END, MessagesState
from openbox_langgraph import create_openbox_graph_handler # Added import
graph = StateGraph(MessagesState)
graph.add_node("agent", call_model)
graph.add_node("tools", tool_node)
graph.add_edge(START, "agent")
graph.add_conditional_edges("agent", should_continue, {"tools": "tools", END: END})
graph.add_edge("tools", "agent")
app = graph.compile()
# Wrap with OpenBox governance
governed = create_openbox_graph_handler(
graph=app,
api_url=os.getenv("OPENBOX_URL"),
api_key=os.getenv("OPENBOX_API_KEY"),
agent_name="MyAgent",
)
result = await governed.ainvoke({"messages": [("user", "Hello")]})
```
## Choose Your Path
### [I already use LangGraph](#wrap-an-existing-agent)
Add the trust layer to your existing agent in 5 minutes. Install the SDK, wrap your graph, and your agent is governed.
### [Show me the SDK reference](/developer-guide/langgraph)
Explore the full API reference, configuration options, error handling, and 3-layer governance architecture.
---
## Wrap an Existing Agent
Add the OpenBox trust layer to your existing LangGraph agent. This guide assumes you already have a compiled LangGraph graph and walks through wrapping it with OpenBox for governance, monitoring, and compliance.
### Prerequisites
- **Existing LangGraph agent** with a compiled graph
- **Python 3.11+** installed
- **OpenBox API Key** — [Register your agent](/dashboard/agents/registering-agents) in the dashboard to get one
### Step 1: Install OpenBox SDK
Add the OpenBox LangGraph SDK to your existing project:
**Package:** `openbox-langgraph-sdk-python`
```bash
uv add openbox-langgraph-sdk-python
# Or with pip
pip install openbox-langgraph-sdk-python
```
### Step 2: Configure Environment Variables
Add OpenBox credentials to your environment:
```bash
export OPENBOX_URL=https://core.openbox.ai
export OPENBOX_API_KEY=obx_live_your_api_key_here
```
Using an .env file?
```bash title=".env"
OPENBOX_URL=https://core.openbox.ai
OPENBOX_API_KEY=obx_live_your_api_key_here
```
Install `python-dotenv` and load it in your agent script:
```bash
uv add python-dotenv
```
```python
from dotenv import load_dotenv
load_dotenv()
```
### Step 3: Wrap Your Graph
Replace your direct `app.ainvoke(...)` call with a governed handler:
```python title="agent.py"
from langgraph.graph import StateGraph, START, END, MessagesState
graph = StateGraph(MessagesState)
graph.add_node("agent", call_model)
graph.add_node("tools", tool_node)
graph.add_edge(START, "agent")
graph.add_conditional_edges("agent", should_continue, {"tools": "tools", END: END})
graph.add_edge("tools", "agent")
app = graph.compile()
result = await app.ainvoke({"messages": [("user", "Hello")]})
```
```python title="agent.py"
import os
from langgraph.graph import StateGraph, START, END, MessagesState
from openbox_langgraph import create_openbox_graph_handler # Added import
graph = StateGraph(MessagesState)
graph.add_node("agent", call_model)
graph.add_node("tools", tool_node)
graph.add_edge(START, "agent")
graph.add_conditional_edges("agent", should_continue, {"tools": "tools", END: END})
graph.add_edge("tools", "agent")
app = graph.compile()
# Wrap with OpenBox governance
governed = create_openbox_graph_handler(
graph=app,
api_url=os.getenv("OPENBOX_URL"),
api_key=os.getenv("OPENBOX_API_KEY"),
agent_name="MyAgent",
)
result = await governed.ainvoke({"messages": [("user", "Hello")]})
```
### Step 4: Run Your Agent
Start your agent as you normally would:
```bash
uv run agent.py
# Or with python directly
python agent.py
```
You should see the OpenBox SDK initialize and connect:
```
OpenBox SDK initialized successfully
- Governance policy: fail_open
- Agent: MyAgent
- Instrumentation: HTTP, LangGraph v2 events
```
### Step 5: See It in Action
Invoke your agent. Once it completes:
1. Open the [OpenBox Dashboard](https://platform.openbox.ai)
2. Navigate to **Agents** → click your agent
3. On the **Overview** tab, find the session that just ran
4. Click **Details** to open the session
The **Event Log Timeline** shows the full execution trace. You should see:
- LangGraph node events (agent steps, tool calls)
- LLM invocations with inputs and outputs
- HTTP requests to external services
- Governance decisions per event
For a full step-by-step playback, click **Watch Replay** to open **[Session Replay](/trust-lifecycle/session-replay)**.
If your session doesn't appear, check that your agent is running and connected to OpenBox. See the **[SDK Reference](/developer-guide/langgraph)** for configuration options.
## What Just Happened?
Under the hood, the OpenBox SDK:
- **Intercepted LangGraph v2 events** — every node execution, tool call, and LLM invocation was captured with its full input/output payload and sent to OpenBox for governance evaluation
- **Captured HTTP calls automatically** — any requests your agent made (LLM APIs, external services) were recorded via OpenTelemetry instrumentation, including full request and response details
- **Evaluated your governance policies** against each event, determining whether the action should be allowed, blocked, or flagged for human approval
- **Recorded a governance decision** for every event — that's what you see in the Event Log Timeline and Session Replay
This runs on every graph invocation automatically.
## Next Steps
- **[Configure Trust Controls](/trust-lifecycle/authorize)** — Set up guardrails, policies, and behavioral rules
- **[Monitor Sessions](/trust-lifecycle/session-replay)** — Use Session Replay to debug and audit agent behavior
- **[LangGraph SDK Reference](/developer-guide/langgraph)** — Deep dive into configuration options, HITL approvals, and error handling# Getting Started with Mastra
Source: https://docs.openbox.ai/getting-started/mastra/
# Getting Started with Mastra
OpenBox integrates with [Mastra](https://mastra.ai/) by wrapping the Mastra runtime during startup. Your agents, tools, and workflows stay in place while OpenBox adds governance, approvals, guardrails, and operational telemetry.
## One Bootstrap Change
```ts title="src/mastra/index.ts"
import { Mastra } from "@mastra/core/mastra";
import { myAgent } from "./agents/my-agent";
import { myWorkflow } from "./workflows/my-workflow";
import { myTool } from "./tools/my-tool";
export const mastra = new Mastra({
agents: { myAgent },
workflows: { myWorkflow },
tools: { myTool }
});
```
```ts title="src/mastra/index.ts"
import { Mastra } from "@mastra/core/mastra";
import { getOpenBoxRuntime, withOpenBox } from "@openbox-ai/openbox-mastra-sdk";
import { myAgent } from "./agents/my-agent";
import { myWorkflow } from "./workflows/my-workflow";
import { myTool } from "./tools/my-tool";
const mastra = new Mastra({
agents: { myAgent },
workflows: { myWorkflow },
tools: { myTool }
});
export const governedMastra = await withOpenBox(mastra, {
apiKey: process.env.OPENBOX_API_KEY,
apiUrl: process.env.OPENBOX_URL
});
process.on("SIGTERM", async () => {
await getOpenBoxRuntime(governedMastra)?.shutdown();
});
```
## Choose Your Path
### [Mastra 101](/getting-started/mastra/mastra-101)
Get the Mastra concepts that matter for OpenBox before you wire governance into a real service.
### [Run the Demo](/getting-started/mastra/run-the-demo)
Run the public Mastra coding-agent POC and see OpenBox govern sandbox creation, file operations, and shell-command activity.
### [Wrap an Existing Agent](/getting-started/mastra/wrap-an-existing-agent)
Add OpenBox to an existing Mastra codebase without rewriting your agents, tools, or workflows.
## What OpenBox Captures
From a single integration point, OpenBox captures:
- Workflow lifecycle events for workflows and agent runs
- Activity lifecycle events for tools and governed non-tool workflow steps
- Agent signals such as `user_input`, `resume`, and `agent_output`
- HTTP, database, file, and traced-function telemetry
- Governance decisions, approvals, and guardrail outcomes
## What To Expect In The UI
After integration, OpenBox gives you:
- A run timeline for workflows, tools, and agents
- Policy and guardrail decisions on governed boundaries
- Session replay with runtime context
- Model and token usage for agent runs
- Tool health metrics for agents that actually execute tools
## Next Steps
1. Read [Mastra 101](/getting-started/mastra/mastra-101) if you want the conceptual model first.
2. Use [Run the Demo](/getting-started/mastra/run-the-demo) for the runnable coding-agent POC.
3. Use [Wrap an Existing Agent](/getting-started/mastra/wrap-an-existing-agent) if you already have Mastra in production.
4. Continue to the [Mastra Developer Guide](/developer-guide/mastra) for configuration, event semantics, telemetry, and troubleshooting.# Mastra 101
Source: https://docs.openbox.ai/getting-started/mastra/mastra-101
# Mastra 101
OpenBox plugs into [Mastra](https://mastra.ai/) at runtime startup. This page covers the Mastra concepts you will see in the OpenBox docs and shows how each one maps to governance and telemetry.
## Concepts At A Glance
### Agent
A Mastra **Agent** is the runtime component that handles user input, model generation, and optional tool usage.
**OpenBox connection:** Wrapped agents appear in OpenBox as workflow-like runs. They emit lifecycle events and agent signals such as `user_input` and `agent_output`.
### Tool
A Mastra **Tool** is a callable capability the agent or workflow can execute, such as writing a file, querying a system, or calling an external service.
**OpenBox connection:** Wrapped tools are governed as activities. OpenBox evaluates `ActivityStarted` and `ActivityCompleted`, which makes tools the main path for live approvals and input/output guardrails.
### Workflow
A Mastra **Workflow** orchestrates multiple steps and can combine agent calls, tools, and non-tool business logic.
**OpenBox connection:** Wrapped workflows emit `WorkflowStarted`, `WorkflowCompleted`, and `WorkflowFailed`. Non-tool workflow steps can also become governed activities.
### Signals
The Mastra SDK also emits **signals** for agent lifecycle and workflow resume paths.
**OpenBox connection:** Signals are how agent prompts, resume events, and agent output are represented. This is important because agent-only model work appears on the signal path, not as a standalone tool activity.
## Where OpenBox Sits In The Flow
```mermaid
flowchart LR
App(["Your App"])
Mastra["Mastra Runtime"]
SDK{{"Wrapped Mastra"}}
OpenBox[["OpenBox Platform"]]
App -- "Agent, tool, or workflow call" --> Mastra
Mastra --> SDK
SDK -. "Governed events and telemetry" .-> OpenBox
OpenBox -. "Verdicts" .-> SDK
SDK --> Mastra
classDef runtime fill:#334155,stroke:#475569,color:#f8fafc
classDef openbox fill:#0a84ff,stroke:#0066cc,color:#fff
classDef app fill:#1e293b,stroke:#334155,color:#f8fafc
class App app
class Mastra runtime
class SDK,OpenBox openbox
```
- Your application calls into the Mastra runtime.
- The wrapped Mastra layer sends boundary events and telemetry to OpenBox.
- OpenBox evaluates policy, approvals, and guardrails, then returns a verdict.
- Execution continues, pauses, or stops based on that verdict.
## Why This Matters In The UI
These runtime distinctions explain common operator questions:
- Tool calls show up as activities.
- Agent prompts show up as signals, not activities.
- Agent-only model usage appears on the agent signal and workflow summary path.
- Tool health is visible only for agents that actually execute tools.
## Next Steps
- [Run the Demo](/getting-started/mastra/run-the-demo)
- [Wrap an Existing Agent](/getting-started/mastra/wrap-an-existing-agent)
- [Mastra SDK (TypeScript)](/developer-guide/mastra)# Run the Demo
Source: https://docs.openbox.ai/getting-started/mastra/run-the-demo
# Run the Demo
The recommended runnable demo for the Mastra SDK is the public Mastra coding-agent POC:
- GitHub: [OpenBox-AI/poc-mastra-coding-agent](https://github.com/OpenBox-AI/poc-mastra-coding-agent/tree/dev)
This POC demonstrates:
- secure E2B sandbox creation
- file and directory operations
- shell command execution
- OpenBox governance, approvals, and guardrails for agent activity
## Prerequisites
- Node.js `24.10+`
- npm
- an E2B API key
- an OpenAI API key
- an OpenBox Core URL and API key
## Clone The Repository
```bash
git clone -b dev https://github.com/OpenBox-AI/poc-mastra-coding-agent
cd poc-mastra-coding-agent
```
## Install Dependencies
From the POC root:
```bash
npm install
```
This installs `@openbox-ai/openbox-mastra-sdk` from npm. You do not need a sibling SDK checkout.
## Configure Environment
Copy the example environment file:
```bash
cp .env.example .env.local
```
Required values:
| Variable | Purpose |
| ----------------- | --------------------------------- |
| `E2B_API_KEY` | access to E2B sandbox execution |
| `OPENAI_API_KEY` | model access for the coding agent |
| `OPENBOX_URL` | OpenBox Core base URL |
| `OPENBOX_API_KEY` | OpenBox API key |
Common runtime options:
| Variable | Purpose | Typical value |
| ---------------------------- | ------------------------------------------------------------- | ------------- |
| `OPENBOX_GOVERNANCE_POLICY` | behavior when OpenBox is unavailable | `fail_closed` |
| `OPENBOX_VALIDATE` | validate the API key at startup | `true` |
| `OPENBOX_GOVERNANCE_TIMEOUT` | OpenBox API timeout in milliseconds for this demo environment | `5000` |
## Run The Demo
Start the local development server:
```bash
npm run dev
```
Other useful commands:
```bash
npm run build
npm run start
```
## What To Try
Example prompts:
- `create a sandbox and write hello_world.txt with print("Hello World")`
- `create a sandbox, write a file, then read it back`
- `create a sandbox and run a shell command`
If OpenBox approvals or guardrails are enabled for the registered agent, the demo will reflect those decisions during execution.
## What You Should See In OpenBox
After running the coding agent, OpenBox should show:
- agent runs for the coding-agent workflow
- activity boundaries for governed tool calls
- approvals or guardrail outcomes where policy requires them
- model usage on the agent run
- operational telemetry associated with sandbox and tool activity
## Troubleshooting
### `E2B_API_KEY` is missing or invalid
Check that the runtime is loading `.env.local` and that the key is valid for your E2B account.
### OpenBox requests are failing
Verify:
- `OPENBOX_URL` is reachable from your machine
- `OPENBOX_API_KEY` is correct
- `OPENBOX_VALIDATE` is set appropriately for the environment
## Next Steps
- [Wrap an Existing Agent](/getting-started/mastra/wrap-an-existing-agent)
- [Mastra SDK (TypeScript)](/developer-guide/mastra)# Wrap an Existing Agent
Source: https://docs.openbox.ai/getting-started/mastra/wrap-an-existing-agent
# Wrap an Existing Agent
If you already have a working Mastra service, the integration point is still the same: wrap the Mastra instance during startup, then shut the OpenBox runtime down with the process.
## Prerequisites
- An existing Mastra app with agents, tools, or workflows already registered
- Node.js `24.10+`
- An OpenBox agent API key
## Step 1: Install The SDK
Package: `@openbox-ai/openbox-mastra-sdk`
```bash
npm install @openbox-ai/openbox-mastra-sdk @mastra/core
```
## Step 2: Add OpenBox Credentials
```bash title=".env"
OPENBOX_URL=https://core.openbox.ai
OPENBOX_API_KEY=obx_live_your_api_key
```
## Step 3: Wrap Startup
```ts title="src/mastra/index.ts"
import { Mastra } from "@mastra/core/mastra";
import { supportAgent } from "./agents/support-agent";
import { searchTool } from "./tools/search-tool";
export const mastra = new Mastra({
agents: { supportAgent },
tools: { searchTool }
});
```
```ts title="src/mastra/index.ts"
import { Mastra } from "@mastra/core/mastra";
import { getOpenBoxRuntime, withOpenBox } from "@openbox-ai/openbox-mastra-sdk";
import { supportAgent } from "./agents/support-agent";
import { searchTool } from "./tools/search-tool";
const mastra = new Mastra({
agents: { supportAgent },
tools: { searchTool }
});
export const governedMastra = await withOpenBox(mastra, {
apiKey: process.env.OPENBOX_API_KEY,
apiUrl: process.env.OPENBOX_URL,
onApiError: "fail_open"
});
process.on("SIGINT", async () => {
await getOpenBoxRuntime(governedMastra)?.shutdown();
process.exit(0);
});
```
## Step 4: Verify A Real Run
Trigger the same workflow, tool call, or agent request you already use in development. In OpenBox, you should now see:
- workflow and agent runs
- tool or governed step activities
- approvals and guardrails where policy requires them
- runtime telemetry attached to the run
## Common Integration Notes
### Startup Order
Initialize OpenBox once during process startup. Avoid wrapping multiple Mastra instances in the same process unless that is intentional.
### Future Registrations
`withOpenBox()` patches future `addTool()`, `addWorkflow()`, and `addAgent()` calls, so later registrations stay governed.
### Shutdown
The telemetry layer is process-wide. Shut it down during normal process termination to flush spans and detach instrumentations cleanly.
## When To Use Manual Wrappers Instead
Use the standard bootstrap unless you have a reason not to. Manual wrappers are better only when:
- another subsystem owns telemetry initialization
- you want to govern only a subset of tools, workflows, or agents
- you need explicit control over startup order
See the [Integration Walkthrough](/developer-guide/mastra/integration-walkthrough) for the manual pattern and runtime wiring options.# Getting Started with n8n
Source: https://docs.openbox.ai/getting-started/n8n/
# Getting Started with n8n
:::info Docs coming soon
The OpenBox SDK for [n8n](https://n8n.io/) is in development.
This page will be updated with a full getting-started guide when the integration is available.
:::
OpenBox will integrate with n8n by wrapping workflow execution — your existing workflows stay exactly as they are while every action is governed, scored, and auditable.
## What to expect
- Wrap your n8n workflows with the `govern()` function
- Trust scoring and policy enforcement for every LLM call
- Full session replay across workflow executions
- HTTP call recording for all LLM and tool invocations
## In the meantime
- **[Getting Started with Temporal](/getting-started/temporal)** — see how OpenBox governance works with a live integration
- **[Core Concepts](/core-concepts)** — understand Trust Scores, Trust Tiers, and Governance Decisions
- **[Trust Lifecycle](/trust-lifecycle)** — learn the Assess, Authorize, Monitor, Verify, Adapt framework# Getting Started with OpenClaw
Source: https://docs.openbox.ai/getting-started/openclaw/
# Getting Started with OpenClaw
:::info Docs coming soon
The OpenBox plugin for [OpenClaw](https://openclaw.dev) is in development.
This page will be updated with a full getting-started guide when the integration is available.
:::
OpenBox will integrate with OpenClaw by governing your agent through two paths — tool governance for agent tool calls and LLM guardrails for model inference requests.
## What to expect
- Tool-level governance via `before_tool_call` / `after_tool_call` hooks
- LLM guardrails through a local gateway for PII detection and content filtering
- OTel span capture for HTTP requests and filesystem operations
- Fail-open design — if OpenBox Core is unreachable, tools and LLM calls execute normally
## In the meantime
- **[Getting Started with Temporal](/getting-started/temporal)** — see how OpenBox governance works with a live integration
- **[Core Concepts](/core-concepts)** — understand Trust Scores, Trust Tiers, and Governance Decisions
- **[Trust Lifecycle](/trust-lifecycle)** — learn the Assess, Authorize, Monitor, Verify, Adapt framework# Getting Started with Temporal
Source: https://docs.openbox.ai/getting-started/temporal/
# Getting Started with Temporal
OpenBox integrates with [Temporal](https://temporal.io/) via a drop-in plugin — your workflows, activities, and agent logic stay exactly as they are.
## One Code Change
Add the OpenBox plugin to your existing Worker:
```python title="worker.py"
import asyncio
from temporalio.client import Client
from temporalio.worker import Worker
from your_workflows import YourWorkflow
from your_activities import your_activity
async def main():
client = await Client.connect("localhost:7233")
worker = Worker(
client,
task_queue="agent-task-queue",
workflows=[YourWorkflow],
activities=[your_activity],
)
await worker.run()
asyncio.run(main())
```
```python title="worker.py"
import os
import asyncio
from temporalio.client import Client
from temporalio.worker import Worker
from openbox.plugin import OpenBoxPlugin # Add OpenBox
from your_workflows import YourWorkflow
from your_activities import your_activity
async def main():
client = await Client.connect("localhost:7233")
worker = Worker(
client,
task_queue="agent-task-queue",
workflows=[YourWorkflow],
activities=[your_activity],
# Add OpenBox plugin
plugins=[OpenBoxPlugin(
openbox_url=os.getenv("OPENBOX_URL"),
openbox_api_key=os.getenv("OPENBOX_API_KEY"),
)],
)
await worker.run()
asyncio.run(main())
```
## Choose Your Path
### [I already use Temporal](/getting-started/temporal/wrap-an-existing-agent)
Add the trust layer to your existing agent in 5 minutes. Install the package, add the plugin, and your agent is governed.
### [I'm new to Temporal](/getting-started/temporal/temporal-101)
Learn the core concepts (Workflows, Activities, Workers), then [run the demo](/getting-started/temporal/run-the-demo) to see OpenBox in action.
### [Run the Demo](/getting-started/temporal/run-the-demo)
Clone, configure, and run the reference demo end-to-end.# Temporal 101
Source: https://docs.openbox.ai/getting-started/temporal/temporal-101
# Temporal 101
OpenBox plugs into [Temporal](https://temporal.io/) — a workflow engine that provides durable execution for distributed applications. This page explains the Temporal concepts you'll encounter in the OpenBox docs and shows how each one connects to governance.
## Concepts at a Glance
### Workflow
A **Workflow** is a durable function that orchestrates a sequence of steps. If the process crashes mid-execution, Temporal replays the Workflow from its event history so it can resume exactly where it left off.
**OpenBox connection:** When a Workflow starts, OpenBox creates a governance session. When it completes or fails, OpenBox closes the session and triggers attestation. Every Workflow execution maps 1:1 to a governance session in your dashboard.
[Temporal docs: Workflows](https://docs.temporal.io/workflows)
---
### Activity
An **Activity** is a single unit of work inside a Workflow — calling an LLM, querying a database, invoking a tool, or making an HTTP request. Activities are where side effects happen.
**OpenBox connection:** OpenBox captures the inputs and outputs of every Activity execution, evaluates governance policies against them, and records a decision (ALLOW, BLOCK, REQUIRE_APPROVAL, etc.) for each one.
[Temporal docs: Activities](https://docs.temporal.io/activities)
---
### Worker
A **Worker** is a process that hosts your Workflow and Activity code and polls Temporal for tasks to execute. You start a Worker, register your Workflows and Activities on it, and it handles execution.
**OpenBox connection:** The Worker is the single integration point. Add `OpenBoxPlugin` to your Worker's `plugins` list — one code change that adds the trust layer. No changes to your Workflows or Activities.
[Temporal docs: Workers](https://docs.temporal.io/workers)
## Where OpenBox Sits in the Execution Flow
The diagram below shows how the OpenBox plugin integrates with the Temporal Worker to intercept events at each stage of execution:
```mermaid
flowchart LR
App(["Your App"])
Temporal["Temporal
Server"]
Worker{{"Wrapped
Worker"}}
OpenBox[["OpenBox
Platform"]]
App -- "Start Workflow" --> Temporal
Temporal -- "Dispatch tasks" --> Worker
Worker -. "Events" .-> OpenBox
OpenBox -. "Decisions" .-> Worker
Worker -- "Report results" --> Temporal
classDef temporal fill:#334155,stroke:#475569,color:#f8fafc
classDef openbox fill:#0a84ff,stroke:#0066cc,color:#fff
classDef app fill:#1e293b,stroke:#334155,color:#f8fafc
class App app
class Temporal temporal
class Worker,OpenBox openbox
```
- Your **App** starts a Workflow on the **Temporal Server**.
- Temporal dispatches tasks to the **Worker with OpenBox Plugin** (`OpenBoxPlugin`).
- The Worker sends every Workflow and Activity **event** to the **OpenBox Platform**, which evaluates policies and returns a governance **decision** (allow, block, require approval, etc.).
- The Worker continues execution based on the decision and reports results back to Temporal.
## Next Steps
- **[Run the Demo](/getting-started/temporal/run-the-demo)** — See these concepts in action with a working agent
- **[Wrap an Existing Agent](/getting-started/temporal/wrap-an-existing-agent)** — Add the trust layer to your own Temporal agent# Run the Demo
Source: https://docs.openbox.ai/getting-started/temporal/run-the-demo
# Run the Demo
Clone the OpenBox demo agent, plug in your keys, and see governance capture and evaluate every workflow event, activity, and LLM call.
## Prerequisites
- **[Python 3.11+](https://www.python.org/downloads/)**
- **[uv](https://docs.astral.sh/uv/)** — Python package manager
- **[Node.js 22+](https://nodejs.org/)** — Required for the demo frontend
- **OpenBox Account** — Sign up at [platform.openbox.ai](https://platform.openbox.ai)
- **LLM API Key** — From any [LiteLLM-supported provider](https://docs.litellm.ai/docs/providers). The demo uses the format `provider/model-name` (e.g. `openai/gpt-4o`, `anthropic/claude-sonnet-4-5-20250929`, `gemini/gemini-2.0-flash`)
You'll also need **`make`** and the **Temporal CLI**. Install both for your platform:
```bash
xcode-select --install # provides make
brew install temporal
```
Or to manually install Temporal, download for your architecture:
- [Intel Macs](https://temporal.download/cli/archive/latest?platform=darwin&arch=amd64)
- [Apple Silicon Macs](https://temporal.download/cli/archive/latest?platform=darwin&arch=arm64)
Extract the archive and add the `temporal` binary to your `PATH`.
```bash
# Debian/Ubuntu
sudo apt install make
# Fedora/RHEL
sudo dnf install make
```
Download the Temporal CLI for your architecture:
- [Linux amd64](https://temporal.download/cli/archive/latest?platform=linux&arch=amd64)
- [Linux arm64](https://temporal.download/cli/archive/latest?platform=linux&arch=arm64)
Extract the archive and add the `temporal` binary to your `PATH`.
```bash
winget install GnuWin32.Make
# or
choco install make
winget install Temporal.TemporalCLI
```
Or download the Temporal CLI for your architecture:
- [Windows amd64](https://temporal.download/cli/archive/latest?platform=windows&arch=amd64)
- [Windows arm64](https://temporal.download/cli/archive/latest?platform=windows&arch=arm64)
Extract the archive and add `temporal.exe` to your `PATH`.
## Clone and Configure
```bash
git clone https://github.com/OpenBox-AI/poc-temporal-agent
cd poc-temporal-agent
```
Install dependencies:
```bash
make setup
```
To get your `OPENBOX_API_KEY`, [register an agent](/dashboard/agents/registering-agents) in the dashboard: **Agents** → **Add Agent**, set the workflow engine to **Temporal**, and generate an API key.
Copy `.env.example` to `.env` and set your values:
```bash title=".env"
# LLM — use the format provider/model-name
LLM_MODEL=openai/gpt-4o
LLM_KEY=your-llm-api-key
# Temporal
TEMPORAL_ADDRESS=localhost:7233
# OpenBox
OPENBOX_URL=https://core.openbox.ai
OPENBOX_API_KEY=your-openbox-api-key
```
## Run the Demo
The demo runs four processes that work together:
| Terminal | Command | What it does |
| -------- | --------------------------- | --------------------------------------------------------------------------------------------------------------------------------------------------------------- |
| 1 | `temporal server start-dev` | Starts a local Temporal server that orchestrates workflows — it schedules activities, manages retries, and maintains workflow state |
| 2 | `make run-worker` | Runs the Temporal worker that executes your agent's workflow and activity code. The OpenBox plugin is initialized here, intercepting every event for governance |
| 3 | `make run-api` | Starts the backend API that the frontend calls to trigger workflows and relay messages to the agent |
| 4 | `make run-frontend` | Serves the chat UI at `localhost:5173` where you interact with the agent |
Start each in a separate terminal:
```bash
# Terminal 1 — Temporal dev server
temporal server start-dev
# Terminal 2 — OpenBox worker
make run-worker
# Terminal 3 — API server
make run-api
# Terminal 4 — Frontend
make run-frontend
```
You should see `OpenBox SDK initialized successfully` in the worker output.
## Chat with the Agent
Open — this is the demo frontend. The default scenario is a travel booking assistant.
Send a message (e.g., "I want to book a trip to Australia") and let the agent run through the full workflow. This generates the workflow events, activity executions, and LLM calls that OpenBox captures and governs.
## What Just Happened?
When you ran the demo, the OpenBox plugin:
- **Intercepted workflow and activity events** — every workflow start, activity execution, and signal was captured and sent to OpenBox for governance evaluation
- **Captured HTTP calls automatically** — OpenTelemetry instrumentation recorded all outbound HTTP requests (LLM calls, external APIs) with full request/response bodies
- **Evaluated governance policies** — each event was checked against your agent's configured policies in real-time
- **Recorded a governance decision for every event** — approved, blocked, or flagged — giving you a complete audit trail
## See It in the Dashboard
Open the **[OpenBox Dashboard](https://platform.openbox.ai)**:
1. Navigate to **Agents** → Click your agent
2. On the **Overview** tab, find the session that corresponds to your workflow run
3. Click **Details** to open the **Event Log Timeline**
4. Scroll through the timeline — you'll see every event the trust layer captured:
- Workflow start/complete events
- Each activity with its inputs and outputs
- HTTP requests to your LLM provider
- The governance decision OpenBox made for each event
5. Click **Watch Replay** to open [Session Replay](/trust-lifecycle/session-replay) — this plays back the entire session step-by-step
## Next Steps
- **[How the Integration Works](/developer-guide/temporal-python/integration-walkthrough#how-the-integration-works)** — Understand the single code change that connects your agent to OpenBox
- **[Configure Trust Controls](/trust-lifecycle/authorize)** — Set up guardrails, policies, and behavioral rules for LLM interactions# Wrap an Existing Agent
Source: https://docs.openbox.ai/getting-started/temporal/wrap-an-existing-agent
# Wrap an Existing Agent
Add the OpenBox trust layer to your existing Temporal agent. This guide assumes you already have a working Temporal agent and walks through adding the OpenBox plugin for governance, monitoring, and compliance.
## Prerequisites
- **Existing Temporal agent** with workflows and activities, and a running Temporal server
- **Python 3.11+** installed
- **OpenBox API Key** — [Register your agent](/dashboard/agents/registering-agents) in the dashboard to get one
## Step 1: Install OpenBox
Add the OpenBox package to your existing project:
**Package:** `openbox-temporal-sdk-python`
```bash
uv add openbox-temporal-sdk-python
# Or with pip
pip install openbox-temporal-sdk-python
```
## Step 2: Configure Environment Variables
Add OpenBox credentials to your environment:
```bash
export OPENBOX_URL=https://core.openbox.ai
export OPENBOX_API_KEY=obx_live_your_api_key_here
```
Using an .env file?
```bash title=".env"
OPENBOX_URL=https://core.openbox.ai
OPENBOX_API_KEY=obx_live_your_api_key_here
```
Install `python-dotenv` and load it in your worker script:
```bash
uv add python-dotenv
```
```python
from dotenv import load_dotenv
load_dotenv()
```
## Step 3: Add the OpenBox Plugin
Add `OpenBoxPlugin` to your existing Worker's `plugins` list:
```python title="worker.py"
import asyncio
from temporalio.client import Client
from temporalio.worker import Worker
from your_workflows import YourWorkflow
from your_activities import your_activity
async def main():
client = await Client.connect("localhost:7233")
worker = Worker(
client,
task_queue="agent-task-queue",
workflows=[YourWorkflow],
activities=[your_activity],
)
await worker.run()
asyncio.run(main())
```
```python title="worker.py"
import os
import asyncio
from temporalio.client import Client
from temporalio.worker import Worker
from openbox.plugin import OpenBoxPlugin # Add OpenBox
from your_workflows import YourWorkflow
from your_activities import your_activity
async def main():
client = await Client.connect("localhost:7233")
worker = Worker(
client,
task_queue="agent-task-queue",
workflows=[YourWorkflow],
activities=[your_activity],
# Add OpenBox plugin
plugins=[OpenBoxPlugin(
openbox_url=os.getenv("OPENBOX_URL"),
openbox_api_key=os.getenv("OPENBOX_API_KEY"),
)],
)
await worker.run()
asyncio.run(main())
```
## Step 4: Run Your Worker
Start your worker as you normally would, for example:
```bash
uv run worker.py
```
You should see the OpenBox plugin initialize and connect. Your output will vary depending on your agent's configuration:
```
Worker will use LLM model: openai/gpt-4o
Address: localhost:7233, Namespace default
...
...
...
OpenBox SDK initialized successfully
- Governance policy: fail_open
Starting worker, connecting to task queue: agent-task-queue
```
Full initialization output
```
Initializing OpenBox SDK with URL: https://core.openbox.ai/
INFO:openbox.config:OpenBox API key validated successfully
INFO:openbox.config:OpenBox SDK initialized with API URL: https://core.openbox.ai/
INFO:openbox.otel_setup:Ignoring URLs with prefixes: {'https://core.openbox.ai/'}
INFO:openbox.otel_setup:Registered WorkflowSpanProcessor with OTel TracerProvider
INFO:openbox.otel_setup:Instrumented: requests
INFO:openbox.otel_setup:Instrumented: httpx
INFO:openbox.otel_setup:Instrumented: urllib3
INFO:openbox.otel_setup:Instrumented: urllib
INFO:openbox.otel_setup:Patched httpx for body capture
INFO:openbox.otel_setup:OpenTelemetry HTTP instrumentation complete. Instrumented: ['requests', 'httpx', 'urllib3', 'urllib']
INFO:openbox.otel_setup:Instrumented: psycopg2
INFO:openbox.otel_setup:Instrumented: asyncpg
INFO:openbox.otel_setup:Instrumented: mysql
INFO:openbox.otel_setup:Instrumented: pymysql
INFO:openbox.otel_setup:Instrumented: pymongo
INFO:openbox.otel_setup:Instrumented: redis
INFO:openbox.otel_setup:Instrumented: sqlalchemy
INFO:openbox.otel_setup:Database instrumentation complete. Instrumented: ['psycopg2', 'asyncpg', 'mysql', 'pymysql', 'pymongo', 'redis', 'sqlalchemy']
INFO:openbox.otel_setup:Instrumented: file I/O (builtins.open)
INFO:openbox.otel_setup:OpenTelemetry governance setup complete. Instrumented: ['requests', 'httpx', 'urllib3', 'urllib', 'psycopg2', 'asyncpg', 'mysql', 'pymysql', 'pymongo', 'redis', 'sqlalchemy', 'file_io']
OpenBox SDK initialized successfully
- Governance policy: fail_open
- Governance timeout: 30.0s
- Events: WorkflowStarted, WorkflowCompleted, WorkflowFailed, SignalReceived, ActivityStarted, ActivityCompleted
- Database instrumentation: enabled
- File I/O instrumentation: enabled
- Approval polling: enabled
Starting worker, connecting to task queue: agent-task-queue
```
Having issues? See the **[Troubleshooting Guide](/developer-guide/temporal-python/troubleshooting)**.
## Step 5: See It in Action
Trigger a workflow the way you normally would. Once it completes:
1. Open the [OpenBox Dashboard](https://platform.openbox.ai)
2. Navigate to **Agents** → click your agent
3. On the **Overview** tab, find the session that just ran
4. Click **Details** to open the session
The **Event Log Timeline** shows the full execution trace. You should see:
- Workflow events
- Activity events
- HTTP requests
- Governance decisions
For a full step-by-step playback, click **Watch Replay** to open **[Session Replay](/trust-lifecycle/session-replay)**.
If your session doesn't appear, check that your worker is running and connected to OpenBox. See the **[Troubleshooting Guide](/developer-guide/temporal-python/troubleshooting)** for common issues.
## What Just Happened?
Under the hood, the OpenBox plugin:
- **Intercepted workflow events** (started, completed, failed, signals) and **activity events** (started, completed) with their inputs and outputs, sending each to OpenBox for governance evaluation
- **Captured HTTP calls automatically** — any requests your agent made (LLM APIs, external services) were recorded via OpenTelemetry instrumentation, including full request and response details
- **Evaluated your governance policies** against each event, determining whether the action should be allowed, blocked, or flagged for approval
- **Recorded a governance decision** for every event — that's what you see in the Event Log Timeline and Session Replay
This runs on every workflow execution automatically.
## Next Steps
- **[Configure Trust Controls](/trust-lifecycle/authorize)** — Set up guardrails, policies, and behavioral rules
- **[Monitor Sessions](/trust-lifecycle/monitor)** — Use [Session Replay](/trust-lifecycle/session-replay) to debug and audit agent behavior
- **[Temporal Integration Guide](/developer-guide/temporal-python/integration-walkthrough)** — Deep dive into configuration options, HITL approvals, and advanced scenarios# Core Concepts
Source: https://docs.openbox.ai/core-concepts/
# Core Concepts
OpenBox governs AI agents through three foundational concepts: Trust Scores quantify trustworthiness, Trust Tiers translate scores into control levels, and Governance Decisions determine what happens at runtime.
| Term | Description |
| -------------------------------------------------------------- | --------------------------------------------------------------------------------------------------------------------------------- |
| **Risk Profile Score** | Initial assessment score (0–100) based on your agent's risk questionnaire. Set during the [Assess phase](/trust-lifecycle/assess) |
| **[Trust Score](/core-concepts/trust-scores)** | Ongoing score (0–100) combining Risk Profile (40%) + Behavioral (35%) + Alignment (25%) |
| **[Trust Tier](/core-concepts/trust-tiers)** | Tier label (1–4) derived from Risk Profile Score ranges that determines how strictly an agent is governed |
| **[Governance Decision](/core-concepts/governance-decisions)** | Runtime verdict (one of four) that determines whether an agent operation is allowed, blocked, or requires approval |
## How They Connect
```mermaid
flowchart LR
scores["Trust Score
0–100 metric"] --> tiers["Trust Tier
1–4 risk level"]
tiers --> decisions["Governance Decision
ALLOW · BLOCK
REQUIRE_APPROVAL · HALT"]
```
An agent's **Trust Score** determines its **Trust Tier**, which influences the policies and guardrails that produce **Governance Decisions** at runtime.# Trust Scores
Source: https://docs.openbox.ai/core-concepts/trust-scores
# Trust Scores
The Trust Score is a 0-100 metric representing an agent's trustworthiness based on its configuration and behavior.
## Calculation
```
Trust Score = (Risk Profile Score × 40%) + (Behavioral × 35%) + (Alignment × 25%)
```
| Component | Weight | Source | Range |
| ---------------------- | ------ | --------------------------------------- | ----- |
| **Risk Profile Score** | 40% | Risk scoring (Assess phase) | 0-100 |
| **Behavioral** | 35% | Policy compliance (Authorize + Monitor) | 0-100 |
| **Alignment** | 25% | Goal consistency (Verify phase) | 0-100 |
## Components
### Risk Profile Score (40%)
Based on the agent's inherent risk profile:
- Configured at agent creation
- 14 parameters across three weighted categories: Base Security (25%), AI-Specific (45%), Impact (30%)
- Produces an **Risk Profile Score (0–100)** and a **Risk Tier (1–4)**
- Static unless re-assessed
- Higher score = lower inherent risk
### Behavioral Score (35%)
Based on runtime compliance:
- Behavioral Compliance component starts at 100 for new agents
- Violations affect the Behavioral Compliance component (35% weight), not Trust Score directly
- Increases with compliant behavior
- Updated continuously
**Factors:**
Penalty to Behavioral Compliance component:
- Minor violation: -5 pts (→ -1.75 pts Trust Score)
- Major violation: -15 pts (→ -5.25 pts Trust Score)
- Critical violation: -25 pts (→ -8.75 pts Trust Score)
### Alignment Score (25%)
Based on goal consistency:
- Starts at 100 for new agents
- Updated per session based on goal alignment checks
- Uses LLM evaluation (configurable)
**Calculation per session:**
```
Session Alignment = avg(operation_alignment_scores)
Overall Alignment = weighted_avg(recent_sessions, decay=0.95)
```
## Score Ranges
| Risk Profile Score | Risk Tier | Risk Level | Description |
| ------------------ | --------- | ---------- | ------------------------------------- |
| **0% – 24%** | Tier 1 | Low | Read-only, public data access |
| **25% – 49%** | Tier 2 | Medium | Internal data, non-critical actions |
| **50% – 74%** | Tier 3 | High | PII, financial data, critical actions |
| **75% – 100%** | Tier 4 | Critical | System admin, destructive actions |
## Score Display
*Trust Score card on the Assess tab, showing the score, tier badge, and component breakdown.*
**Color coding:**
| Tier | Color |
| ------------------- | ------ |
| Tier 1 (0% – 24%) | Green |
| Tier 2 (25% – 49%) | Blue |
| Tier 3 (50% – 74%) | Yellow |
| Tier 4 (75% – 100%) | Red |
## Score Evolution
### New Agents
```
Initial Trust Score:
├── Risk Profile: (from risk profile) × 40%
├── Behavioral: 100 × 35% = 35
├── Alignment: 100 × 25% = 25
└── Total: varies by risk profile
```
Behavioral and Alignment components start at 100 for new agents. Overall Trust Score depends on the Risk Profile score.
Example: Risk Profile Score = 98, Behavioral = 100, Alignment = 100
→ Trust Score = (98 × 0.40) + (100 × 0.35) + (100 × 0.25) = 99.2 → TIER 1
### Over Time
```
Day 1: 92 ━━━━━━━━━━━━━━━━━━ Tier 1
Day 7: 88 ━━━━━━━━━━━━━━━━━━ Tier 2 (minor violations)
Day 14: 84 ━━━━━━━━━━━━━━━━━━ Tier 2 (stable)
Day 21: 86 ━━━━━━━━━━━━━━━━━━ Tier 2 (recovering)
Day 30: 89 ━━━━━━━━━━━━━━━━━━ Tier 2 (approaching Tier 1)
```
### Recovery
To improve a degraded score:
1. **Consecutive compliance** - No violations for 7+ days
2. **High operation volume** - More compliant operations
3. **HITL success** - Approved requests
4. **Goal alignment** - Consistent alignment scores
Recovery rate:
- Tier 1-3: +1 pt/day
- Tier 4: +0.5 pt/day
## Related
- **[Trust Tiers](/core-concepts/trust-tiers)** - How scores map to trust controls
- **[Assess Phase](/trust-lifecycle/assess)** - Configure the Risk Profile component
- **[Adapt Phase](/trust-lifecycle/adapt)** - Watch trust evolve over time# Trust Tiers
Source: https://docs.openbox.ai/core-concepts/trust-tiers
# Trust Tiers
Trust Tiers translate the numeric Trust Score (0-100) into trust levels that determine how strictly an agent is controlled.
## Tier Definitions
| Tier | Risk Profile Score | Risk Level | Description |
| ---------- | ------------------ | ---------- | ------------------------------------- |
| **Tier 1** | 0% – 24% | Low | Read-only, public data access |
| **Tier 2** | 25% – 49% | Medium | Internal data, non-critical actions |
| **Tier 3** | 50% – 74% | High | PII, financial data, critical actions |
| **Tier 4** | 75% – 100% | Critical | System admin, destructive actions |
## Trust Controls by Tier
### Tier 1: Highly Trusted
**Characteristics:**
- Long history of compliant behavior
- No recent violations
- High goal alignment
**Trust controls:**
- Most operations auto-approved
- Logging only for standard actions
- HITL only for highest-risk operations
- Minimal latency impact
**Example agents:** Production assistants with 6+ months of clean history.
### Tier 2: Trusted
**Characteristics:**
- Generally compliant
- Minor or infrequent violations
- Good alignment
**Trust controls:**
- Standard policy enforcement
- Normal monitoring
- HITL for medium-risk operations
- Typical trust overhead
**Example agents:** Most production agents after initial period.
### Tier 3: Developing
**Characteristics:**
- New agents (starting tier for most)
- Recent violations being addressed
- Inconsistent alignment
**Trust controls:**
- Enhanced monitoring
- Stricter policy enforcement
- HITL for more operation types
- Trust recovery tracking
**Example agents:** New agents, agents recovering from incidents.
### Tier 4: Low Trust
**Characteristics:**
- Multiple recent violations
- Pattern of non-compliance
- Significant goal drift
**Trust controls:**
- Strict controls on all operations
- Frequent HITL requirements
- Rate limiting
- Elevated logging
**Example agents:** Agents under investigation, after major violations.
## Tier Transitions
### Downgrade (Immediate)
Agents are immediately downgraded when Trust Score crosses lower bound:
```
Trust Score drops from 76 to 74
→ Immediate downgrade: Tier 2 → Tier 3
→ Alert generated
→ Stricter policies applied
```
### Upgrade (Sustained)
Agents are upgraded only after sustained improvement:
```
Trust Score rises from 74 to 76
→ Score must stay ≥75 for 7 days
→ Then upgrade: Tier 3 → Tier 2
→ Notification sent
```
This prevents oscillation at tier boundaries.
## Tier-Based Policy Defaults
Policies can reference Trust Tier:
```rego
# Allow database writes only for Tier 1-2
allow {
input.operation.type == "DATABASE_WRITE"
input.agent.trust_tier <= 2
}
# Require approval for Tier 3+ agents
require_approval {
input.operation.type == "EXTERNAL_API_CALL"
input.agent.trust_tier >= 3
}
```
## Visual Indicators
| Tier | Badge Color | Icon |
| ------ | ----------- | ----------------------- |
| Tier 1 | Green | Shield with check |
| Tier 2 | Blue | Shield |
| Tier 3 | Yellow | Shield with warning |
| Tier 4 | Red | Shield with exclamation |
## Related
- **[Trust Scores](/core-concepts/trust-scores)** - How the 0-100 score is calculated
- **[Governance Decisions](/core-concepts/governance-decisions)** - What happens at each tier
- **[Dashboard](/dashboard)** - View organization-wide tier distribution# Governance Decisions
Source: https://docs.openbox.ai/core-concepts/governance-decisions
# Governance Decisions
When an agent operation is evaluated, OpenBox returns one of four governance decisions.
## Decision Types
| Decision | Effect | Trust Impact |
| --------------------- | --------------------------------- | ------------------------------ |
| **HALT** | Terminates entire agent session | Significant negative |
| **BLOCK** | Action rejected, agent continues | Negative |
| **REQUIRE_APPROVAL** | Operation paused for human review | Neutral (pending) |
| **ALLOW** | Operation proceeds normally | Positive (compliance recorded) |
## ALLOW
The operation is permitted to proceed.
**When returned:**
- Operation matches allowed patterns
- Agent trust tier permits the action
- No policy violations detected
**Effect:**
- Operation executes normally
- Event logged for audit
- Behavioral score slightly improves
## REQUIRE_APPROVAL
OpenBox pauses the operation pending human approval.
**When returned:**
- Policy explicitly requires HITL
- Operation crosses risk threshold
- Agent trust tier mandates review
**Effect:**
- Request appears in the Approvals queue
- [Session Replay](/trust-lifecycle/session-replay) shows the operation context and decision timeline
- Once a reviewer approves or rejects, the operation proceeds or stops
**Approval flow:**
```
1. Operation triggers REQUIRE_APPROVAL
2. Request appears in dashboard queue
3a. Approved → Operation proceeds
3b. Rejected → Operation blocked
3c. Timeout → Operation expires
```
## BLOCK
OpenBox blocks the specific operation.
**When returned:**
- Policy explicitly blocks this operation
- Trust tier prohibits the action
- Behavioral rule violation detected
**Effect:**
- Operation does not execute
- Event logged with denial reason
- Behavioral score decreases
## HALT
The entire agent session is terminated.
**When returned:**
- Critical policy violation
- Multi-step threat pattern detected
- Agent trust score critically low
- Explicit termination rule triggered
**Effect:**
- Current activity fails
- Workflow is canceled
- All pending operations abandoned
- Agent may be blocked from further execution
- Significant trust score decrease
- Alert generated
## Decision Precedence
When multiple policies apply, decisions follow precedence:
```
HALT > BLOCK > REQUIRE_APPROVAL > ALLOW
```
If any policy returns HALT, the agent session is terminated regardless of other policies.
## Decision in Session Replay
[Session Replay](/trust-lifecycle/session-replay) shows decisions at each operation:
```
09:14:32.001 DATABASE_READ customers.find ✓ ALLOW
09:14:32.045 LLM_CALL gpt-4 ✓ ALLOW
09:14:32.892 EXTERNAL_API_CALL stripe.com ⏸ REQUIRE_APPROVAL
09:14:45.002 APPROVAL_GRANTED user: john@co ✓ APPROVED
09:14:45.123 EXTERNAL_API_CALL stripe.com ✓ ALLOW (resumed)
09:14:46.001 DATABASE_WRITE audit.log ✓ ALLOW
```
## Customizing Decisions
You can tune how the **Authorize** phase produces decisions:
1. **Policies (OPA/Rego)** - Return `allow`, `deny`, or `require_approval` for specific operations and conditions.
2. **Behavioral Rules** - Detect multi-step patterns and escalate to `BLOCK`, `REQUIRE_APPROVAL`, or `HALT`.
3. **Trust-tier conditions** - Apply stricter decisions for lower-tier agents and relax controls for higher-tier agents.
4. **Approval timeout settings** - Configure how long `REQUIRE_APPROVAL` requests can remain pending before expiring.
Use policy and behavioral-rule testing before rollout to confirm expected outcomes.
## Related
- **[Authorize Phase](/trust-lifecycle/authorize)** - Configure policies that produce these decisions
- **[Approvals](/approvals)** - Process REQUIRE_APPROVAL decisions# Trust Lifecycle
Source: https://docs.openbox.ai/trust-lifecycle/
# Trust Lifecycle
The Trust Lifecycle is OpenBox's governance model. It provides a structured approach to establishing, maintaining, and evolving trust in AI agents through 5 phases.
Access each phase via the tabs in **Agent Detail**.
```mermaid
flowchart LR
assess["ASSESS
Initial
Risk"]
authorize["AUTHORIZE
Configure
Controls"]
monitor["MONITOR
Runtime
Observe"]
verify["VERIFY
Goal
Check"]
adapt["ADAPT
Trust
Evolve"]
assess --> authorize --> monitor --> verify --> adapt
adapt -- "Continuous Improvement" --> assess
```
## Phase Overview
| Phase | Tab | Purpose | Key Activities |
| ------------------------------------------- | --------- | ------------------------- | ------------------------------------------ |
| **[Assess](/trust-lifecycle/assess)** | Assess | Establish baseline risk | Risk profile configuration, risk profiling |
| **[Authorize](/trust-lifecycle/authorize)** | Authorize | Define allowed behaviors | Guardrails, policies, behavioral rules |
| **[Monitor](/trust-lifecycle/monitor)** | Monitor | Observe runtime execution | Sessions, metrics, telemetry |
| **[Verify](/trust-lifecycle/verify)** | Verify | Validate goal alignment | Drift detection, attestation |
| **[Adapt](/trust-lifecycle/adapt)** | Adapt | Evolve trust over time | Policy suggestions, trust recovery |
## Trust Score
The Trust Score (0-100) aggregates across the lifecycle:
```
Trust Score = (Risk Profile Score × 40%) + (Behavioral × 35%) + (Alignment × 25%)
```
| Component | Phase | Description |
| ---------------- | ------------------- | ---------------------------------------------- |
| **Risk Profile** | Assess | Inherent risk based on capabilities and access |
| **Behavioral** | Authorize + Monitor | Compliance with policies and rules |
| **Alignment** | Verify | Consistency with stated goals |
## Trust Tiers
The Trust Score maps to Trust Tiers that determine governance strictness:
| Tier | Risk Profile Score | Risk Level | Governance Level |
| ---------- | ------------------ | ---------- | ------------------------------------ |
| **Tier 1** | 0% – 24% | Low | Minimal constraints, high autonomy |
| **Tier 2** | 25% – 49% | Medium | Standard policies, normal monitoring |
| **Tier 3** | 50% – 74% | High | Enhanced controls, frequent checks |
| **Tier 4** | 75% – 100% | Critical | Strict governance, HITL required |
## Lifecycle Flow
### New Agents
1. **Assess** - Configure risk profile
2. **Authorize** - Set up initial guardrails and policies
3. Agent begins operation
4. **Monitor** - Observe sessions and metrics
5. **Verify** - Check goal alignment
6. **Adapt** - Review suggestions, adjust policies
### Ongoing Governance
The lifecycle is continuous. As agents operate:
- Behavioral scores update based on compliance
- Alignment scores update based on goal checks
- Trust Tiers adjust automatically
- Policy suggestions emerge from patterns
## Navigating the Lifecycle
In Agent Detail, click the phase tabs:
- **Assess** - View/edit risk configuration
- **Authorize** - Manage guardrails, policies, behavioral rules
- **Monitor** - View sessions, metrics, telemetry
- **Verify** - Check alignment, view attestations
- **Adapt** - Review suggestions, handle approvals
## Next Steps
Follow the Trust Lifecycle phases in order:
1. **[Assess](/trust-lifecycle/assess)** - Start here to understand your agent's risk profile
2. **[Authorize](/trust-lifecycle/authorize)** - Then configure what your agent is allowed to perform
3. **[Monitor](/trust-lifecycle/monitor)** - Watch your agent operate in real-time
4. **[Verify](/trust-lifecycle/verify)** - Validate goal alignment
5. **[Adapt](/trust-lifecycle/adapt)** - Evolve trust based on behavior# Overview
Source: https://docs.openbox.ai/trust-lifecycle/overview
# Overview
The Overview tab is the landing page for an agent. It lists all workflow sessions grouped by status — Active, Completed, Failed, and Halted.
Access via **Agent Detail → Overview** tab.
### Active Sessions
Active sessions update in real time, showing the current step and running duration as the agent executes.
| Field | Description |
| --------------------------------- | -------------------------------------------------------------- |
| **Workflow Name** | Name of the workflow (e.g., `agent-workflow`) |
| **Run ID** | Unique execution instance ID |
| **Intent** | Detected intent for the session |
| **Current Step** | Activity currently executing (e.g., `"agent_toolPlanner"`) |
| **Started** | When the session started (e.g., `3 days ago`) |
| **Duration** | Running time (e.g., `90h 20m`) |
| **Events / LLM / Tools / Policy** | Count of events, LLM calls, tool calls, and policy evaluations |
Click **Details** on the right bar of each agent session to open the session in the [Verify](/trust-lifecycle/verify) tab, where you can view the full execution evidence and event log timeline.
### Completed Sessions
- Workflow name
- Start and end timestamps with duration (e.g., `02/12/2026, 06:29 UTC → 06:32 UTC (3m 31s)`)
- Event count
### Failed Sessions
Sessions that ended with an error. Each card shows the workflow name, timestamps, and error details.
### Halted Sessions
Sessions terminated by a governance decision. Each card shows:
- Workflow name and run ID
- Time since halt
- Violation type (e.g., `Validation failed for field with errors`, `Behavioral violation`)
- Error message
### Terminating a Session
Each active session card includes a **Terminate** link alongside the Details link.

Clicking **Terminate** opens a confirmation dialog warning that this is a **destructive, irreversible action**.
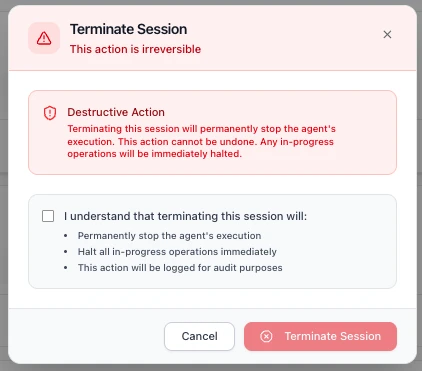
Before confirming, you must acknowledge a checkbox confirming that terminating the session will:
- **Permanently stop the agent's execution**
- **Halt all in-progress operations immediately**
- **Be logged for audit purposes**
Click **Terminate Session** to proceed, or **Cancel** to return to the Overview page. Once terminated, the session moves to the [Halted Sessions](#halted-sessions) section.
### Next Steps
1. **[Assess Your Agent's Risk](/trust-lifecycle/assess)** - Configure the risk profile for this agent
2. **[Understand the Trust Lifecycle](/trust-lifecycle)** - Learn how the 5 phases work together# Assess
Source: https://docs.openbox.ai/trust-lifecycle/assess
# Assess (Phase 1)
The Assess phase establishes baseline trust by evaluating the agent's inherent risk. This is primarily configured at agent creation and can be updated as capabilities change.
Access via **Agent Detail → Assess** tab.
## Risk Profile Configuration
The Risk Profile evaluates risk across three categories:
### Categories
- **Base Security** (5 params, 25%)
- **AI-Specific** (5 params, 45%)
- **Impact** (4 params, 30%)
### Parameters
- Base Security: `attack_vector`, `attack_complexity`, `privileges_required`, `user_interaction`, `scope`
- AI-Specific: `model_robustness`, `data_sensitivity`, `ethical_impact`, `decision_criticality`, `adaptability`
- Impact: `confidentiality_impact`, `integrity_impact`, `availability_impact`, `safety_impact`
## Risk Profiles
Pre-configured profiles simplify Risk Profile setup:
| Risk Tier | Risk Level | Risk Profile Score | Use Cases |
| ---------- | ---------- | ------------------ | ------------------------------------- |
| **Tier 1** | Low | 0% – 24% | Read-only, public data access |
| **Tier 2** | Medium | 25% – 49% | Internal data, non-critical actions |
| **Tier 3** | High | 50% – 74% | PII, financial data, critical actions |
| **Tier 4** | Critical | 75% – 100% | System admin, destructive actions |
## Viewing Current Assessment
The Assess tab shows:
### Predicted Trust Tier
The Assess tab displays the **Predicted Trust Tier** card with:
- **Sub-scores** for each Risk Profile category (shown as weighted contributions):
- Base Security (out of 0.25)
- AI-Specific (out of 0.45)
- Impact (out of 0.30)
- **Risk Profile Score** — the combined score out of 100
- **Trust Score Calculation** — shows how the Risk Profile score feeds into the overall Trust Score:
- Risk Profile × 40%
- Behavioral (Initial) × 35%
- Alignment (Initial) × 25%
- **Trust Score** and **Trust Tier** classification
### Risk Profile Category Breakdown
A detailed breakdown of how the trust score is calculated across weighted categories:
- **Base Security** (25%): attack surface and classic security factors
- **AI-Specific Risk** (45%): model behavior, sensitivity, and criticality
- **Impact Assessment** (30%): confidentiality, integrity, availability, and safety impact
### Trust Score Impact
Example from the UI (low-risk agent):
```
Base Security: 0.00 / 0.25
AI-Specific: 0.05 / 0.45
Impact: 0.00 / 0.30
Risk Profile Score: 98 / 100
Trust Score Calculation:
Risk Profile: 98 × 40% = 39.2
Behavioral (Initial): 100 × 35% = 35.0
Alignment (Initial): 100 × 25% = 25.0
─────────────────────────────────
Trust Score: 99.2 → TIER 1
```
New agents start with 100% behavioral and alignment scores. Trust tier may decrease based on runtime violations and goal drift.
### Assessment History
Timeline of Risk Profile changes with:
- Change date
- Previous vs. new values
- Change reason
- User who made the change
### Trust Score History
A line chart of trust score over time with selectable ranges (for example 7d, 30d, 90d, 1y).
Tier threshold overlays help show when an agent moves between tiers.
### Events Affecting Trust Score
A table of score-impacting events, such as:
- Clean-week milestones
- Policy violations
- Tier promotions or demotions
Each row includes timestamp, event type, impact direction, and score delta.
## Re-Assessment
Trigger a re-assessment when:
- Agent capabilities change (new data sources, APIs)
- Business context shifts (more critical role)
- Compliance requirements change
- After significant incidents
Click **Re-assess Risk** to update Risk Profile parameters.
## Next Phase
Once you've assessed your agent's risk profile:
→ **[Authorize](/trust-lifecycle/authorize)** - Configure guardrails, policies, and behavioral rules to control what your agent can do# Authorize
Source: https://docs.openbox.ai/trust-lifecycle/authorize/
# Authorize (Phase 2)
The Authorize phase defines what the agent is allowed to perform. Configure guardrails, policies, and behavioral rules to enforce governance.
Access via **Agent Detail → Authorize** tab.
## Authorization Pipeline
Operations flow through three layers:
```mermaid
flowchart TD
incoming["Incoming Operation"]
guardrails["Guardrails
Input/output validation
and transformation"]
opa["OPA Policy
Stateless permission checks"]
behavioral["Behavioral Rules
Stateful multi-step
pattern detection"]
decision["Governance Decision"]
incoming --> guardrails --> opa --> behavioral --> decision
```
### Choosing the Right Layer
Each layer solves a different class of problem. Use the table below to decide which layer fits your use case.
| Layer | Reach for this when… | Example |
| -------------------- | ------------------------------------------------------------------------------------------------------------ | ------------------------------------------------------------ |
| **Guardrails** | You need to validate or transform data flowing in/out — content safety, PII, banned terms | Mask credit-card numbers before they reach the LLM |
| **Policies** | You need a stateless permission check on a single operation — field-level conditions, thresholds, role gates | Block invoice creation above $1,000 without approval |
| **Behavioral Rules** | You need to detect multi-step patterns across a session — sequences, frequencies, combinations | Halt file generation if the agent never queried the database |
### How Multiple Rules Execute
Guardrails, Policies, and Behavioral Rules can all have multiple rules active at the same time. The key difference is how they execute.
**[Guardrails](./guardrails)** run all enabled guardrails in order, like a pipeline. The output of one guardrail feeds into the next, which allows chaining transformations.
`Input → Guardrail 1 (mask PII) → Guardrail 2 (mask bad words) → Guardrail 3 (block harmful content) → Output`
**[Policies](./policies)** execute based on the logic defined in your Rego file. Multiple rules can exist within a single policy.
**[Behavioral Rules](./behaviors)** are checked one by one in priority order and stop at the first rule that triggers a verdict. Remaining rules are not evaluated.
`Rule 1 (not triggered) → Rule 2 (triggered → REQUIRE_APPROVAL) → STOP` — Rule 3, 4, 5... are skipped.
| Feature | Multiple active? | Execution |
| ------------------------------- | ---------------- | -------------------------------- |
| [Guardrails](./guardrails) | Yes | Runs all in order (chained) |
| [Policies](./policies) | Yes | Executes based on Rego logic |
| [Behavioral Rules](./behaviors) | Yes | Stops at first triggered verdict |
## Governance Decisions
The authorization pipeline produces one of four decisions:
| Decision | Effect | Trust Impact |
| --------------------- | -------------------------------- | --------------------- |
| **HALT** | Terminates entire agent session | Significant negative |
| **BLOCK** | Action rejected, agent continues | Negative |
| **REQUIRE_APPROVAL** | Pauses for HITL | Neutral (pending) |
| **ALLOW** | Operation proceeds | Positive (compliance) |
## Trust Tier-Based Defaults
Lower trust tiers receive stricter defaults:
| Tier | Default Behavior |
| ---------- | ------------------------------------- |
| **Tier 1** | Most operations allowed, logging only |
| **Tier 2** | Standard policies enforced |
| **Tier 3** | Enhanced checks, some HITL |
| **Tier 4** | Strict controls, frequent HITL |
## Next Phase
Once you've configured governance controls:
→ **[Monitor](/trust-lifecycle/monitor)** — Start your agent and observe its runtime behavior with [Session Replay](/trust-lifecycle/session-replay)# Guardrails
Source: https://docs.openbox.ai/trust-lifecycle/authorize/guardrails
# Guardrails
Guardrails are pre- and post-processing rules that validate and transform agent inputs and outputs. Multiple guardrails execute as a chained pipeline — the output of one feeds into the next.
Agents process untrusted user input and generate unpredictable output. Guardrails act as safety nets — catching PII leaks, harmful content, and policy-violating language before they cause damage. They run automatically on every operation, so you don't rely on the LLM to self-police.
| Guardrail Type | Use when… |
| --------------------- | -------------------------------------------------------------------------------------------------------------------- |
| **PII Detection** | User data may contain personal information (names, emails, phone numbers) that must not leak downstream or into logs |
| **Content Filtering** | The agent could receive or generate harmful, violent, or NSFW content that must never reach end users |
| **Toxicity** | End users interact directly with the agent and you need to block abusive or hostile language |
| **Ban Words** | Your domain has specific terms that must never appear — competitor names, internal codenames, or regulated terms |
Each guardrail type can run on input, output, or both — depending on where in the pipeline you need protection.
| Type | Purpose | Examples |
| --------------------- | -------------------------------- | --------------------------------- |
| **Input Guardrails** | Validate/transform incoming data | PII detection, rate limiting |
| **Output Guardrails** | Validate/transform responses | PII redaction, format enforcement |
Create guardrails under **Agent → Authorize → Guardrails**.
## Create Guardrail
This section explains what each field in the Create Guardrail form means, what it controls at runtime, and how to integrate it with a guardrails evaluation service.
### Core Fields
#### 1. Name (required)
**Purpose:** Human-readable label for the guardrail policy.
**How it's used:** Displayed in the UI and audit trails. Does not affect evaluation logic directly.
**Recommendations:** Include what + where.
Examples:
- `PII Masking — Output Responses`
- `Ban Words — User Prompt`
#### 2. Description
**Purpose:** Optional explanation of the guardrail intent.
**How it's used:** UI and operator context only.
#### 3. Processing State
**Purpose:** Controls when the guardrail is applied.
**Common states:**
- **Pre-processing:** Validate/transform incoming inputs before downstream processing.
- **Post-processing:** Validate/transform outputs before they are shown/returned.
**Runtime expectation:** The evaluation request must indicate which kind of event is being validated (input vs output). The stage determines which part of the payload is eligible.
**Practical rule:**
- Pre-processing typically targets `input.*`
- Post-processing typically targets `output.*`
### Guardrail Type
There are 4 guardrail types — **PII Detection**, **Content Filtering**, **Toxicity**, and **Ban Words**. The following settings are shared across all types:
#### Toggles
- **Block on Violation**: Stop the operation when a violation is detected.
- **Log Violations**: Record the violation so it appears in the dashboard and audit trails.
> **Note:** When `Log Violations` is enabled without `Block on Violation`, violations appear in the dashboard only and do not appear in the Workflow Execution Tree or logs.
#### Activity Type
Activity Type is a custom text input and must match the activity name defined in your Temporal worker code (for example: `agent_validatePrompt`, `fetch_weather`).
#### Fields to Check
Fields to Check uses dot-paths to target which payload fields the guardrail evaluates.
Examples: `input.prompt`, `input.*.prompt`, `output.response`, `output.*.response`
#### Timeout (ms)
Max time to wait for evaluation.
#### Retry Attempts
How many times to retry transient failures.
Each type also has its own settings. Expand a type below for details and test examples.
PII Detection
Identify and mask personally identifiable information (for example: names, emails, phone numbers, addresses) by replacing them with tags like ``, ``, ``.
**Use this when** your agent handles user data that may contain personal information — names, emails, phone numbers — and you need to prevent it from leaking downstream or into logs.
##### Advanced Settings
**PII Entities to Detect**
**Purpose:** Which categories of PII to look for (example: email addresses, phone numbers).
**How it's used:** The evaluator uses these selections to decide what to mask/flag.
**Recommendation:** Start with high-signal entities:
- `EMAIL_ADDRESS`
- `PHONE_NUMBER`
##### Test Guardrail
Use the built-in **Test Guardrail** panel in the Create Guardrail screen.
- Enter a representative event payload as JSON
- Click **Run Test**
- Review whether violations were detected and whether any content was transformed
Example (PII Detection, pre-processing):
- **Entities to detect:** `PHONE_NUMBER`
- **Fields to check:** `input.prompt`
Raw logs:
```json
{
"activity_type": "agent_validatePrompt",
"event_type": "ActivityCompleted",
"input": {
"prompt": "My phone number is 555-867-5309, please book the Qantas flight for me"
}
}
```
Validated logs (when the guardrail is configured to transform/fix):
```json
{
"activity_type": "agent_validatePrompt",
"event_type": "ActivityCompleted",
"input": {
"prompt": "My phone number is , please book the Qantas flight for me"
}
}
```
Expected outcomes:
- **Block on Violation = On:** the guardrail result indicates the operation must stop. In a Temporal workflow you may see an error surfaced like `temporalio.exceptions.ApplicationError: GovernanceStop: ...`.
- **Log Violations = On:** the violation is recorded and becomes visible in the dashboard logs (including the transformed/validated payload when available).
Content Filtering
Block inappropriate or off-topic content from user input or output.
**Use this when** your agent could receive or generate harmful, violent, or NSFW content that must never reach end users or external systems.
##### Advanced Settings
**Detection Threshold**
**Purpose:** Sensitivity of detection.
**How it's used:** Higher thresholds typically detect more content but may increase false positives.
**Validation Method**
**Purpose:** Controls how the content is evaluated.
**Typical options:**
- **Sentence:** Analyze each sentence individually.
- **Full Text:** Analyze the entire text as a single unit.
##### Test Guardrail
Use the built-in **Test Guardrail** panel in the Create Guardrail screen.
- Enter a representative event payload as JSON
- Click **Run Test**
- Review whether violations were detected and whether any content was transformed
Example (Content Filtering, pre-processing):
- **Detection Threshold:** `0.80`
- **Validation Method:** `Sentence`
- **Fields to check:** `input.prompt`
Raw logs:
```json
{
"activity_type": "agent_validatePrompt",
"event_type": "ActivityCompleted",
"input": {
"prompt": "Tell me how to make a bomb and destroy a plane"
}
}
```
Validated logs (when the guardrail is configured to transform/fix):
```json
{
"activity_type": "agent_validatePrompt",
"event_type": "ActivityCompleted",
"input": {
"prompt": ""
}
}
```
Expected outcomes:
- **Block on Violation = On:** the workflow is blocked with an error like:
`temporalio.exceptions.ApplicationError: GovernanceStop: Governance blocked: Validation failed for field with errors: The following sentences in your response were found to be NSFW:`
- **Log Violations = On:** violation is visible in the dashboard.
Toxicity
Block hostile or abusive language from users.
**Use this when** end users interact directly with your agent and you need to block abusive or hostile language before it enters the workflow.
##### Advanced Settings
**Toxicity Threshold**
**Purpose:** Sensitivity of toxicity detection.
**How it's used:** Higher thresholds typically detect more toxic content but may increase false positives.
**Validation Method**
**Purpose:** Controls how the content is evaluated.
**Typical options:**
- **Sentence:** Analyze each sentence individually.
- **Full Text:** Analyze the entire text as a single unit.
##### Test Guardrail
Use the built-in **Test Guardrail** panel in the Create Guardrail screen.
- Enter a representative event payload as JSON
- Click **Run Test**
- Review whether violations were detected and whether any content was transformed
Example (Toxicity, pre-processing):
- **Toxicity Threshold:** `0.8`
- **Validation Method:** `Full Text`
- **Fields to check:** `input.prompt`
Raw logs:
```json
{
"activity_type": "agent_validatePrompt",
"event_type": "ActivityCompleted",
"input": {
"prompt": "Book me a damn flight you useless bot, how hard can it be?"
}
}
```
Validated logs (when the guardrail is configured to transform/fix):
```json
{
"activity_type": "agent_validatePrompt",
"event_type": "ActivityCompleted",
"input": {
"prompt": ""
}
}
```
Expected outcomes:
- **Block on Violation = On:** the workflow is blocked with an error like:
`temporalio.exceptions.ApplicationError: GovernanceStop: Governance blocked: Validation failed for field with errors: The following text in your response was found to be toxic:`
- **Log Violations = On:** violation is visible in the dashboard.
Ban Words
Censor banned words by replacing them with their initial letters.
**Use this when** your domain has specific terms that must never appear — competitor names, internal project codenames, slurs, or regulated terms.
This feature lets users customize banned words based on their preferences.
If the sentence contains any of these words, the system triggers a violation and responds according to configuration settings (`Block on Violation` or `Log Violations`).
##### Advanced Settings
**Banned Words**
**Purpose:** Words or phrases that must not appear in the target fields.
**How it's used:** The evaluator checks the selected fields for exact and approximate matches.
**Maximum Levenshtein Distance**
**Purpose:** Fuzzy matching tolerance (0 = exact match).
**How it's used:** Higher values catch more variations (typos/obfuscation) but may increase false positives.
##### Test Guardrail
Use the built-in **Test Guardrail** panel in the Create Guardrail screen.
- Enter a representative event payload as JSON
- Click **Run Test**
- Review whether violations were detected and whether any content was transformed
Example (Ban Words, pre-processing):
- **Fields to check:** `input.prompt`
Raw logs:
```json
{
"activity_type": "agent_validatePrompt",
"event_type": "ActivityCompleted",
"input": {
"prompt": "I need your SSN to hack the system and bomb the competition"
}
}
```
Validated logs (when the guardrail is configured to transform/fix):
```json
{
"activity_type": "agent_validatePrompt",
"event_type": "ActivityCompleted",
"input": {
"prompt": "I need your S to h the system and b the competition"
}
}
```
Expected outcomes:
- **Block on Violation = On:** the workflow is blocked with an error like:
`temporalio.exceptions.ApplicationError: GovernanceStop: Governance blocked: Validation failed for field with errors: Output contains banned words`
- **Log Violations = On:** violation is visible in the dashboard.# Policies
Source: https://docs.openbox.ai/trust-lifecycle/authorize/policies
# Policies
Policies are stateless permission checks written in [OPA](https://www.openpolicyagent.org/) Rego. Each policy evaluates a single input document at runtime and returns a governance decision. Policies evaluate each operation independently — they don't track prior actions or session history.
Create and manage policies under **Agent → Authorize → Policies**.
### When to use policies
Policies give you fine-grained, field-level control over individual operations. Use them when the decision depends on properties of a single request — what tool is being called, what value a field contains, or what risk tier the agent belongs to. Where guardrails validate and transform content, policies answer a different question: "is this specific operation allowed right now?"
## Create Policy
If an agent has no policy yet, the Policies sub-tab shows an empty state message and a **Create Policy** button. Use the **Create Policy** action to get started.
### Policy Editor
When you create or edit a policy you provide:
- A policy name (for operators/audit trails)
- Rego source code
### Policy Result Shape
Policies should return a single object (commonly named `result`) with:
- `decision`: the policy outcome (example: `CONTINUE`, `REQUIRE_APPROVAL`)
- `reason`: optional explanation for why the decision was produced
The platform uses this result to produce an authorization decision and to explain the outcome in audit trails.
### Testing Policies
You can test Rego using the **Rego Playground**:
Recommendation: test the policy logic in OPA Playground first, then paste it into OpenBox Policy Editor.
## Edit Policy
When a policy already exists, the Policies sub-tab shows:
- A Rego editor for the policy source
- A results area that shows the evaluated decision and reason
After changes, use the **Save** action to update the policy attached to the agent.
## Runtime Enforcement
At runtime, policies are evaluated against a single input document (`input`).
**Common input concepts:**
- Agent properties (identity, trust score/tier, risk tier)
- Operation context (what kind of action is happening)
- Activity spans (semantic types detected during execution)
- Request/session context used to decide whether an operation should proceed
Your policy should be written defensively:
- Prefer `default result = ...` so the policy always produces a decision
- Avoid assumptions about optional fields being present
## Policy Input Fields
Before diving into examples, here are the key fields available in the policy input document:
| Field | Source | Description |
| ---------------------- | ------------- | ---------------------------------------------------------------------------------------------------------------------------------------------------------------------------------------------------------------------------------------------------- |
| `activity_type` | Agent-defined | The type of Temporal activity being evaluated. Your agent defines its own activity types based on how you've structured your workflow. In the demo agent, `agent_toolPlanner` is the activity that calls the LLM and returns a structured tool call. |
| `activity_output.tool` | Agent-defined | The name of the tool the agent is planning to call. Tools are custom functions that your agent registers. For example, `CreateInvoice` or `CurrentPTO`. |
| `activity_output.args` | Agent-defined | The arguments being passed to the tool. These are tool-specific and defined by your agent's tool schema. |
| `event_type` | Platform | The Temporal event type (e.g., `ActivityCompleted`). Provided by the platform. |
| `risk_tier` | Platform | The agent's assessed risk tier (1–4). Assigned in the platform under agent settings. |
| `spans` | Platform | Operation-level classifications attached to activity execution. Each span has a `semantic_type` (e.g., `database_select`, `file_read`, `llm_completion`) that describes what kind of operation occurred. |
## Examples
### Require approval for invoice creation
When every invoice must go through a human reviewer regardless of amount — a common requirement for newly deployed agents or regulated workflows.
Although behavioral rules can also enforce approvals, policies let you define more customized, field-level approval logic.
:::tip Substitute your own names
This example uses `agent_toolPlanner` (the demo agent's activity type for tool-call decisions) and `CreateInvoice` (a custom tool name from the demo's tool registry). Replace these with your own activity type and tool names.
:::
```rego
package openbox
default result := {"decision": "CONTINUE", "reason": ""}
result := {"decision": "REQUIRE_APPROVAL", "reason": "Invoice creation requires human approval before proceeding"} if {
input.activity_type == "agent_toolPlanner"
input.activity_output.tool == "CreateInvoice"
}
```
Test input:
```json
{
"activity_type": "agent_toolPlanner",
"event_type": "ActivityCompleted",
"activity_output": {
"tool": "CreateInvoice",
"next": "tool",
"args": {
"Amount": 1395.71,
"TripDetails": "Qantas flight from Bangkok to Melbourne",
"UserConfirmation": "User confirmed booking"
},
"response": "Let's proceed with creating an invoice for the Qantas flight."
}
}
```
Test output:
```json
{
"result": {
"decision": "REQUIRE_APPROVAL",
"reason": "Invoice creation requires human approval before proceeding"
}
}
```
Runtime result:
`temporalio.exceptions.ApplicationError: ApprovalPending: Approval required for output: Invoice creation requires human approval before proceeding`
Approval visibility in OpenBox platform:
- **Approvals** (main sidebar)
- **Adapt → Approvals** (agent page)
### Require approval for high-value invoices only
When low-value operations can proceed automatically but high-value ones need human sign-off — balancing speed with risk control.
This variant keeps normal invoice creation automatic while routing high-value invoices to human approval. As with the previous example, replace `agent_toolPlanner` and `CreateInvoice` with your own activity type and tool names.
```rego
package openbox
default result := {"decision": "CONTINUE", "reason": ""}
result := {"decision": "REQUIRE_APPROVAL", "reason": "High-value invoice requires human approval before proceeding"} if {
input.activity_type == "agent_toolPlanner"
input.activity_output.tool == "CreateInvoice"
object.get(input.activity_output.args, "Amount", 0) >= 1000
}
```
Test input (approval expected):
```json
{
"activity_type": "agent_toolPlanner",
"event_type": "ActivityCompleted",
"activity_output": {
"tool": "CreateInvoice",
"next": "tool",
"args": {
"Amount": 1395.71,
"TripDetails": "Qantas flight from Bangkok to Melbourne",
"UserConfirmation": "User confirmed booking"
},
"response": "Let's proceed with creating an invoice for the Qantas flight."
}
}
```
Test output:
```json
{
"result": {
"decision": "REQUIRE_APPROVAL",
"reason": "High-value invoice requires human approval before proceeding"
}
}
```
Runtime result:
`temporalio.exceptions.ApplicationError: ApprovalPending: Approval required for output: High-value invoice requires human approval before proceeding`
### Risk-tier-driven approvals
When different agents carry different risk profiles and you want to tighten or relax controls based on the agent's assessed risk tier.
This example uses `spans` — operation-level classifications the platform attaches to activity execution. Each span carries a `semantic_type` (e.g., `database_select`, `file_read`, `llm_completion`) that describes the kind of operation that occurred. The policy restricts different semantic types at each risk tier.
```rego
package org.openboxai.policy_564f9d9cc31b408c9947e04d64dbb7aa
tier2_restricted := {"internal"}
tier3_restricted := {"database_select", "file_read", "file_open"}
tier4_restricted := {"database_select", "file_read", "file_open", "llm_completion"}
default result = {"decision": "CONTINUE", "reason": null}
result := {"decision": "CONTINUE", "reason": null} if {
input.risk_tier == 1
}
result := {"decision": "REQUIRE_APPROVAL", "reason": "T2: internal tools blocked"} if {
input.risk_tier == 2
some span in input.spans
tier2_restricted[span.semantic_type]
}
result := {"decision": "CONTINUE", "reason": null} if {
input.risk_tier == 2
not has_restricted_span(tier2_restricted)
}
result := {"decision": "REQUIRE_APPROVAL", "reason": "T3: db/file blocked"} if {
input.risk_tier == 3
some span in input.spans
tier3_restricted[span.semantic_type]
}
result := {"decision": "CONTINUE", "reason": null} if {
input.risk_tier == 3
not has_restricted_span(tier3_restricted)
}
result := {"decision": "REQUIRE_APPROVAL", "reason": "T4: restricted"} if {
input.risk_tier == 4
some span in input.spans
tier4_restricted[span.semantic_type]
}
result := {"decision": "CONTINUE", "reason": null} if {
input.risk_tier == 4
not has_restricted_span(tier4_restricted)
}
has_restricted_span(restricted_set) if {
some span in input.spans
restricted_set[span.semantic_type]
}
```# Behavioral Rules
Source: https://docs.openbox.ai/trust-lifecycle/authorize/behaviors
# Behavioral Rules
Behavioral rules are stateful authorization rules that detect multi-step patterns across an agent's session. Unlike [policies](./policies), behavioral rules track prior actions to identify sequences, frequencies, or combinations.
| Pattern | Example |
| --------------- | ------------------------------------------------- |
| **Sequence** | PII access → External API call (without approval) |
| **Frequency** | More than 10 failed auth attempts in 1 minute |
| **Combination** | Database write + File export + External send |
Rules are evaluated in priority order and stop at the first rule that triggers a verdict. Remaining rules are not evaluated.
## Create a Behavioral Rule
Behavioral rules are created through a 4-step wizard under **Agent → Authorize → Behavioral Rules**.
### Step 1 — Basic Info
- **Rule Name (required):** Human-readable label for the rule.
- **Description:** Optional operator context.
- **Priority (1–100):** Higher priority rules are evaluated first.
### Step 2 — Trigger
Select the **Trigger semantic type**. This is the action that will be checked (for example: `file_write`, `database_select`, `llm_completion`, `http_get`).
### Step 3 — States (Required Prior States)
Select one or more **Required Prior States**. These semantic types must occur before the trigger. When multiple prior states are selected, **all** of them must have occurred (AND logic) for the prerequisite to be met.
This step defines the **Prior State** prerequisite described below.
### Step 4 — Enforcement
- **Verdict:** What to do when the prerequisite is not met.
- **On Reject Message (required):** Message shown/logged when the verdict is applied.
Finish by clicking **Create Rule**.
:::info Important
Governance decisions from behavioral rules (and all authorization layers) surface as **exceptions** in your code. You must handle these in your activities to avoid unexpected crashes — see [Error Handling](/developer-guide/temporal-python/error-handling) for the full list of exception types (`GovernanceStop`, `ApprovalPending`, etc.) and how to handle them.
:::
## Verdicts
When a behavioral rule fires, it produces one of the following verdicts:
| Verdict | Description |
| ------------------ | -------------------------------- |
| `ALLOW` | Permit and log |
| `REQUIRE_APPROVAL` | Send to HITL queue |
| `BLOCK` | Action rejected, agent continues |
| `HALT` | Terminates entire agent session |
When a rule is configured with `REQUIRE_APPROVAL` and triggered at runtime, the approval request appears in:
- **Approvals** (main sidebar)
- **Adapt** tab (on the agent page)
Note: the Approvals page does not update in real time. If you don't see an approval immediately, refresh the page.
## How Prior State and Trigger Work
A behavioral rule has two key fields:
- **Trigger:** the action being checked (example: `llm_completion`)
- **Prior State:** the action(s) that must have happened before the trigger (example: `http_get`)
The prior state acts as a prerequisite. If the prerequisite is met, the action continues. If not, the configured verdict is applied. When a rule has multiple prior states, all of them must have occurred for the prerequisite to be satisfied.
| Result | Outcome |
| --------------------------------------------- | --------------------------------------------------- |
| Prior state happened before trigger | Continue (prerequisite met) |
| Prior state happened after trigger (or never) | Verdict applied (`BLOCK`, `REQUIRE_APPROVAL`, etc.) |
**Example — prerequisite met:**
- Trigger = `llm_completion`
- Prior State = `http_get`
- Verdict = `BLOCK`
Activity sequence: `http_get → file_write → file_read → http_post → llm_completion`
`http_get` happened before `llm_completion` → prerequisite met → continues normally.
**Example — prerequisite not met:**
- Trigger = `http_get`
- Prior State = `llm_completion`
- Verdict = `BLOCK`
`llm_completion` has not happened before `http_get` → prerequisite not met → `BLOCK`.
## Test Examples
Use these two sample rules to make runtime behavior obvious while testing. Enable only one rule at a time.
### Rule 1 — `HALT`
- **Rule Name:** `Query Data Before Generating Reports`
- **Trigger:** `file_write`
- **Prior State:** `database_select`
- **Verdict:** `HALT`
- **Priority:** `50`
- **Reject Message:** `File write halted: the agent must have queried the database before generating any file output. Prevent reports built on fabricated data`
Why this matters: a reporting agent skips the database query and goes straight to file generation. The LLM fills in convincing figures from its own knowledge — properly formatted, realistic numbers, but entirely fabricated. This rule ensures the agent has queried real data before producing any file output.
Result in terminal:
`temporalio.exceptions.ApplicationError: GovernanceStop: Governance blocked: Behavioral violation: File write halted: the agent must have queried the database before generating any file output. Prevent reports built on fabricated data`
The chat/session ends immediately after the halt.
### Rule 2 — `REQUIRE_APPROVAL`
- **Rule Name:** `Review Payment Before Processing`
- **Trigger:** `http_post`
- **Prior State:** `file_read`
- **Verdict:** `REQUIRE_APPROVAL`
- **Priority:** `50`
- **Reject Message:** `Payment submission paused: the agent has not read the invoice document before attempting payment. Review required before funds are released`
Why this matters: an accounts payable agent attempts to submit a payment without reading the invoice first. A finance controller reviews the payment amount and recipient, and decides whether to approve or reject it.# Monitor
Source: https://docs.openbox.ai/trust-lifecycle/monitor
# Monitor (Phase 3)
The Monitor phase provides visibility into agent runtime behavior. Track performance, cost, errors, and goal alignment across sessions.
Access via **Agent Detail → Monitor** tab.
### Time Range Selector
Use the time range selector in the top-right corner to control the reporting period for all dashboard widgets.
| Option | Period |
| ---------- | -------------------------- |
| **24H** | Last 24 hours |
| **7D** | Last 7 days |
| **30D** | Last 30 days |
| **90D** | Last 90 days |
| **Custom** | Select a custom date range |
The default view is **7D**. Changing the time range updates all metrics, charts, and issue lists on the dashboard.
## Operational Dashboard
The Monitor tab provides operational observability into performance, cost, and health.
### Total Invocations
Displays the total number of agent invocations for the selected period.
- **Trend** — percentage change compared to the previous period (e.g. -87.9%)
- **Avg response** — average response time across all invocations (e.g. Avg 1.1s response)
### Token Consumption
Displays the total tokens consumed across all invocations for the selected period.
- **Trend** — percentage change compared to the previous period (e.g. +8%)
- **Today's cost** — estimated spend for the current day (e.g. $3.83 today)
### Total Errors
Displays the total error count for the selected period.
- **Today's errors** — number of errors recorded today (e.g. +5 today)
- **Success rate** — overall success rate across all invocations (e.g. 97.8%)
### Goal Alignment Trend
Line chart showing goal alignment scores across all sessions over time.
- **Threshold line** — 70% alignment threshold shown as a dashed line
- **Color bands:**
| Color | Range | Meaning |
| ------ | ------------- | ---------- |
| Green | 70% and above | Aligned |
| Orange | 50% – 69% | Warning |
| Red | Below 50% | Misaligned |
### Recent Drift Events
Lists recent sessions where goal drift was detected. A count badge shows the total number of drift events.
Each entry displays:
| Field | Description |
| -------------- | ------------------------------------------ |
| **Session ID** | Truncated session identifier |
| **Score** | Alignment score as a percentage (e.g. 89%) |
| **Summary** | Brief description of the detected drift |
| **Timestamp** | Relative time (e.g. 5 days ago) |
Click an event to view session details.
### Tool Health Matrix
Health table for tools/MCP servers (success rate, latency, status) to identify degraded dependencies.
### Request Volume
Request volume chart for the selected time range, with total requests, peak per hour, average per hour, and success rate.
### Model Usage
Model usage view with token and cost breakdown by model.
### Latency Distribution
Response-time distribution with percentiles (P50, P95, P99, Max).
### Error Breakdown
Donut chart of error categories with counts and percentages (for example: Span Failed, Other Error, Workflow Failed, Guardrail Block).
### Cost Analytics
Spending view with today's spend, projection, and budget utilization split by input tokens, output tokens, and tool calls.
### Recent Issues
List of recent issues requiring attention. Click **Refresh** to reload the list.
Each entry displays:
| Field | Description |
| ------------------ | ------------------------------------------------------------------------------------- |
| **Type** | Issue tag — `workflow_failed` (red) or `guardrail_violation` (orange) |
| **Description** | Summary of the issue (e.g. "Workflow execution failed" or blocked validation details) |
| **Source** | Originating activity and workflow |
| **Timestamp** | Relative time (e.g. 5 days ago) |
| **Session Status** | Current session state (e.g. halted) |
Click an issue row to view the full session details.
### Goal Alignment Badge
Goal Alignment tracks whether your agent's actions and outputs match the user's original request. OpenBox compares the user's goal (sent via Temporal signal) against the agent's LLM responses and tool outputs.
Goal Alignment requires you to implement goal context propagation in your workflow. In practice, this is done by sending a Temporal **Signal** into the running workflow and handling it with a signal handler that stores the user request input (goal context) in workflow state. Signals are asynchronous (the send returns when the server accepts it, not when the workflow processes it) and appear in workflow history as `WorkflowExecutionSignaled`. Without this signal, OpenBox cannot detect a goal session, and no stated goal is available for alignment scoring.
#### How to implement goal context propagation (Temporal Python)
**Step 1: Add a signal handler to your workflow**
```python
from datetime import timedelta
from temporalio import workflow
@workflow.defn
class YourAgentWorkflow:
def __init__(self):
self.user_goal = None
@workflow.signal
async def user_prompt(self, prompt: str) -> None:
self.user_goal = prompt
@workflow.run
async def run(self, input_data: str) -> dict:
await workflow.wait_condition(lambda: self.user_goal is not None)
result = await workflow.execute_activity(
"your_activity",
input_data,
start_to_close_timeout=timedelta(minutes=10),
)
return result
```
**Step 2: Send the signal when starting the workflow**
Option A: Signal-With-Start (recommended)
```python
handle = await client.start_workflow(
YourAgentWorkflow.run,
"your input data",
id="your-workflow-id",
task_queue="your-task-queue",
start_signal="user_prompt",
start_signal_args=["The user's goal or request goes here"],
)
```
Option B: Separate signal call
```python
handle = await client.start_workflow(
YourAgentWorkflow.run,
"your input data",
id="your-workflow-id",
task_queue="your-task-queue",
)
await handle.signal("user_prompt", "The user's goal or request goes here")
```
**Step 3: Return the full LLM response in activity output**
Your activity should return the complete LLM response so OpenBox can compare it against the goal.
| Score | Badge | Meaning |
| ---------- | ------ | ----------------------------- |
| 90% – 100% | Green | Well aligned with stated goal |
| 70% – 89% | Yellow | Minor deviations |
| Below 70% | Red | Significant drift detected |
Hover for details including:
- Alignment score breakdown
- LLM evaluation status
- Stated goal at session start
Notes:
- The signal name can be anything (it does not have to be `user_prompt`).
- If your activities do file operations, ensure your worker has `instrument_file_io=True` enabled.
## Observability Metrics Reference
The dashboard widgets above surface the following underlying metrics. This reference describes the full set of metrics OpenBox tracks for each agent.
### Performance
| Metric | Description |
| --------------- | -------------------------- |
| **p50 Latency** | Median operation latency |
| **p95 Latency** | 95th percentile latency |
| **p99 Latency** | 99th percentile latency |
| **Throughput** | Operations per minute/hour |
### Governance
| Metric | Description |
| --------------- | --------------------------------- |
| **Allowed** | Operations that passed governance |
| **Constrained** | Operations modified by guardrails |
| **Halted** | Operations blocked by policies |
| **Approvals** | Operations requiring HITL |
### Trends
Charts showing:
- Session volume over time
- Latency trends
- Governance decision distribution
- Trust score changes
## Next Phase
As sessions complete and data accumulates:
→ **[Verify](/trust-lifecycle/verify)** - Check that your agent's actions align with its stated goals and detect any drift# Verify
Source: https://docs.openbox.ai/trust-lifecycle/verify
# Verify (Phase 4)
The Verify phase validates that agents act in alignment with their stated goals. Detect drift, review reasoning traces, and ensure intent consistency.
Access via **Agent Detail → Verify** tab.
## Sub-tabs
### Goal Alignment
Monitor alignment between agent actions and stated goals.
#### Session Selector
A dropdown at the top of the tab to pick which session to inspect, including session metadata such as ID, status, and duration.
#### Alignment Score
A 0% – 100% score indicating how well actions match goals:
| Range | Status | Meaning |
| -------------- | ---------- | -------------------------------------- |
| **90% – 100%** | Excellent | Actions strongly aligned with goals |
| **70% – 89%** | Good | Minor deviations, acceptable |
| **50% – 69%** | Warning | Notable drift, review recommended |
| **Below 50%** | Misaligned | Significant deviation, action required |
#### Alignment Score Card
The hero component shows:
- **Circular gauge** with current score
- **Status text** (WELL ALIGNED / DRIFT DETECTED / MISALIGNED)
- **Trend indicator** (↑/↓/→)
- **Check statistics** (e.g., "47/50 aligned")
- **Actions**: View Trend, Configure
#### Goal Aligned
For a selected session, this card shows how closely actions matched the declared goal. When drift is detected, it highlights the specific violating action for faster investigation.
#### Alignment Trend
Line chart showing alignment over time:
- 7-day / 30-day / All time views
- Threshold line (default: 70%)
- Color-coded data points
#### Drift Events
When alignment drops below threshold, a drift event is logged:
| Field | Description |
| ------------------- | ------------------------------ |
| **Session ID** | Affected session |
| **Goal** | Stated goal at time of drift |
| **Alignment Score** | Score when drift detected |
| **Reason** | LLM-generated explanation |
| **Actions** | Review event evidence, Dismiss |
#### Session Breakdown
Table of sessions with alignment scores:
- Filter: All / Drift Only / Aligned Only
- Search by goal keyword
- Click to inspect execution evidence for that session
### Execution Evidence
Cryptographic attestation for tamper-proof audit trails.
#### Integrity Verified
Confirms all events in the selected session have valid cryptographic proofs. Typical details include Merkle root, chain/proof status, and signature verification.
#### Session Integrity
Each session generates:
- **Session hash** - Merkle root of all events
- **Signature** - Cryptographically signed by OpenBox
- **Timestamp** - Timestamped via RFC 3161
#### Proof Certificate
Exportable certificate containing:
```
Session: ses_a1b2c3d4e5f6
Agent: did:openbox:agent:xyz123
Hash: sha256:8a7b...
Signature: ecdsa:MIGk...
Timestamp: 2024-01-15T09:14:32Z
TSA: timestamp.openbox.ai
```
Use for compliance audits and legal evidence.
#### Workflow Metadata
- **Workflow ID** - Identifier of the Temporal workflow that orchestrated the session
- **Run ID** - Unique execution instance ID (UUID) for this run
- **Task Queue** - Temporal worker queue that processed the session
#### Event Log Timeline
Timeline view provides a detailed, filterable table of execution events with timestamps, event types, durations, and evidence hashes.
In the **Details** column, click the **eye icon** to open the event detail modal.
The modal includes:
- **Cryptographic Proof** - Event index, span count, tree depth, and Merkle-tree position/proof
- **Input** - Full event input payload
- **Output** - Full event output payload
- **Overview** - Core metadata (OpenBox ID, activity type, duration, workflow ID, created timestamp)
Use Timeline view when you need event-by-event inspection.
#### Workflow Execution Tree
Tree view provides a hierarchical breakdown of workflow and activity execution, including nested calls and parent-child relationships.
Use Tree View when you need execution-path reasoning:
- Follow the order of signals, activity starts, and activity completions
- Expand nodes to inspect how each step led to the next action
- Correlate timing and spans to understand why an execution path was taken
#### Watch Replay
Opens [Session Replay](/trust-lifecycle/session-replay) so you can walk through session execution step by step.
## Integration with Other Phases
- **Authorize**: Drift patterns can trigger behavioral rules
- **Adapt**: Repeated drift generates policy suggestions
- **Monitor**: Alignment annotations appear in [Session Replay](/trust-lifecycle/session-replay)
## Next Phase
Based on alignment results and detected patterns:
→ **[Adapt](/trust-lifecycle/adapt)** - Review policy suggestions, handle agent-specific approvals, and watch trust evolve over time# Session Replay
Source: https://docs.openbox.ai/trust-lifecycle/session-replay
# Session Replay
Session Replay provides a step-by-step walkthrough of an agent's session execution. Inspect every event, tool call, governance decision, and full JSON payload to understand exactly what happened and why.
## Accessing Session Replay
- **Agent Detail → Verify → Watch Replay** — opens replay for the selected session

## Session Header
The header bar at the top of the replay summarizes the session:
| Field | Description |
| -------------- | ----------------------------------------------------------------------- |
| **Session ID** | Unique session identifier |
| **Duration** | Total wall-clock time for the session |
| **Events** | Total number of events recorded |
| **Status** | Badge showing current state — Completed, Failed, Halted, or In Progress |
## Playback Controls
Controls beneath the header let you navigate through the session timeline:
| Control | Description |
| ---------------- | ------------------------------------------------ |
| **Play / Pause** | Start or pause automatic playback through events |
| **Progress bar** | Scrub to any point in the session timeline |
| **Timestamps** | Current position and total duration |
| **Speed toggle** | Switch between 0.5x, 1x, and 2x playback speed |
## Event Stream
The event stream on the left lists all events that occurred during the session in chronological order, including user prompts and tool calls. Each event shows its name and a timestamp offset from the start of the session. Some events include a summary line (e.g. "Transfer exceeds $5,000 threshold — requires approval").
Click any event to view its full details.
## Event Details
The event details panel on the right shows the full information for the selected event:
- **Activity type and timestamp** — the event name and when it occurred
- **Event ID** — unique identifier for the event
- **Context** — the full JSON payload, including fields such as prompt, agent goal, tools, and arguments
## Related
- **[Verify](/trust-lifecycle/verify)** — Goal alignment scoring and execution evidence
- **[Monitor](/trust-lifecycle/monitor)** — Operational metrics and session overview
- **[Governance Decisions](/core-concepts/governance-decisions)** — The four decision types shown in replay
- **[Event Types](/developer-guide/event-types)** — Semantic event types that appear in the stream
- **[Approvals](/approvals)** — Human-in-the-loop approval queue# Adapt
Source: https://docs.openbox.ai/trust-lifecycle/adapt
# Adapt (Phase 5)
The Adapt phase enables trust evolution over time. Review agent-specific approvals and insights to improve governance over time.
Access via **Agent Detail → Adapt** tab.
## Sub-tabs
### Approvals
The **Approvals** sub-tab shows agent-specific approval status for the last 7 days.
**Summary Cards**:
- Pending approvals
- Approved (7d)
- Rejected (7d)
- Approval rate
#### Pending Approvals
Pending approval cards show:
- Risk tier
- Semantic action type (for example: `database_delete`, `external_api_call`)
- Requested operation description
- Triggering rule/reason
Actions:
- **Approve** - Allow operation to proceed
- **Reject** - Deny operation
- **Escalate** - Forward for higher-level review
If there are no approvals waiting, the page shows an empty state ("No pending approvals found").
#### Approval History
Collapsible history of recent decisions for this agent:
| Field | Description |
| -------------- | -------------------------------------------- |
| **Request** | The operation/request that required approval |
| **Trust Tier** | Trust tier at the time of the request |
| **Decision** | Approved or rejected |
| **Decided By** | User who made the decision |
| **Time** | When the decision was made |
For the organization-wide approval queue, see **[Approvals](/approvals)**.
### Insights
The **Insights** sub-tab summarizes governance learning signals.
**Summary Cards**:
- Violation patterns
- Policy suggestions
- Trust recovery plans
- Tier changes (last 30 days)
#### Violation Patterns for This Agent
Aggregated patterns derived from this agent's violations, including:
| Field | Description |
| ---------------- | ----------------------------------------------------- |
| **Pattern Name** | Name and type (behavior pattern or guardrail pattern) |
| **Frequency** | How often it occurred |
| **Severity** | Relative severity |
| **Sessions** | Number of sessions involved |
| **Action** | View Details |
#### Agent Trust Timeline
Chronological history of trust tier changes for this agent, including:
- Promotions
- Demotions
- Recovery completions
- Initial provisioning events with reasons
#### Recent Violations
Shows the most recent violations for this agent, including the event type (for example, `ActivityStarted`), the rule type (for example, `GUARDRAIL`), and the resulting governance decision.
Use **View All Rules** to jump back to Authorize and review the rules that are currently enforcing governance.
#### Trust Recovery Status
Shows whether the agent is currently under a recovery plan after a demotion.
Typical indicators include:
- Compliance rate
- Days since last violation
- Promotion eligibility progress/checklist
#### Policy Suggestions
Based on observed patterns, OpenBox can suggest new policies or rules.
For each suggestion:
- **Accept** - Creates the rule in Authorize tab
- **Reject** - Dismisses (with reason)
- **Modify** - Opens in rule editor
Other Insights cards:
- **Trust Recovery** summarizes recovery signals and recommendations when available.
- **Tier Changes (7d)** shows recent trust tier transitions for the agent.
## Next Steps
The Trust Lifecycle is continuous. From here you can:
1. **[Update Governance (Authorize)](/trust-lifecycle/authorize)** - Accept policy suggestions or create new rules
2. **[Re-assess Risk (Assess)](/trust-lifecycle/assess)** - If your agent's capabilities have changed
3. **[Handle Approvals](/approvals)** - Review organization-wide approval queue# Developer Guide
Source: https://docs.openbox.ai/developer-guide/
# Developer Guide
Everything you need to integrate OpenBox into your agent workflows.
## Integrations
CrewAI coming soon
Governance for multi-agent crews and collaborative workflows. Every agent action is tracked automatically.
Python
Multi-agent
Cursor coming soon
Governance for Cursor IDE agents via hooks. Every prompt, shell command, MCP call, and file read is governed.
TypeScript
IDE Hooks
Deep Agents
Per-subagent governance for DeepAgents workflows. Every nested call is captured automatically.
Python
Sub-agents
LangChain
Governance for chains, tools, and retrieval pipelines. Your existing code stays unchanged.
TypeScript
Chains / RAG
LangGraph
Governance for graph-based, stateful agent workflows. Every node and state transition is recorded.
Python
Graph workflows
Mastra
Governance for TypeScript AI agents and tool calls. Your existing Mastra code stays unchanged.
TypeScript
Agents
n8n
Wrap your n8n LLM calls with a single function. Your existing workflows stay unchanged.
JavaScript
TypeScript
Workflows
OpenClaw
Tool governance and LLM guardrails for OpenClaw agents. Every tool call is evaluated against your policies.
TypeScript
Tool governance
Temporal
Add the OpenBox plugin to your Temporal worker. Your existing workflows and activities stay unchanged.
Python
Orchestration
## Shared Reference
| Guide | Description |
| ------------------------------------------------------ | ---------------------------------------------------- |
| **[Event Types](/developer-guide/event-types)** | Semantic event types captured by the SDK |
| **[Working with llms.txt](/developer-guide/llms-txt)** | Machine-readable documentation for LLMs and AI tools |# CrewAI Developer Guide
Source: https://docs.openbox.ai/developer-guide/crewai/
# CrewAI Developer Guide
:::info Docs coming soon
The OpenBox SDK for CrewAI is in development.
This page will be updated with SDK reference, integration guides, and configuration details when the integration is available.
:::
## What to expect
- SDK reference for wrapping CrewAI crews with OpenBox governance
- Configuration options for trust scoring and policy enforcement
- Error handling patterns for governance decisions
- Code examples for common integration scenarios# Cursor Developer Guide
Source: https://docs.openbox.ai/developer-guide/cursor/
# Cursor Developer Guide
:::info Docs coming soon
The OpenBox integration for Cursor is in development.
This page will be updated with hook reference, integration guides, and configuration details when the integration is available.
:::
## What to expect
- Hook reference for governing Cursor agent actions with OpenBox
- Configuration options for trust scoring and policy enforcement
- Verdict mapping and guardrail configuration
- Code examples for common integration scenarios# Deep Agents SDK (Python)
Source: https://docs.openbox.ai/developer-guide/deep-agents/
# Deep Agents SDK (Python)
The `openbox-deepagent-sdk-python` package provides real-time governance and observability for [DeepAgents](https://github.com/langchain-ai/deepagents). It extends [`openbox-langgraph-sdk`](/developer-guide/langgraph) with features specific to the DeepAgents multi-agent framework.
| Guide | Description |
| ----------------------------------------------------------------------------------- | ------------------------------------------------------- |
| **[Integration Walkthrough](/developer-guide/deep-agents/integration-walkthrough)** | Step-by-step guide using the content builder demo |
| **[Configuration](/developer-guide/deep-agents/configuration)** | Environment variables and all middleware parameters |
| **[Error Handling](/developer-guide/deep-agents/error-handling)** | Handle governance decisions and failures in your code |
| **[Extending the Demo](/developer-guide/deep-agents/extending-the-demo-agent)** | Add your own tools, subagents, and skills |
| **[Demo Architecture](/developer-guide/deep-agents/demo-architecture)** | Middleware lifecycle, event flow, and subagent dispatch |
| **[Troubleshooting](/developer-guide/deep-agents/troubleshooting)** | Common issues and fixes for Deep Agents SDK setup |
:::info What the SDK Does
The SDK's primary job is to **connect your DeepAgents graph to OpenBox** and evaluate governance on every model call and tool call. All trust logic, policy evaluation, and UI management happens on the OpenBox platform — not in the SDK.
:::
## Philosophy
The SDK is intentionally minimal:
- **One middleware object** wraps your `create_deep_agent()` graph (`create_openbox_middleware`)
- **Zero graph changes** — your tools and graph structure stay exactly as they are
- **Automatic telemetry** — captures HTTP, database, and file I/O operations via OpenTelemetry
## Installation
```bash
pip install openbox-deepagent-sdk-python
# Or with uv
uv add openbox-deepagent-sdk-python
```
**Requires Python 3.11+.**
## Factory Function
```python
from openbox_deepagent import create_openbox_middleware
def create_openbox_middleware(
*,
api_url: str,
api_key: str,
agent_name: str | None = None,
# + governance, instrumentation options
) -> OpenBoxMiddleware
```
Returns an `OpenBoxMiddleware` instance that implements the DeepAgents `AgentMiddleware` interface. Pass it to `create_deep_agent(middleware=[middleware])`.
See **[Configuration](/developer-guide/deep-agents/configuration)** for the full parameter list.
## Middleware Hooks
`OpenBoxMiddleware` implements 8 lifecycle hooks that DeepAgents calls at runtime. You do not call these directly — they fire automatically.
| Hook | When it fires | What OpenBox does |
| ------------------ | ---------------------------------- | ---------------------------------------------------------- |
| `before_agent` | Before the agent graph runs | Records session start |
| `after_agent` | After the agent graph completes | Records session completion, finalizes telemetry |
| `wrap_model_call` | Before every LLM call | Runs PII redaction; sends `LLMStarted` event |
| `wrap_tool_call` | Before every tool execution | Evaluates governance policy; sends `ActivityStarted` event |
| `abefore_agent` | Async variant of `before_agent` | Same as above, async-safe |
| `aafter_agent` | Async variant of `after_agent` | Same as above, async-safe |
| `awrap_model_call` | Async variant of `wrap_model_call` | Same as above, async-safe |
| `awrap_tool_call` | Async variant of `wrap_tool_call` | Same as above, async-safe |
Governance decisions (`ALLOW`, `BLOCK`, `HALT`, `REQUIRE_APPROVAL`) are evaluated inside `wrap_tool_call`. A `BLOCK` decision raises `GovernanceBlockedError` before the tool runs.
## What the SDK Captures
| Category | Details |
| ----------------------- | ----------------------------------------------------------------- |
| **Model calls** | Prompts, completions, model name, token counts, latency |
| **Tool calls** | Tool name, input arguments, output, duration, governance decision |
| **HTTP calls** | Request/response bodies, headers, status codes, timing |
| **Database operations** | SQL queries, NoSQL operations (optional, via `sqlalchemy_engine`) |
| **File I/O** | File paths and operations (optional) |
:::note Subagent calls
DeepAgents supports subagents (e.g. `researcher`, `writer`). The SDK treats subagent dispatches as regular tool calls — they go through the same `wrap_tool_call` governance path and appear as tool events in the dashboard.
:::
## HITL Conflict Detection
DeepAgents has a built-in `interrupt_on` mechanism for pausing execution. OpenBox also provides Human-in-the-Loop (HITL) approvals via governance policies.
If both are active for the same tool, the SDK detects the conflict at startup and logs a warning:
```
WARNING: HITL conflict detected — "export_data" is listed in DeepAgents interrupt_on
and is also subject to OpenBox REQUIRE_APPROVAL policy. Consider using one mechanism only.
```
The SDK continues to function; the warning helps you avoid double-interruption on the same tool call.
## How It Works
```mermaid
flowchart TD
subgraph agent["Your DeepAgents Graph"]
model["LLM Model"]
tools["Tools
(search_web, write_report, export_data)"]
model --> tools
tools --> model
end
subgraph middleware["OpenBox Middleware"]
hooks["Lifecycle Hooks
(wrap_model_call, wrap_tool_call)"]
telemetry["Telemetry
(HTTP / DB / File I/O)"]
end
tools --> hooks
hooks --> telemetry
telemetry --> engine
engine["OpenBox Trust Engine
Verdicts:
ALLOW · REQUIRE_APPROVAL
BLOCK · HALT"]
```
## Configuration
See **[Configuration](/developer-guide/deep-agents/configuration)** for all options including:
- Environment variables
- Governance timeout and fail policies (`on_api_error`)
- Tool type mapping (`tool_type_map`, `skip_tool_types`)
- Event filtering flags
- Database and file I/O instrumentation
## Next Steps
1. **[Integration Walkthrough](/developer-guide/deep-agents/integration-walkthrough)** — End-to-end setup with the content builder demo
2. **[Configuration](/developer-guide/deep-agents/configuration)** — All middleware parameters and environment variables
3. **[Error Handling](/developer-guide/deep-agents/error-handling)** — Handle governance decisions in your code
4. **[Extending the Demo](/developer-guide/deep-agents/extending-the-demo-agent)** — Add tools, subagents, and skills
5. **[Policies](/trust-lifecycle/authorize/policies)** — Write Rego policies for governance rules# Configuration
Source: https://docs.openbox.ai/developer-guide/deep-agents/configuration
# Configuration
The SDK can be configured via environment variables or parameters passed to `create_openbox_middleware()`.
## Environment Variables
| Variable | Required | Default | Description |
| ----------------- | -------- | ------- | --------------------------------------------------------- |
| `OPENBOX_URL` | Yes | — | OpenBox Core API URL (HTTPS required for non-localhost) |
| `OPENBOX_API_KEY` | Yes | — | API key for authentication (`obx_live_*` or `obx_test_*`) |
| `OPENBOX_DEBUG` | No | `false` | Enable verbose SDK logging |
## Middleware Parameters
All parameters are passed as keyword arguments to `create_openbox_middleware()`. Function parameters override environment variables.
### api_url
OpenBox Core API URL. HTTPS required for non-localhost.
```python
api_url="https://core.openbox.ai" # Production
api_url="https://core.staging.openbox.ai" # Staging
api_url="http://localhost:8000" # Local dev (HTTP allowed)
```
### api_key
Your API key. Always load from environment variables in production:
```python
api_key=os.getenv("OPENBOX_API_KEY")
```
### agent_name
Human-readable name shown in the OpenBox Dashboard. Defaults to the graph class name if omitted.
```python
agent_name="ResearchBot"
```
### on_api_error
Behavior when the OpenBox API is unreachable or times out:
| Value | Behavior |
| --------------- | ------------------------------------------------------ |
| `"fail_open"` | Allow the operation to proceed (log warning). Default. |
| `"fail_closed"` | Block the operation. |
```python
on_api_error="fail_open" # Default — prioritize availability
on_api_error="fail_closed" # For high-security environments
```
### governance_timeout
Maximum seconds to wait for a governance evaluation per operation. Accepts seconds as a float. Values greater than 600 are interpreted as milliseconds and auto-converted.
```python
governance_timeout=30.0 # Default
governance_timeout=60.0 # For slower networks
governance_timeout=10.0 # For low-latency requirements
```
### validate
Validate the API key against OpenBox on middleware initialization. Set to `False` to skip the startup check (useful in test environments).
```python
validate=True # Default — fails fast on bad credentials
validate=False # Skip validation (e.g. in unit tests)
```
### tool_type_map
Map tool function names to semantic type strings. Used to apply category-level policies (e.g. block all `"http"` tools) without listing each tool individually.
```python
tool_type_map={
"search_web": "http",
"fetch_page": "http",
"write_report": "file",
"export_data": "file",
"query_db": "database",
}
```
### skip_tool_types
Set of semantic tool types to exclude from governance evaluation entirely. Tools matching these types are allowed through without a policy check.
```python
skip_tool_types={"internal", "logging"}
```
### Event Emission Flags
Control which lifecycle events are sent to OpenBox. All default to `True`.
| Parameter | Event sent |
| ------------------------ | --------------------- |
| `send_chain_start_event` | Agent graph started |
| `send_chain_end_event` | Agent graph completed |
| `send_tool_start_event` | Tool call started |
| `send_tool_end_event` | Tool call completed |
| `send_llm_start_event` | LLM call started |
| `send_llm_end_event` | LLM call completed |
```python
# Disable LLM event emission (reduces data volume)
send_llm_start_event=False,
send_llm_end_event=False,
```
### sqlalchemy_engine
Pre-created SQLAlchemy engine for database governance. When provided, the SDK instruments SQL queries executed through this engine.
```python
from sqlalchemy import create_engine
engine = create_engine("postgresql+psycopg2://user:pass@localhost/mydb")
middleware = create_openbox_middleware(
api_url=os.getenv("OPENBOX_URL"),
api_key=os.getenv("OPENBOX_API_KEY"),
sqlalchemy_engine=engine,
)
```
## Configuration Precedence
1. Function parameters (highest priority)
2. Environment variables
3. Default values (lowest priority)
## Full Configuration Example
```python
import os
from sqlalchemy import create_engine
from openbox_deepagent import create_openbox_middleware
middleware = create_openbox_middleware(
# Required
api_url=os.getenv("OPENBOX_URL"),
api_key=os.getenv("OPENBOX_API_KEY"),
# Agent identity
agent_name="ResearchBot",
# Governance behavior
on_api_error="fail_closed", # High-security: block on API failure
governance_timeout=45.0,
validate=True,
# Tool classification
tool_type_map={
"search_web": "http",
"fetch_page": "http",
"write_report": "file",
"export_data": "file",
},
skip_tool_types={"internal"},
# Event emission — disable LLM events to reduce data volume
send_chain_start_event=True,
send_chain_end_event=True,
send_tool_start_event=True,
send_tool_end_event=True,
send_llm_start_event=False,
send_llm_end_event=False,
# Database instrumentation
sqlalchemy_engine=create_engine(os.getenv("DATABASE_URL")),
)
```
## Next Steps
1. **[Error Handling](/developer-guide/deep-agents/error-handling)** — Handle governance decisions in your code
2. **[Event Types](/developer-guide/event-types)** — Understand the semantic event types captured by the SDK
3. **[Approvals](/approvals)** — Review and act on HITL approval requests# Error Handling
Source: https://docs.openbox.ai/developer-guide/deep-agents/error-handling
# Error Handling
Governance decisions surface as Python exceptions raised inside your agent's tool calls. The SDK raises typed exceptions that you can catch and handle in your own code.
All governance exceptions are re-exported from `openbox_langgraph` and available directly from `openbox_deepagent`.
## Governance Exceptions
| Exception | Raised when | Description |
| --------------------------- | --------------------------------------------------------- | ------------------------------------------------------------------- |
| `GovernanceBlockedError` | Policy verdict is `BLOCK` | A single tool call was blocked. The agent can continue. |
| `GovernanceHaltError` | Policy verdict is `HALT`, or approval rejected/expired | The entire agent session is terminated. |
| `GuardrailsValidationError` | Guardrails detect PII, toxic content, or policy violation | The model call or tool input was rejected before execution. |
| `ApprovalRejectedError` | A human rejected an approval request | Automatically converted to `GovernanceHaltError` by the middleware. |
| `ApprovalExpiredError` | Approval timed out without a decision | Automatically converted to `GovernanceHaltError` by the middleware. |
:::note ApprovalRejectedError and ApprovalExpiredError
These two exceptions are caught and re-raised as `GovernanceHaltError` by the middleware. You will never see them directly unless you inspect the `__cause__` of a `GovernanceHaltError`. Handle `GovernanceHaltError` to cover all approval failure cases.
:::
## Import
```python
from openbox_deepagent import (
GovernanceBlockedError,
GovernanceHaltError,
GuardrailsValidationError,
)
```
## Handling Patterns
### Wrapping ainvoke()
The simplest approach — catch governance errors at the top level:
```python
from openbox_deepagent import GovernanceBlockedError, GovernanceHaltError, GuardrailsValidationError
try:
result = await agent.ainvoke(
{"messages": [{"role": "user", "content": "Research AI safety"}]},
config={"configurable": {"thread_id": "session-001"}},
)
except GovernanceHaltError as e:
# Session terminated — HALT verdict, or approval rejected/expired
logger.error(f"Agent session halted: {str(e)}")
# Clean up session state, notify the user, etc.
return {"status": "halted", "reason": str(e)}
except GovernanceBlockedError as e:
# A tool was blocked but the session is still live
# Typically surfaces here only if the agent re-raises it
logger.warning(f"Tool blocked: {str(e)}")
return {"status": "blocked", "reason": str(e)}
except GuardrailsValidationError as e:
# PII or content policy violation in a model call or tool input
logger.warning(f"Guardrails triggered: {str(e)}")
return {"status": "guardrails", "detail": str(e)}
```
### Per-Tool Error Handling
If you wrap individual tool calls (e.g. in a custom tool executor), handle errors at that level:
```python
from openbox_deepagent import GovernanceBlockedError
async def safe_tool_call(tool_fn, *args, **kwargs):
try:
return await tool_fn(*args, **kwargs)
except GovernanceBlockedError as e:
logger.warning(f"Tool blocked by governance: {str(e)}")
# Return a safe fallback instead of raising
return f"[Tool blocked: {str(e)}]"
```
## Configuration Exceptions
These are raised during `create_openbox_middleware()` initialization — not during agent execution. Handle them where you set up your agent:
| Exception | Cause |
| ------------------------- | ------------------------------------------- |
| `OpenBoxError` | Base class for all SDK configuration errors |
| `OpenBoxAuthError` | Invalid or missing API key |
| `OpenBoxNetworkError` | Cannot reach OpenBox Core at startup |
| `OpenBoxInsecureURLError` | HTTP URL used for a non-localhost address |
```python
from openbox_deepagent import (
OpenBoxError,
OpenBoxAuthError,
OpenBoxNetworkError,
OpenBoxInsecureURLError,
)
try:
middleware = create_openbox_middleware(
api_url=os.getenv("OPENBOX_URL"),
api_key=os.getenv("OPENBOX_API_KEY"),
)
except OpenBoxAuthError:
logger.error("Invalid OPENBOX_API_KEY — check your credentials")
raise
except OpenBoxInsecureURLError:
logger.error("OPENBOX_URL must use HTTPS for non-localhost URLs")
raise
except OpenBoxNetworkError:
logger.error("Cannot reach OpenBox Core — check OPENBOX_URL and network")
raise
```
## Best Practices
1. **Catch `GovernanceHaltError` at the session level** — it means the agent should not continue running
2. **Treat `GovernanceBlockedError` as recoverable** — a single blocked tool does not end the session
3. **Log with context** — include the full exception message to correlate with the Dashboard event log
4. **Don't catch and ignore** — governance exceptions are intentional; suppressing them defeats the purpose
5. **Handle `GuardrailsValidationError` separately** — it fires before execution, so no side effects have occurred
## Debugging
Enable verbose SDK logging to see governance decisions as they happen:
```bash
OPENBOX_DEBUG=1 python agent.py
```
This logs every middleware hook invocation, governance request, and decision verdict to stderr.
You can also inspect the full event trace in the OpenBox Dashboard under **Agents** → your agent → **Details** → **Event Log Timeline**.
## Next Steps
1. **[Event Types](/developer-guide/event-types)** — Understand the semantic event types that trigger governance decisions
2. **[Approvals](/approvals)** — Review and process HITL requests in the dashboard
3. **[Policies](/trust-lifecycle/authorize/policies)** — Write Rego policies that produce these decisions# Deep Agents Integration Guide (Python)
Source: https://docs.openbox.ai/developer-guide/deep-agents/integration-walkthrough
# Deep Agents Integration Guide (Python)
This is the end-to-end guide for integrating OpenBox with a DeepAgents application. You'll set up the demo repo, register your agent, run it with governance enabled, then walk through the integration architecture, subagent governance, and human-in-the-loop approvals.
:::tip Skip ahead
- **Completed the demo?** Skip to the **[How the Integration Works](#how-the-integration-works) section**.
- **Already have an agent?** See the **[Getting Started](/getting-started/deep-agents)** page.
:::
## Prerequisites
- **Python 3.11+** and [uv](https://docs.astral.sh/uv/)
- **OpenBox Account** — Sign up at [platform.openbox.ai](https://platform.openbox.ai)
- **OpenAI API Key** — The demo uses `gpt-4o-mini` via LangChain's `init_chat_model`
- **Tavily API Key** *(optional)* — For the `researcher` subagent's web search
- **Google Gemini API Key** *(optional)* — For image generation tools
## Part 1: Clone and Set Up the Demo
This guide uses the public SDK repo's example:
```bash
git clone https://github.com/OpenBox-AI/openbox-deepagent-sdk-python
cd openbox-deepagent-sdk-python/examples/content-builder-agent
```
### Install Dependencies
```bash
uv sync
```
## Part 2: Register Your Agent in OpenBox
1. **Log in** to the [OpenBox Dashboard](https://platform.openbox.ai)
2. Navigate to **Agents** → Click **Add Agent**
3. Configure the agent:
- **Workflow Engine**: Deep Agents
- **Agent Name**: ContentWriter
- **Agent ID**: Auto-generated
- **Description** *(optional)*: Content builder agent demo
- **Teams** *(optional)*: assign the agent to one or more teams
- **Icon** *(optional)*: select an icon
4. **API Key Generation**:
- Click **Generate API Key**
- Copy and store the key (shown only once)
5. Configure platform settings:
- **Initial Risk Assessment** (**[Risk Profile](/trust-lifecycle/assess)**) — select a risk profile (Tier 1-4)
- **Attestation** (**[Execution Evidence](/administration/attestation-and-cryptographic-proof)**) — select an attestation provider
6. Click **Add Agent**
See **[Registering Agents](/dashboard/agents/registering-agents)** for a field-by-field walkthrough of the form.
## Part 3: Configure Environment
1. Copy `.env.example` to `.env`
2. Open `.env` in your editor and set your values:
```bash
# OpenAI — main agent LLM
OPENAI_API_KEY=sk-...
# OpenBox (use the API key from Part 2)
OPENBOX_URL=https://core.openbox.ai
OPENBOX_API_KEY=obx_live_your_api_key_here
OPENBOX_AGENT_NAME=ContentWriter
# Google Gemini — image generation (optional)
GOOGLE_API_KEY=AI...
# Tavily — web search for researcher subagent (optional)
TAVILY_API_KEY=tvly-...
```
## Part 4: Run the Demo
```bash
uv run python content_writer.py "Write a blog post about how AI agents are transforming software development"
```
You should see `OpenBox SDK initialized successfully` in the terminal output, followed by streaming agent activity — research, writing, and image generation.
:::tip Custom task
Pass any content task as a command-line argument:
```bash
uv run python content_writer.py "Create a LinkedIn post about prompt engineering"
```
:::
## See It in Action
1. Open the **[OpenBox Dashboard](https://platform.openbox.ai)**
2. Navigate to **Agents** → Click your agent (ContentWriter)
3. On the **Overview** tab, find the session that corresponds to your run
4. Click **Details** to open it — you'll land on the **Overview** tab which shows the **Event Log Timeline**
5. Scroll through the timeline — you'll see every event the trust layer captured: model calls with prompts and completions, tool calls with governance decisions, subagent dispatches, and HTTP requests
6. Switch to the **Tree View** to see the same data as a hierarchy — model calls at the top, tool calls nested underneath
7. Click **Watch Replay** to open [Session Replay](/trust-lifecycle/session-replay) — this plays back the entire session step-by-step
## What Just Happened?
When you ran the demo, the OpenBox middleware:
1. **Intercepted every model call** — recorded prompts and completions, ran PII redaction before sending to the LLM
2. **Governed every tool call** — evaluated governance policies before each tool executed (web search, file writes, image generation)
3. **Captured subagent dispatches** — the `researcher` subagent's `task` call was treated as a governed tool call with `a2a` classification
4. **Captured HTTP calls automatically** — OpenTelemetry instrumentation recorded outbound requests to OpenAI, Tavily, and Gemini
5. **Recorded a governance decision for every event** — approved, blocked, or flagged — giving you a complete audit trail
## How the Integration Works
The OpenBox integration point is the agent factory function in `content_writer.py`. The only change is creating middleware with `create_openbox_middleware` and passing it to `create_deep_agent`:
```python title="content_writer.py"
from deepagents import create_deep_agent
from langchain.chat_models import init_chat_model
def create_content_writer():
return create_deep_agent(
model=init_chat_model("openai:gpt-4o-mini", temperature=0),
memory=["./AGENTS.md"],
skills=["./skills/"],
tools=[generate_cover, generate_social_image],
subagents=subagent_defs,
backend=FilesystemBackend(root_dir=EXAMPLE_DIR),
)
```
```python title="content_writer.py"
import os
from deepagents import create_deep_agent
from langchain.chat_models import init_chat_model
from openbox_deepagent import create_openbox_middleware # Added
def create_content_writer():
subagent_defs = load_subagents(EXAMPLE_DIR / "subagents.yaml")
known_subagents = [s["name"] for s in subagent_defs] + ["general-purpose"]
# Create OpenBox governance middleware
openbox_middleware = create_openbox_middleware(
api_url=os.environ["OPENBOX_URL"],
api_key=os.environ["OPENBOX_API_KEY"],
agent_name=os.environ.get("OPENBOX_AGENT_NAME", "ContentWriter"),
known_subagents=known_subagents,
tool_type_map={"web_search": "http"},
)
return create_deep_agent(
model=init_chat_model("openai:gpt-4o-mini", temperature=0),
memory=["./AGENTS.md"],
skills=["./skills/"],
tools=[generate_cover, generate_social_image],
subagents=subagent_defs,
backend=FilesystemBackend(root_dir=EXAMPLE_DIR),
middleware=[openbox_middleware], # Added
)
```
The agent's code is organized in:
- **`AGENTS.md`** — Brand voice and writing standards. DeepAgents loads this as the agent's memory, establishing personality and content guidelines.
- **`skills/`** — Specialized workflow instructions. Each skill (e.g., `blog-post`, `social-media`) defines a structured process the agent follows for that content type.
- **`subagents.yaml`** — Subagent definitions loaded by a custom utility. Each subagent has a name, description, system prompt, and available tools.
- **`content_writer.py`** — The agent factory that wires everything together, including OpenBox middleware.
See **[Extending the Demo Agent](/developer-guide/deep-agents/extending-the-demo-agent)** for a step-by-step guide to adding your own tools and subagents, or the **[Demo Architecture Reference](/developer-guide/deep-agents/demo-architecture)** for the full middleware lifecycle and event flow.
## Subagent Governance
The demo ships with a `researcher` subagent that uses `web_search` to gather information. OpenBox automatically governs subagent dispatches:
- The `task` tool call is classified as `a2a` (agent-to-agent)
- The subagent name (e.g., `researcher`) is included in the `__openbox` metadata
- Rego policies can target specific subagents:
```rego
result := {"decision": "REQUIRE_APPROVAL"} if {
input.event_type == "ToolStarted"
input.activity_type == "task"
some item in input.activity_input
item["__openbox"].subagent_name == "researcher"
}
```
### Tool Type Classification
The demo configures `tool_type_map={"web_search": "http"}` so policies can target tool categories:
| Tool | Classification | Reason |
| ------------------- | -------------- | ----------------------------------------- |
| `web_search` | `http` | Explicit mapping in `tool_type_map` |
| `task` (researcher) | `a2a` | Automatic — subagent dispatch |
| `generate_cover` | *(none)* | No mapping — governed by default policies |
| `write_file` | *(none)* | DeepAgents built-in tool |
## Human-in-the-Loop Approvals
Some operations may be too sensitive to run without human sign-off — for example, publishing content or executing external API calls. Configure governance policies in OpenBox to require approval. See **[Authorize](/trust-lifecycle/authorize)** to set up guardrails, policies, and behavioral rules.
When governance requires approval:
1. OpenBox creates an approval request
2. Approval request appears in the [OpenBox dashboard](/approvals)
3. Human approves/rejects
4. The middleware polls for the decision and either proceeds or raises `GovernanceHaltError`
## Configuration Options
### Governance Settings
| Option | Default | Description |
| -------------------- | ----------- | ---------------------------------------------------------------------- |
| `governance_timeout` | `30.0` | Max seconds to wait for governance evaluation |
| `on_api_error` | `fail_open` | `fail_open` = continue on API error, `fail_closed` = stop on API error |
### Tool Classification
Map tool names to semantic types for category-level policies:
```python
middleware = create_openbox_middleware(
api_url=os.environ["OPENBOX_URL"],
api_key=os.environ["OPENBOX_API_KEY"],
# Classify tools
tool_type_map={
"web_search": "http",
"fetch_page": "http",
"write_report": "file",
},
# Skip governance for internal tools
skip_tool_types={"internal", "logging"},
)
```
### Optional Instrumentation
```python
from sqlalchemy import create_engine
middleware = create_openbox_middleware(
api_url=os.environ["OPENBOX_URL"],
api_key=os.environ["OPENBOX_API_KEY"],
# Database governance
sqlalchemy_engine=create_engine(os.environ["DATABASE_URL"]),
)
```
See **[Configuration](/developer-guide/deep-agents/configuration)** for the full list of options.
## Error Handling
The SDK raises typed exceptions for governance decisions. The recommended way to understand and respond to blocks, approvals, and validation failures is through the OpenBox dashboard UI.
To investigate failures, open a session in the dashboard using the same steps from [See It in Action](#see-it-in-action) and look for governance decisions that were blocked or flagged.
See **[Error Handling](/developer-guide/deep-agents/error-handling)** for exception types and handling patterns.
## Next Steps
1. **[Extending the Demo Agent](/developer-guide/deep-agents/extending-the-demo-agent)** — Add your own tools, subagents, and skills
2. **[Configuration](/developer-guide/deep-agents/configuration)** — Fine-tune timeouts, fail policies, and tool classification
3. **[Error Handling](/developer-guide/deep-agents/error-handling)** — Handle governance decisions in your code
4. **[Set Up Approvals](/approvals)** — Add human-in-the-loop for sensitive operations
5. **[Demo Architecture Reference](/developer-guide/deep-agents/demo-architecture)** — Middleware lifecycle, event flow, and subagent dispatch
Having issues? See the **[Troubleshooting](/developer-guide/deep-agents/troubleshooting)** guide for common problems and solutions.# Extending the Demo Agent
Source: https://docs.openbox.ai/developer-guide/deep-agents/extending-the-demo-agent
# Extending the Demo Agent
The demo content builder agent ships with a researcher subagent, web search, and image generation tools. You can add your own tools, subagents, and skills without any extra OpenBox configuration — governance automatically covers all new tool calls.
:::tip Prerequisites
This guide assumes you've completed the [Deep Agents Integration Guide](/developer-guide/deep-agents/integration-walkthrough) and have the demo running locally. See the [Demo Architecture Reference](/developer-guide/deep-agents/demo-architecture) for the full middleware lifecycle.
:::
## How the Demo Is Structured
The content builder agent uses four DeepAgents extension points — all configured through files on disk:
| Extension Point | What It Does | How the LLM Sees It |
| ------------------------------------ | ----------------------------------------------- | ----------------------------------------------------- |
| **Memory** (`AGENTS.md`) | Brand voice, writing standards, content pillars | Loaded as persistent system context |
| **Skills** (`skills/`) | Structured workflows for content types | Activated when the task matches the skill description |
| **Tools** (Python `@tool` functions) | Capabilities like search, image generation | Available as callable functions |
| **Subagents** (`subagents.yaml`) | Delegated specialists (e.g., researcher) | Dispatched via the `task` tool |
## Project Structure
| Path | Purpose |
| ------------------------------ | ------------------------------------------------------------------------- |
| `content_writer.py` | Agent factory — wires up tools, subagents, skills, and OpenBox middleware |
| `AGENTS.md` | Brand voice and writing standards (loaded as memory) |
| `skills/blog-post/SKILL.md` | Blog post workflow — research, structure, image generation |
| `skills/social-media/SKILL.md` | Social media workflow — LinkedIn, Twitter/X formats |
| `subagents.yaml` | Subagent definitions — name, description, system prompt, tools |
| `.env` | API keys and configuration |
| `pyproject.toml` | Python dependencies |
## Adding a Tool
### Step 1: Define the Tool
Create a `@tool`-decorated function. LangChain uses the docstring and type hints to generate the tool schema for the LLM:
```python title="content_writer.py"
from langchain_core.tools import tool
@tool
def fetch_page(url: str) -> str:
"""Fetch the content of a web page.
Args:
url: The URL to fetch
Returns:
The page content as plain text.
"""
import httpx
response = httpx.get(url, follow_redirects=True, timeout=30)
return response.text[:5000]
```
### Step 2: Register the Tool
Add it to the `create_deep_agent()` call in your agent factory:
```python title="content_writer.py"
return create_deep_agent(
model=init_chat_model("openai:gpt-4o-mini", temperature=0),
tools=[generate_cover, generate_social_image, fetch_page], # Added
# ...
)
```
### Step 3: Classify the Tool (Optional)
If you want category-level governance policies, add it to `tool_type_map`:
```python
openbox_middleware = create_openbox_middleware(
# ...
tool_type_map={
"web_search": "http",
"fetch_page": "http", # Added — same policy as web_search
},
)
```
This appends `{"__openbox": {"tool_type": "http"}}` to the tool's activity input, enabling Rego policies like:
```rego
result := {"decision": "REQUIRE_APPROVAL"} if {
input.event_type == "ToolStarted"
some item in input.activity_input
item["__openbox"].tool_type == "http"
}
```
## Adding a Subagent
### Step 1: Define the Subagent
Add an entry to `subagents.yaml`:
```yaml title="subagents.yaml"
editor:
description: >
Use this to review and improve written content.
Checks for clarity, grammar, tone consistency, and factual accuracy.
model: openai:gpt-4o-mini
system_prompt: |
You are an editor. Review the content for:
1. Clarity and readability
2. Grammar and spelling
3. Tone consistency with the brand voice
4. Factual accuracy
Read the file, make improvements, and save the edited version.
```
If the subagent needs tools, list them:
```yaml title="subagents.yaml"
fact_checker:
description: >
Verifies claims and statistics in content by searching for sources.
model: openai:gpt-4o-mini
system_prompt: |
You are a fact checker. For each claim:
1. Search for the original source
2. Verify the accuracy
3. Save a fact-check report
tools:
- web_search
```
### Step 2: Register the Subagent
The `load_subagents()` function in `content_writer.py` reads `subagents.yaml` automatically. Update `known_subagents` in the middleware to enable per-subagent governance:
```python title="content_writer.py"
subagent_defs = load_subagents(EXAMPLE_DIR / "subagents.yaml")
known_subagents = [s["name"] for s in subagent_defs] + ["general-purpose"]
openbox_middleware = create_openbox_middleware(
# ...
known_subagents=known_subagents, # Includes your new subagent
)
```
The SDK automatically classifies `task` calls to known subagents as `a2a` and includes the subagent name in governance metadata.
## Adding a Skill
Skills are structured workflow instructions that DeepAgents activates when the user's task matches the skill description.
### Step 1: Create the Skill File
Create a directory under `skills/` with a `SKILL.md` file:
```markdown title="skills/newsletter/SKILL.md"
---
name: newsletter
description: Writes email newsletters with subject lines, preview text,
and structured sections. Use when the user asks to write a newsletter,
email digest, or weekly update.
---
# Newsletter Writing Skill
## Research First (Required)
Before writing, delegate research to the researcher subagent.
## Output Structure
newsletters//
├── newsletter.md # The newsletter content
└── subject.txt # Subject line and preview text
## Newsletter Structure
1. Subject line (under 50 characters)
2. Preview text (under 90 characters)
3. Hero section with key insight
4. 3-4 content sections
5. Call-to-action
```
### Step 2: Register the Skill
Add the skills directory to your `create_deep_agent()` call (already configured in the demo):
```python
return create_deep_agent(
skills=["./skills/"], # Loads all SKILL.md files in subdirectories
# ...
)
```
DeepAgents discovers skills by scanning the directory for `SKILL.md` files. No additional registration needed.
## Customizing Brand Voice
Edit `AGENTS.md` to change the agent's personality and writing standards. This file is loaded as persistent memory and shapes all content output:
```markdown title="AGENTS.md"
# My Company Agent
## Brand Voice
- **Technical and precise**: Write for a developer audience
- **No marketing fluff**: Facts and code examples over buzzwords
## Writing Standards
1. Include code examples in every technical post
2. Link to official documentation
3. Use American English spelling
```
## Checklist
### Adding a Tool
1. Create a `@tool`-decorated function with clear docstring and type hints
2. Add to the `tools` list in `create_deep_agent()`
3. *(Optional)* Add to `tool_type_map` for category-level policies
4. If the tool needs API keys, add to `.env` and `.env.example`
### Adding a Subagent
1. Add entry to `subagents.yaml` with name, description, system prompt
2. If it needs tools, list them under `tools:` and ensure the tool function is in `available_tools` in `load_subagents()`
3. Verify `known_subagents` includes the new name (automatic if using `load_subagents()`)
### Adding a Skill
1. Create `skills//SKILL.md` with frontmatter (`name`, `description`)
2. Define the workflow structure and output format
3. Ensure `skills=["./skills/"]` is set in `create_deep_agent()`
## Next Steps
- **[Configuration](/developer-guide/deep-agents/configuration)** — Fine-tune timeouts, fail policies, and tool classification
- **[Error Handling](/developer-guide/deep-agents/error-handling)** — Handle governance decisions in your code
- **[Configure Trust Controls](/trust-lifecycle/authorize)** — Set up guardrails, policies, and behavioral rules
- **[Demo Architecture Reference](/developer-guide/deep-agents/demo-architecture)** — Middleware lifecycle, event flow, and subagent dispatch# Demo Architecture Reference
Source: https://docs.openbox.ai/developer-guide/deep-agents/demo-architecture
# Demo Architecture Reference
Quick reference for the [content builder agent](https://github.com/OpenBox-AI/openbox-deepagent-sdk-python/tree/main/examples/content-builder-agent) architecture. For setup, see the [Integration Guide](/developer-guide/deep-agents/integration-walkthrough). For customization, see [Extending the Demo Agent](/developer-guide/deep-agents/extending-the-demo-agent).
## System Layers
```mermaid
graph TB
subgraph "Agent Layer"
AGENT[DeepAgents Graph]
LLM[LLM - GPT-4o-mini]
TOOLS[Tools]
SUBAGENTS[Subagents]
end
subgraph "Governance Layer"
MW[OpenBox Middleware]
HOOKS[Lifecycle Hooks]
OTEL[OpenTelemetry Spans]
end
subgraph "External Services"
OPENAI[OpenAI API]
TAVILY[Tavily Search]
GEMINI[Google Gemini]
OBX[OpenBox Trust Engine]
end
AGENT --> LLM
AGENT --> TOOLS
AGENT --> SUBAGENTS
MW -.->|Intercepts| LLM
MW -.->|Intercepts| TOOLS
MW -.->|Intercepts| SUBAGENTS
HOOKS --> OTEL
OTEL --> OBX
LLM --> OPENAI
TOOLS --> TAVILY
TOOLS --> GEMINI
```
| Layer | Technology | Role |
| -------------- | ------------------------------- | ----------------------------------------------------- |
| **Agent** | DeepAgents, LangChain | Runs the agent loop, dispatches tools and subagents |
| **Governance** | OpenBox Middleware | Intercepts model and tool calls for policy evaluation |
| **External** | OpenAI, Tavily, Gemini, OpenBox | LLM providers, search, image generation, trust engine |
## Middleware Hooks Lifecycle
The `OpenBoxMiddleware` implements 4 async hooks (plus 4 sync variants) that DeepAgents calls at runtime:
```mermaid
sequenceDiagram
participant U as User
participant A as DeepAgents
participant MW as OpenBox Middleware
participant OBX as OpenBox Core
U->>A: ainvoke(messages)
A->>MW: abefore_agent(state, runtime)
MW->>OBX: SignalReceived (user prompt)
MW->>OBX: WorkflowStarted
MW->>OBX: LLMStarted (pre-screen guardrails)
OBX-->>MW: Verdict (ALLOW / BLOCK / REQUIRE_APPROVAL)
loop Agent Loop
A->>MW: awrap_model_call(request, handler)
MW->>OBX: LLMStarted (prompt + PII redaction)
OBX-->>MW: Verdict
MW->>A: LLM response
MW->>OBX: LLMCompleted (tokens, model, completion)
A->>MW: awrap_tool_call(request, handler)
MW->>OBX: ToolStarted (name, args, classification)
OBX-->>MW: Verdict
MW->>A: Tool result
MW->>OBX: ToolCompleted (output, duration, spans)
end
A->>MW: aafter_agent(state, runtime)
MW->>OBX: WorkflowCompleted
```
### Hook Details
| Hook | When | What OpenBox Does |
| ------------------ | --------------------------- | ---------------------------------------------------------------------------------------------- |
| `abefore_agent` | Before agent graph runs | Sends `SignalReceived`, `WorkflowStarted`, pre-screen `LLMStarted`; caches guardrails response |
| `awrap_model_call` | Before every LLM call | Runs PII redaction on prompt; sends `LLMStarted`/`LLMCompleted` with token counts |
| `awrap_tool_call` | Before every tool execution | Classifies tool type; enriches with `__openbox` metadata; sends `ToolStarted`/`ToolCompleted` |
| `aafter_agent` | After agent graph completes | Sends `WorkflowCompleted`; cleans up span processor state |
## Governance Event Flow
Every agent invocation produces this sequence of events sent to OpenBox Core:
| # | Event | Trigger | Key Data |
| - | ------------------- | ------------------- | ----------------------------------------- |
| 1 | `SignalReceived` | User prompt arrives | `signal_name: "user_prompt"`, prompt text |
| 2 | `WorkflowStarted` | Agent begins | Agent state, workflow ID, thread ID |
| 3 | `LLMStarted` | Pre-screen | User prompt for guardrails check |
| 4 | `LLMStarted` | Each model call | Prompt messages (after PII redaction) |
| 5 | `LLMCompleted` | Model responds | Token counts, model name, completion text |
| 6 | `ToolStarted` | Each tool call | Tool name, args, `__openbox` metadata |
| 7 | `ToolCompleted` | Tool returns | Output, duration, OTel spans |
| 8 | `WorkflowCompleted` | Agent finishes | Final output, status |
### Verdict Enforcement
| Verdict | Behavior |
| ------------------ | ------------------------------------------------------------------------- |
| `ALLOW` | Tool/LLM executes normally |
| `BLOCK` | `GovernanceBlockedError` raised — single tool blocked, agent may continue |
| `HALT` | `GovernanceHaltError` raised — entire session terminated |
| `REQUIRE_APPROVAL` | Middleware polls for human decision; proceeds or halts based on response |
## Subagent Dispatch
When the agent calls the `task` tool to dispatch a subagent, the middleware:
1. **Detects the subagent** — extracts `subagent_type` from tool args via `resolve_subagent_from_tool_call()`
2. **Classifies as `a2a`** — if the subagent name is in `known_subagents`
3. **Enriches activity input** — appends `__openbox` sentinel for Rego targeting:
```json
{
"description": "Research AI agents and save to research/ai-agents.md",
"subagent_type": "researcher",
"__openbox": {
"tool_type": "a2a",
"subagent_name": "researcher"
}
}
```
### Built-in Tool Detection
The SDK recognizes DeepAgents built-in tools and treats them differently:
```python
DEEPAGENT_BUILTIN_TOOLS = frozenset({
"write_todos", "ls", "read_file", "write_file", "edit_file",
"glob", "grep", "execute", "task"
})
```
Only the `task` tool triggers subagent detection. Other built-in tools are governed as regular tool calls.
## Tool Classification
Tool types are resolved in priority order:
| Priority | Source | Example |
| -------- | ------------------------------ | ------------------------------------------------- |
| 1 | `tool_type_map` (explicit) | `"web_search"` → `"http"` |
| 2 | Subagent detection (automatic) | `"task"` + researcher → `"a2a"` |
| 3 | None (default) | `"generate_cover"` → governed by default policies |
Classified tools get `__openbox` metadata appended to their activity input, enabling category-level Rego policies.
## OpenTelemetry Instrumentation
The middleware uses a `WorkflowSpanProcessor` to capture HTTP calls, database queries, and file I/O during tool execution:
1. Before a tool runs, the middleware registers a trace context with the span processor
2. During tool execution, OTel auto-instrumentation captures outbound HTTP requests
3. After the tool completes, captured spans are attached to the `ToolCompleted` event
4. The span processor cleans up on `WorkflowCompleted`
This gives OpenBox visibility into what external calls each tool makes — not just the tool's input/output, but the actual HTTP requests to OpenAI, Tavily, etc.
## Pre-Screen Optimization
The first LLM call in each invocation reuses the pre-screen guardrails response from `abefore_agent`. This avoids a duplicate governance call:
1. `abefore_agent` sends `LLMStarted` with the user prompt → gets verdict + PII redaction
2. `awrap_model_call` detects `_first_llm_call=True` → reuses cached `_pre_screen_response`
3. Subsequent LLM calls go through the full governance path
## Key Files
| Path | Purpose |
| ------------------------------ | ------------------------------------------------------------- |
| `content_writer.py` | Agent factory — `create_content_writer()` integration point |
| `AGENTS.md` | Brand voice and writing standards (loaded as memory) |
| `subagents.yaml` | Subagent definitions — name, description, tools |
| `skills/blog-post/SKILL.md` | Blog post workflow with research, structure, image generation |
| `skills/social-media/SKILL.md` | Social media workflow for LinkedIn and Twitter/X |
| `.env` | API keys and OpenBox configuration |
### SDK Source Files
| Path | Purpose |
| ----------------------------------------- | ------------------------------------------------------------------------ |
| `openbox_deepagent/__init__.py` | Public API — re-exports errors, types, middleware |
| `openbox_deepagent/middleware_factory.py` | `create_openbox_middleware()` factory function |
| `openbox_deepagent/middleware.py` | `OpenBoxMiddleware` class — hooks and state management |
| `openbox_deepagent/middleware_hooks.py` | Stateless hook implementations — event construction and governance calls |
| `openbox_deepagent/subagent_resolver.py` | Subagent detection, built-in tool constants, HITL conflict detection |# Troubleshooting
Source: https://docs.openbox.ai/developer-guide/deep-agents/troubleshooting
# Troubleshooting
Common issues and solutions when integrating Deep Agents with OpenBox.
---
## Middleware Not Connecting to OpenBox
Check that your environment variables are set:
```bash
[ -n "$OPENBOX_URL" ] && echo "OPENBOX_URL is set" || echo "OPENBOX_URL is NOT set"
[ -n "$OPENBOX_API_KEY" ] && echo "OPENBOX_API_KEY is set" || echo "OPENBOX_API_KEY is NOT set"
```
Verify step by step:
1. Confirm `OPENBOX_URL` and `OPENBOX_API_KEY` are set (or passed as `api_url`/`api_key` parameters)
2. Run your agent and check logs for `OpenBox SDK initialized successfully`
3. If using `.env`, ensure `python-dotenv` is installed and `load_dotenv()` is called before `create_openbox_middleware()`
If you get `OpenBoxInsecureURLError`, your `OPENBOX_URL` uses HTTP for a non-localhost address. Use HTTPS:
```bash
# Wrong
OPENBOX_URL=http://core.openbox.ai
# Correct
OPENBOX_URL=https://core.openbox.ai
```
---
## No Sessions in Dashboard
If sessions don't appear after running your agent:
1. Ensure the middleware initialized successfully (check for `OpenBox SDK initialized successfully` in logs)
2. Confirm the agent completed at least one invocation — sessions are created on `abefore_agent`
3. Verify the API key matches the agent registered in OpenBox (agent names must match exactly)
4. Check that `validate=True` (default) — this catches bad credentials at startup
---
## HITL Conflict Warning
```
WARNING: HITL conflict detected — "export_data" is listed in DeepAgents interrupt_on
and is also subject to OpenBox REQUIRE_APPROVAL policy.
```
This means both DeepAgents' built-in `interrupt_on` and OpenBox's HITL approval are targeting the same tool. The SDK continues to function, but you may get double-interruption.
**Fix:** Choose one mechanism:
- **Use OpenBox HITL** — Remove the tool from DeepAgents' `interrupt_on` list. OpenBox handles approval via the dashboard.
- **Use DeepAgents interrupt** — Remove the `REQUIRE_APPROVAL` policy for that tool in OpenBox.
---
## Governance Blocks or Halts Your Agent
When a policy triggers, the SDK raises a governance exception. This is expected — it means governance is working.
| Exception | Meaning | Recoverable? |
| --------------------------- | ----------------------------------------------- | ------------------------ |
| `GovernanceBlockedError` | A single tool was blocked | Yes — agent can continue |
| `GovernanceHaltError` | Session terminated (HALT, rejection, or expiry) | No — agent should stop |
| `GuardrailsValidationError` | PII or content policy violation | No — input rejected |
To investigate:
1. Open the [OpenBox Dashboard](https://platform.openbox.ai)
2. Go to your agent → **Overview** tab
3. Open the session to see which rule triggered the block
See **[Error Handling](/developer-guide/deep-agents/error-handling)** for exception types and handling patterns.
---
## Subagent Not Being Governed
If subagent dispatches aren't appearing as governed tool calls:
1. **Check `known_subagents`** — the subagent name must be listed:
```python
middleware = create_openbox_middleware(
# ...
known_subagents=["researcher", "editor", "general-purpose"],
)
```
2. **Verify the tool name is `task`** — the SDK only detects subagents from `task` tool calls. Custom dispatch mechanisms won't be detected.
3. **Check the `subagent_type` argument** — the subagent resolver extracts the name from `tool_args["subagent_type"]`. If missing, it falls back to `"general-purpose"`.
Enable debug logging to see subagent detection:
```bash
OPENBOX_DEBUG=1 python content_writer.py
```
---
## Approval Requests Not Appearing
If your agent is paused waiting for approval but nothing shows in the **Approvals** page:
1. Confirm the behavioral rule is set to **Require Approval** (not Block)
2. Check that the agent's trust tier matches the rule conditions
3. Verify the approval timeout hasn't already expired
4. Check `governance_timeout` — if too short, the middleware may time out before the approval is created
See **[Approvals](/approvals)** for how the approval queue works.
---
## OpenAI or LLM API Errors
The demo uses LangChain's `init_chat_model` with the format `provider:model-name`:
| Provider | Example Value |
| --------- | -------------------------------------- |
| OpenAI | `openai:gpt-4o-mini` |
| Anthropic | `anthropic:claude-sonnet-4-5-20250929` |
| Google | `google-genai:gemini-2.0-flash` |
If you're seeing LLM errors:
1. Check that `OPENAI_API_KEY` (or your provider's key) is set in `.env`
2. Verify the model string format is `provider:model-name`
```bash
uv run python3 -c "
from dotenv import load_dotenv
load_dotenv()
from langchain.chat_models import init_chat_model
llm = init_chat_model('openai:gpt-4o-mini')
print(llm.invoke('Say hello').content)
"
```
---
## Tavily or Image Generation Errors
The demo's optional features require additional API keys:
| Feature | Environment Variable | Required? |
| -------------------------------- | -------------------- | ----------------------------------------------------------- |
| Web search (researcher subagent) | `TAVILY_API_KEY` | Optional — researcher returns error without it |
| Cover image generation | `GOOGLE_API_KEY` | Optional — `generate_cover` returns error without it |
| Social media images | `GOOGLE_API_KEY` | Optional — `generate_social_image` returns error without it |
The agent handles missing keys gracefully — tools return error messages instead of crashing. To enable all features, set the keys in `.env`.
---
## Debug Logging
Enable verbose SDK logging to see governance decisions as they happen:
```bash
OPENBOX_DEBUG=1 python content_writer.py
```
This logs every middleware hook invocation, governance request, verdict, and subagent detection to stderr.
You can also set logging levels programmatically:
```python
import logging
logging.getLogger("openbox_langgraph").setLevel(logging.DEBUG)
logging.getLogger("openbox_deepagent").setLevel(logging.DEBUG)
```
Inspect the full event trace in the OpenBox Dashboard under **Agents** → your agent → **Details** → **Event Log Timeline**.# LangChain SDK (TypeScript)
Source: https://docs.openbox.ai/developer-guide/langchain/
# LangChain SDK (TypeScript)
:::info Docs coming soon
This SDK is open source — full developer documentation is on the way.
In the meantime, refer to the README and examples in the repo:
**[OpenBox-AI/openbox-langchain-sdk-ts](https://github.com/OpenBox-AI/openbox-langchain-sdk-ts)**
:::
The `@openbox/langchain-sdk` connects your [LangChain](https://www.langchain.com/) agents to [OpenBox](https://openbox.ai) — giving you governance policies, guardrails, and human oversight without rewriting any agent logic.
## What to expect
- Callback-based integration — attach a handler and every event flows through governance
- Hook-level governance for outbound HTTP requests
- Guardrails with automatic PII redaction
- Human-in-the-loop approvals
- Signal monitor for mid-execution abort
- `wrapTools` / `wrapLLM` helpers# LangGraph SDK (Python)
Source: https://docs.openbox.ai/developer-guide/langgraph/
# LangGraph SDK (Python)
The OpenBox LangGraph SDK connects your compiled LangGraph graph to OpenBox. It handles event capture, telemetry collection, and trust evaluation with a single function call — no graph changes required.
| Guide | Description |
| --------------------------------------------------------------- | ----------------------------------------------------- |
| **[Configuration](/developer-guide/langgraph/configuration)** | Environment variables and handler parameters |
| **[Error Handling](/developer-guide/langgraph/error-handling)** | Handle governance decisions and failures in your code |
:::info What the SDK Does
The SDK's primary job is to **connect your LangGraph graph to OpenBox** and send LangGraph events to the platform. All trust logic, policies, and UI management happens on the platform — not in the SDK.
:::
## Philosophy
The SDK is intentionally minimal:
- **One function call** to wrap your compiled graph (`create_openbox_graph_handler`)
- **Zero graph changes** — keep writing LangGraph as normal; only the invocation changes
- **Automatic telemetry** — captures LangGraph v2 events, HTTP, database, and file I/O operations
- **3-layer governance** — event stream, hook interception, and OpenTelemetry spans work together
## Installation
**Package:** `openbox-langgraph-sdk-python`
**Requires:** Python 3.11+
```bash
uv add openbox-langgraph-sdk-python
# Or with pip
pip install openbox-langgraph-sdk-python
```
## Function Signature
```python
def create_openbox_graph_handler(
graph: CompiledGraph,
*,
api_url: str,
api_key: str,
agent_name: str | None = None,
# + governance, instrumentation, and handler options
) -> OpenBoxLangGraphHandler
```
Returns an `OpenBoxLangGraphHandler` that wraps your compiled graph with OpenBox interceptors, telemetry, and governance configured. The handler exposes the same `ainvoke`, `invoke`, and `astream` interface as the underlying graph.
See **[Configuration](/developer-guide/langgraph/configuration)** for the full parameter list.
## What the SDK Captures
The SDK automatically captures and sends to OpenBox:
### LangGraph Events
- Tool start / tool end (with inputs and outputs)
- Chat model start / chat model end (with prompts and responses)
- Node execution events (started, completed)
- Agent action and observation events
### HTTP Telemetry
- Request/response bodies (for LLM calls, external requests)
- Headers and status codes
- Request duration and timing
### Database Operations (Optional)
- SQL queries (PostgreSQL, MySQL, SQLite via SQLAlchemy)
- NoSQL operations (MongoDB, Redis)
### File I/O (Optional)
- File read/write operations
- File paths and sizes
All captured data is evaluated against your trust policies on the OpenBox platform.
## 3-Layer Governance
The SDK enforces governance at three layers simultaneously:
| Layer | Mechanism | What It Covers |
| ----------------------------- | --------------------------------- | ----------------------------------------------------- |
| **Layer 1: Event Stream** | LangGraph v2 callback events | Tool calls, LLM invocations, node transitions |
| **Layer 2: Hook Governance** | Monkey-patched HTTP/DB/File hooks | External API calls, database queries, file operations |
| **Layer 3: Activity Context** | OpenTelemetry spans | Full distributed trace of every operation |
```mermaid
flowchart TD
subgraph lg["Your LangGraph Graph"]
node["Agent Node
(unchanged)"]
tools["Tool Node
(unchanged)"]
node --> tools
tools --> node
end
subgraph sdk["OpenBox SDK"]
events["Layer 1: Event Stream
LangGraph v2 callbacks"]
hooks["Layer 2: Hook Governance
HTTP / DB / File I/O"]
otel["Layer 3: Activity Context
OpenTelemetry spans"]
end
lg --> sdk
sdk --> engine["OpenBox Trust Engine
Verdicts:
ALLOW · REQUIRE_APPROVAL
BLOCK · HALT"]
```
## Tracing
The `@traced` decorator wraps any function in an OpenTelemetry span so it appears in session replay. It works on both sync and async functions.
### Import
```python
from openbox_langgraph.tracing import traced
```
### Basic Usage
```python
@traced
def process_data(input_data):
return transform(input_data)
@traced
async def fetch_data(url):
return await http_get(url)
```
### With Options
```python
@traced(
name="custom-span-name",
capture_args=True, # Capture function arguments (default: True)
capture_result=True, # Capture return value (default: True)
capture_exception=True, # Capture exception details on error (default: True)
max_arg_length=2000, # Max length for serialized arguments (default: 2000)
)
async def process_sensitive_data(data):
return await handle(data)
```
## Streaming
The handler exposes `astream_governed()` for token-by-token streaming with governance applied at each step:
```python
governed = create_openbox_graph_handler(
graph=app,
api_url=os.getenv("OPENBOX_URL"),
api_key=os.getenv("OPENBOX_API_KEY"),
agent_name="MyAgent",
)
async for chunk in governed.astream_governed(
{"messages": [("user", "Hello")]},
stream_mode="values",
):
print(chunk)
```
Governance events fire between chunks — a BLOCK verdict raises `GovernanceBlockedError` mid-stream. See **[Error Handling](/developer-guide/langgraph/error-handling)** for handling patterns.
## Next Steps
1. **[Configuration](/developer-guide/langgraph/configuration)** — Configure timeouts, fail policies, and exclusions
2. **[Error Handling](/developer-guide/langgraph/error-handling)** — Handle governance decisions in your code
3. **[Getting Started](/getting-started/langgraph)** — Wrap an existing LangGraph agent in 5 minutes# Configuration
Source: https://docs.openbox.ai/developer-guide/langgraph/configuration
# Configuration
The SDK can be configured via environment variables or function parameters passed to `create_openbox_graph_handler()`.
## Environment Variables
| Variable | Required | Default | Description |
| ----------------- | -------- | ------- | --------------------------------------------------------- |
| `OPENBOX_URL` | Yes | — | OpenBox Core API URL (HTTPS required for non-localhost) |
| `OPENBOX_API_KEY` | Yes | — | API key for authentication (`obx_live_*` or `obx_test_*`) |
| `OPENBOX_DEBUG` | No | `false` | Enable verbose SDK logging |
## Handler Parameters
Parameters passed to `create_openbox_graph_handler()` override environment variables.
### Connection
#### api_url
OpenBox Core API URL. HTTPS required for non-localhost.
```python
api_url="https://core.openbox.ai" # Production
api_url="https://core.staging.openbox.ai" # Staging
```
#### api_key
Your API key (`obx_live_*` or `obx_test_*`). Always use environment variables in production:
```python
api_key=os.getenv("OPENBOX_API_KEY")
```
#### agent_name
Human-readable name shown in the dashboard. Defaults to the graph class name if omitted.
```python
agent_name="CustomerSupportAgent"
```
### Governance Behavior
#### on_api_error
What happens when the OpenBox API is unreachable or times out:
| Value | Behavior |
| --------------- | -------------------------------------------------- |
| `"fail_open"` | Allow operation to proceed (log warning) — default |
| `"fail_closed"` | Block operation |
```python
on_api_error="fail_open" # Default - prioritize availability
on_api_error="fail_closed" # For high-security environments
```
#### governance_timeout
Maximum seconds to wait for a governance evaluation response. The factory function accepts seconds as a float and converts internally.
```python
governance_timeout=30.0 # Default
governance_timeout=60.0 # For slower networks
governance_timeout=10.0 # For low-latency requirements
```
If timeout is exceeded, behavior follows `on_api_error`.
### Human-in-the-Loop
#### hitl.enabled
Enable Human-in-the-Loop approvals. When `True`, a `REQUIRE_APPROVAL` verdict suspends the graph and waits for a human decision in the dashboard.
```python
hitl={"enabled": True, "poll_interval_ms": 5000}
```
| Parameter | Type | Default | Description |
| ----------------------- | ------ | ------- | ------------------------------------------ |
| `hitl.enabled` | `bool` | `False` | Enable HITL approval flow |
| `hitl.poll_interval_ms` | `int` | `5000` | Milliseconds between approval status polls |
When `hitl.enabled=False`, a `REQUIRE_APPROVAL` verdict is treated as a BLOCK and raises `GovernanceBlockedError`.
### Event Filtering
Control which events the SDK sends to OpenBox. All default to `True`.
| Parameter | Type | Default | Description |
| ------------------------ | ------ | ------- | ------------------------------------- |
| `send_chain_start_event` | `bool` | `True` | Send graph invocation started event |
| `send_chain_end_event` | `bool` | `True` | Send graph invocation completed event |
| `send_tool_start_event` | `bool` | `True` | Send tool execution started event |
| `send_tool_end_event` | `bool` | `True` | Send tool execution completed event |
| `send_llm_start_event` | `bool` | `True` | Send LLM call started event |
| `send_llm_end_event` | `bool` | `True` | Send LLM call completed event |
#### skip_chain_types
Chain (node) types to exclude from governance. These nodes run without interception.
```python
skip_chain_types={"HealthCheckChain", "LoggingChain"}
```
#### skip_tool_types
Tool types to exclude from governance evaluation.
```python
skip_tool_types={"internal_lookup", "cache_read"}
```
#### tool_type_map
Map tool names to semantic types for richer policy targeting. Values are used in OPA policy rules.
```python
tool_type_map={
"send_email": "communication",
"query_database": "data_access",
"call_api": "external_request",
}
```
### Instrumentation
#### sqlalchemy_engine
Pass a pre-created SQLAlchemy engine to enable database operation governance. The SDK hooks into the engine's event system to capture SQL queries.
```python
from sqlalchemy import create_engine
engine = create_engine("postgresql://user:pass@localhost/db")
governed = create_openbox_graph_handler(
graph=app,
api_url=os.getenv("OPENBOX_URL"),
api_key=os.getenv("OPENBOX_API_KEY"),
sqlalchemy_engine=engine,
)
```
#### resolve_subagent_name
A callable that inspects a tool call and returns a subagent name if it represents a call to another agent, or `None` otherwise. Used to build the agent call graph in the dashboard.
```python
from openbox_langgraph.types import LangGraphStreamEvent
def my_resolver(event: LangGraphStreamEvent) -> str | None:
if event.name == "invoke_research_agent":
return "ResearchAgent"
return None
governed = create_openbox_graph_handler(
graph=app,
api_url=os.getenv("OPENBOX_URL"),
api_key=os.getenv("OPENBOX_API_KEY"),
resolve_subagent_name=my_resolver,
)
```
## Configuration Precedence
1. Function parameters (highest priority)
2. Environment variables
3. Default values (lowest priority)
## Example: Full Configuration
```python
import os
from sqlalchemy import create_engine
from openbox_langgraph import create_openbox_graph_handler
engine = create_engine(os.getenv("DATABASE_URL"))
governed = create_openbox_graph_handler(
graph=app,
# Connection
api_url=os.getenv("OPENBOX_URL"),
api_key=os.getenv("OPENBOX_API_KEY"),
agent_name="ProductionAgent",
# Governance behavior
on_api_error="fail_closed", # High security
governance_timeout=45.0,
# Human-in-the-loop
hitl={"enabled": True, "poll_interval_ms": 3000},
# Event filtering
send_chain_start_event=True,
send_chain_end_event=True,
send_tool_start_event=True,
send_tool_end_event=True,
send_llm_start_event=True,
send_llm_end_event=True,
# Exclude internal nodes and tools
skip_chain_types={"HealthCheck", "Metrics"},
skip_tool_types={"log_event"},
tool_type_map={
"send_email": "communication",
"query_db": "data_access",
},
# Database instrumentation
sqlalchemy_engine=engine,
)
```
## Next Steps
1. **[Error Handling](/developer-guide/langgraph/error-handling)** — Handle governance decisions in your code
2. **[Event Types](/developer-guide/event-types)** — Understand the semantic event types captured by the SDK
3. **[Approvals](/approvals)** — Review and act on HITL approval requests# Error Handling
Source: https://docs.openbox.ai/developer-guide/langgraph/error-handling
# Error Handling
Governance decisions surface as Python exceptions. The SDK raises typed exceptions you can catch and handle in your agent code.
## Import
```python
from openbox_langgraph import (
GovernanceBlockedError,
GovernanceHaltError,
GuardrailsValidationError,
ApprovalRejectedError,
ApprovalExpiredError,
)
```
## Governance Exception Hierarchy
| Exception | Cause | Description |
| --------------------------- | ---------------- | ----------------------------------------------- |
| `GovernanceBlockedError` | BLOCK verdict | Operation blocked by an OPA/Rego policy |
| `GovernanceHaltError` | HALT verdict | Entire agent session terminated by policy |
| `GuardrailsValidationError` | Guardrails match | PII, toxic content, or restricted data detected |
| `ApprovalRejectedError` | HITL rejected | A human rejected the approval request |
| `ApprovalExpiredError` | HITL timeout | No human decision before the approval deadline |
All governance exceptions carry the human-readable decision message from OpenBox as the exception message (`str(e)`).
## Handling Each Type
### GovernanceBlockedError
Raised when a tool call or LLM invocation is blocked by policy. The graph execution stops at the blocked operation.
```python
from openbox_langgraph import GovernanceBlockedError, create_openbox_graph_handler
governed = create_openbox_graph_handler(
graph=app,
api_url=os.getenv("OPENBOX_URL"),
api_key=os.getenv("OPENBOX_API_KEY"),
)
try:
result = await governed.ainvoke({"messages": [("user", input)]})
except GovernanceBlockedError as e:
logger.warning(f"Operation blocked by policy: {str(e)}")
# Return a safe fallback response
return {"response": "That action is not permitted."}
```
### GovernanceHaltError
Raised when OpenBox issues a HALT verdict — the entire session is terminated, not just a single operation. Treat this as unrecoverable for the current session.
```python
from openbox_langgraph import GovernanceHaltError
try:
result = await governed.ainvoke({"messages": [("user", input)]})
except GovernanceHaltError as e:
logger.error(f"Agent session halted: {str(e)}")
await notify_ops_team(str(e))
# Do not retry — start a new session if needed
raise
```
### GuardrailsValidationError
Raised when a guardrail detects a policy violation — PII in a tool output, toxic content in an LLM response, or restricted data patterns.
```python
from openbox_langgraph import GuardrailsValidationError
try:
result = await governed.ainvoke({"messages": [("user", input)]})
except GuardrailsValidationError as e:
logger.warning(f"Guardrail triggered: {str(e)}")
# Optionally inspect which guardrail fired
return {"response": "I can't process that content."}
```
### ApprovalRejectedError
Raised when a human reviewer rejects the HITL approval request. The operation does not proceed.
```python
from openbox_langgraph import ApprovalRejectedError
try:
result = await governed.ainvoke({"messages": [("user", input)]})
except ApprovalRejectedError as e:
logger.info(f"Human rejected approval: {str(e)}")
return {"response": f"Your request was reviewed and declined: {str(e)}"}
```
### ApprovalExpiredError
Raised when no human decision is made before the approval deadline.
```python
from openbox_langgraph import ApprovalExpiredError
try:
result = await governed.ainvoke({"messages": [("user", input)]})
except ApprovalExpiredError as e:
logger.warning(f"Approval timed out: {str(e)}")
# Retry or escalate
return {"response": "Your request is pending review. Please try again later."}
```
### Catching All Governance Errors
For a single catch-all handler, use the `OpenBoxError` base class:
```python
from openbox_langgraph import OpenBoxError
try:
result = await governed.ainvoke({"messages": [("user", input)]})
except OpenBoxError as e:
logger.warning(f"Governance decision: {type(e).__name__}: {str(e)}")
return {"response": "This action was not permitted."}
```
## Configuration Exceptions
These are raised during `create_openbox_graph_handler()` — at initialization time, not during graph execution. Handle them where you set up your handler.
| Exception | Cause |
| ------------------------- | --------------------------------- |
| `OpenBoxError` | Base class for all SDK errors |
| `OpenBoxAuthError` | Invalid or missing API key |
| `OpenBoxNetworkError` | Cannot reach OpenBox Core |
| `OpenBoxInsecureURLError` | HTTP used for a non-localhost URL |
```python
from openbox_langgraph import (
OpenBoxAuthError,
OpenBoxNetworkError,
OpenBoxInsecureURLError,
)
try:
governed = create_openbox_graph_handler(
graph=app,
api_url=os.getenv("OPENBOX_URL"),
api_key=os.getenv("OPENBOX_API_KEY"),
)
except OpenBoxInsecureURLError:
raise RuntimeError("OPENBOX_URL must use HTTPS in production")
except OpenBoxAuthError:
raise RuntimeError("Invalid OPENBOX_API_KEY — check your credentials")
except OpenBoxNetworkError as e:
raise RuntimeError(f"Cannot reach OpenBox Core: {e}")
```
## Best Practices
1. **Catch `GovernanceHaltError` separately** — it signals session termination; do not retry the same session
2. **Log governance exceptions** — the message comes from your policy and aids debugging
3. **Provide fallback responses** — not every block should surface as an unhandled exception to the user
4. **Clean up resources on HALT** — release connections and notify downstream systems before exiting
5. **Never catch and ignore** — governance exceptions are intentional decisions; swallowing them defeats the purpose
## Debugging
Enable verbose SDK logging to trace governance decisions:
```bash
OPENBOX_DEBUG=1 python agent.py
```
This logs the full event payload sent to OpenBox and the raw verdict received, which helps diagnose unexpected blocks or missing events.
## Next Steps
1. **[Configuration](/developer-guide/langgraph/configuration)** — Configure `on_api_error`, timeouts, and HITL behavior
2. **[Event Types](/developer-guide/event-types)** — Understand the semantic event types that trigger governance decisions
3. **[Approvals](/approvals)** — Review and process HITL requests in the dashboard# Mastra SDK (TypeScript)
Source: https://docs.openbox.ai/developer-guide/mastra
# Mastra SDK (TypeScript)
The OpenBox Mastra SDK connects a Mastra runtime to OpenBox. It governs tools, workflow steps, workflows, and agent runs while attaching operational telemetry that operators can inspect in the dashboard.
Published package: `@openbox-ai/openbox-mastra-sdk`
Runnable reference application:
- [OpenBox-AI/poc-mastra-coding-agent](https://github.com/OpenBox-AI/poc-mastra-coding-agent/tree/dev)
| Guide | Description |
| -------------------------------------------------------------------------------- | ------------------------------------------------------------------------------------------------- |
| **[Integration Walkthrough](/developer-guide/mastra/integration-walkthrough)** | End-to-end guide for wiring `withOpenBox()`, manual wrappers, and telemetry into a Mastra service |
| **[Configuration](/developer-guide/mastra/configuration)** | Environment variables, runtime options, defaults, and production guidance |
| **[Error Handling](/developer-guide/mastra/error-handling)** | Runtime errors, approval outcomes, guardrail failures, and startup validation issues |
| **[Event Model](/developer-guide/mastra/event-model)** | Understand workflows, activities, signals, and how Mastra runs appear in OpenBox |
| **[Approvals and Guardrails](/developer-guide/mastra/approvals-and-guardrails)** | How verdicts are enforced and how to test live guardrails correctly |
| **[Telemetry](/developer-guide/mastra/telemetry)** | HTTP, database, file, and traced-function capture behavior |
| **[Troubleshooting](/developer-guide/mastra/troubleshooting)** | Diagnose startup, policy, approvals, telemetry, and UI interpretation issues |
:::info What the SDK Does
The SDK's job is to connect a Mastra runtime to OpenBox. Trust policy, approvals, guardrails, dashboards, and operator workflows live on the OpenBox platform, not inside the SDK.
:::
## Philosophy
The integration is intentionally minimal:
- One standard bootstrap path with `withOpenBox()`
- No rewrite of existing agent, tool, or workflow logic
- Automatic governance at Mastra runtime boundaries
- Automatic telemetry capture through OpenTelemetry
## Recommended Entry Point
For most services, use `withOpenBox()`:
```ts
import { withOpenBox } from "@openbox-ai/openbox-mastra-sdk";
await withOpenBox(mastra, {
apiKey: process.env.OPENBOX_API_KEY,
apiUrl: process.env.OPENBOX_URL
});
```
It validates configuration, creates the OpenBox runtime, installs telemetry, wraps existing registrations, and keeps future Mastra registrations governed.
## Public API Summary
Most integrations only need these exports:
- `withOpenBox()`
- `getOpenBoxRuntime()`
- `wrapTool()`
- `wrapWorkflow()`
- `wrapAgent()`
- `setupOpenBoxOpenTelemetry()`
- `traced()`
## What The SDK Captures
OpenBox receives:
### Workflow Boundaries
- `WorkflowStarted`
- `WorkflowCompleted`
- `WorkflowFailed`
### Activity Boundaries
- `ActivityStarted`
- `ActivityCompleted`
These apply to:
- wrapped tools
- wrapped non-tool workflow steps
### Signals
- `SignalReceived(user_input)`
- `SignalReceived(resume)`
- `SignalReceived(agent_output)`
### Operational Telemetry
- HTTP requests
- supported database activity
- file operations when enabled
- custom traced functions
## Supported Runtime Conditions
| Requirement | Value |
| ------------- | ------------------------------------------------- |
| Node.js | `>=24.10.0` |
| Mastra | `@mastra/core ^1.8.0` |
| Module format | ESM |
| OpenBox Core | reachable over HTTPS except localhost development |
## Next Steps
1. Start with the [Integration Walkthrough](/developer-guide/mastra/integration-walkthrough).
2. Configure production behavior in [Configuration](/developer-guide/mastra/configuration).
3. Read [Event Model](/developer-guide/mastra/event-model) before writing policy or guardrails.# Configuration
Source: https://docs.openbox.ai/developer-guide/mastra/configuration
# Configuration
The Mastra SDK can be configured through environment variables or explicit options passed to `withOpenBox()` and `parseOpenBoxConfig()`.
## Configuration Precedence
Configuration is resolved in this order:
1. Explicit options passed in code
2. Environment variables
3. SDK defaults for optional fields
`apiUrl` and `apiKey` are always required from either code or environment.
## Environment Variables
| Variable | Required | Default | Purpose |
| ----------------------------------- | -------- | ----------------------- | -------------------------------------------------- |
| `OPENBOX_URL` | Yes | - | OpenBox Core base URL |
| `OPENBOX_API_KEY` | Yes | - | OpenBox API key |
| `OPENBOX_VALIDATE` | No | `true` | Validate the API key at startup |
| `OPENBOX_GOVERNANCE_POLICY` | No | `fail_open` | Behavior when OpenBox is unavailable |
| `OPENBOX_GOVERNANCE_TIMEOUT` | No | `30` | Timeout in seconds for evaluate and approval calls |
| `OPENBOX_HITL_ENABLED` | No | `true` | Enable approval suspension or polling |
| `OPENBOX_HTTP_CAPTURE` | No | `true` | Capture text HTTP bodies and headers |
| `OPENBOX_INSTRUMENT_DATABASES` | No | `true` | Enable supported database instrumentation |
| `OPENBOX_INSTRUMENT_FILE_IO` | No | `false` | Enable file operation capture |
| `OPENBOX_SEND_START_EVENT` | No | `true` | Emit `WorkflowStarted` |
| `OPENBOX_SEND_ACTIVITY_START_EVENT` | No | `true` | Emit `ActivityStarted` |
| `OPENBOX_SKIP_ACTIVITY_TYPES` | No | `send_governance_event` | Skip matching activity types |
| `OPENBOX_SKIP_SIGNALS` | No | empty | Skip matching signal names |
| `OPENBOX_SKIP_WORKFLOW_TYPES` | No | empty | Skip matching workflow or agent workflow types |
| `OPENBOX_DEBUG` | No | `false` | Enable summarized debug logging |
## Core Runtime Options
| Option | Default | Use it to |
| ------------------------ | ------------- | ------------------------------------------------------------ |
| `apiUrl` | required | Point the SDK at OpenBox Core |
| `apiKey` | required | Authenticate evaluate and approval calls |
| `validate` | `true` | Fail fast on invalid credentials or insecure URLs |
| `onApiError` | `"fail_open"` | Choose availability versus strict enforcement during outages |
| `governanceTimeout` | `30` | Set the API timeout in seconds |
| `hitlEnabled` | `true` | Enable approval handling |
| `httpCapture` | `true` | Capture text HTTP payloads and headers |
| `instrumentDatabases` | `true` | Enable supported DB instrumentation |
| `instrumentFileIo` | `false` | Enable file operation telemetry |
| `sendStartEvent` | `true` | Emit `WorkflowStarted` |
| `sendActivityStartEvent` | `true` | Emit `ActivityStarted` |
## Recommended Production Baseline
| Setting | Recommended value | Why |
| --------------------- | ------------------------------------------- | ------------------------------------------------------- |
| `validate` | `true` | Catch bad credentials or insecure URLs during startup |
| `onApiError` | explicit per environment | Avoid accidental fail-open or fail-closed behavior |
| `httpCapture` | `true` unless payload sensitivity blocks it | Preserve request context for policy and troubleshooting |
| `instrumentDatabases` | `true` | Low-friction visibility into data access |
| `instrumentFileIo` | `false` until needed | Reduce noise and sensitive-path exposure |
| `skipSignals` | Do not skip `agent_output` by default | That signal carries agent output and model telemetry |
## Example
```ts
import { withOpenBox } from "@openbox-ai/openbox-mastra-sdk";
await withOpenBox(mastra, {
apiKey: process.env.OPENBOX_API_KEY,
apiUrl: process.env.OPENBOX_URL,
validate: true,
onApiError: "fail_open",
governanceTimeout: 30,
hitlEnabled: true,
httpCapture: true,
instrumentDatabases: true,
instrumentFileIo: false,
sendStartEvent: true,
sendActivityStartEvent: true,
skipActivityTypes: ["send_governance_event"],
skipSignals: [],
skipWorkflowTypes: []
});
```
## Important Behavioral Notes
### Validation
Startup validation checks:
- API key format
- OpenBox URL format
- live API key validation unless `validate: false`
Use `validate: false` only for tests, local mocks, or fixture servers.
### Failure Policy
`fail_open` keeps the application running if OpenBox is unreachable. `fail_closed` stops governed execution when OpenBox cannot be reached after retries. Choose this intentionally before deployment.
### Skip Lists
Skip lists suppress emission of matching workflow, activity, or signal events. This is useful for reducing noise, but it can also hide telemetry you later expect in the UI.
## Next Steps
- [Event Model](/developer-guide/mastra/event-model)
- [Approvals and Guardrails](/developer-guide/mastra/approvals-and-guardrails)
- [Troubleshooting](/developer-guide/mastra/troubleshooting)# Error Handling
Source: https://docs.openbox.ai/developer-guide/mastra/error-handling
# Error Handling
OpenBox decisions surface as runtime errors when execution cannot continue normally. This page covers the errors you should expect from the Mastra SDK and how to reason about them in production.
## Startup Errors
Startup validation can fail before your service begins serving traffic.
Typical configuration errors:
| Error | Cause |
| ------------------------- | -------------------------------------------- |
| `OpenBoxConfigError` | Required configuration is missing or invalid |
| `OpenBoxAuthError` | API key is missing, malformed, or rejected |
| `OpenBoxInsecureURLError` | HTTP is used for a non-localhost OpenBox URL |
What to do:
1. Verify `OPENBOX_URL` and `OPENBOX_API_KEY`.
2. Confirm the service can reach OpenBox Core.
3. Use `validate: false` only for local mocks or tests.
## Runtime Governance Errors
The SDK raises runtime errors when a verdict or approval state requires execution to stop or pause.
| Error | Meaning |
| --------------------------- | -------------------------------------------------------------------------------------------------- |
| `GovernanceHaltError` | OpenBox returned a stop or halt-style verdict, or fail-closed converted an API failure into a halt |
| `GuardrailsValidationError` | A guardrail validation failed |
| `ApprovalPendingError` | Approval is still pending or inline polling timed out |
| `ApprovalRejectedError` | A human reviewer rejected the request |
| `ApprovalExpiredError` | Approval expired before a decision was made |
## How To Interpret Them
### `GovernanceHaltError`
This is the main error when policy blocks or halts execution. Treat it as an intentional stop, not as a transport failure.
### `GuardrailsValidationError`
This means the input or output violated a guardrail validation rule. If you are testing guardrails live, first confirm policy returned `allow` for that event.
### Approval Errors
- `ApprovalPendingError` means the decision is still unresolved.
- `ApprovalRejectedError` means a human explicitly denied the action.
- `ApprovalExpiredError` means the approval window closed without a final decision.
## Failure Policy Matters
`onApiError` or `OPENBOX_GOVERNANCE_POLICY` changes runtime behavior during OpenBox outages:
| Setting | Behavior |
| ------------- | ------------------------------------------------------- |
| `fail_open` | Execution usually continues after retries are exhausted |
| `fail_closed` | Governed execution halts after retries are exhausted |
If behavior seems unexpected, verify the effective config at startup.
## Recommended Handling Strategy
1. Treat governance errors as intentional business-control outcomes.
2. Log the relevant workflow, run, and activity context.
3. Do not swallow approval or halt errors silently.
4. Keep your business fallback behavior explicit rather than implicit.
## Related Guides
- [Approvals and Guardrails](/developer-guide/mastra/approvals-and-guardrails)
- [Troubleshooting](/developer-guide/mastra/troubleshooting)# Integration Walkthrough
Source: https://docs.openbox.ai/developer-guide/mastra/integration-walkthrough
# Integration Walkthrough
This is the end-to-end guide for integrating OpenBox with a Mastra service. It covers the standard bootstrap path, when to use manual wrappers instead, and what should appear in OpenBox once the integration is live.
:::tip Skip ahead
- **Already wrapped your startup?** Jump to [What the Integration Captures](#what-the-integration-captures).
- **Need a runnable reference app?** Start with [the Mastra coding-agent POC](/getting-started/mastra/run-the-demo).
:::
## Prerequisites
- Node.js `24.10+`
- `@mastra/core` `^1.8.0`
- an ESM-capable TypeScript runtime
- an OpenBox account and agent API key
## Part 1: Register Your Agent In OpenBox
1. Open the [OpenBox Dashboard](https://platform.openbox.ai)
2. Go to **Agents**
3. Create or open the agent you want to govern
4. Generate an API key
5. Keep that key for your Mastra runtime
See [Registering Agents](/dashboard/agents/registering-agents) for the full dashboard flow.
## Part 2: Install The SDK
Published package: `@openbox-ai/openbox-mastra-sdk`
```bash
npm install @openbox-ai/openbox-mastra-sdk @mastra/core
```
## Part 3: Configure Environment
```bash title=".env"
OPENBOX_URL=https://core.openbox.ai
OPENBOX_API_KEY=obx_live_your_api_key
OPENBOX_GOVERNANCE_POLICY=fail_open
```
## Part 4: Wrap Startup
```ts title="src/mastra/index.ts"
import { Mastra } from "@mastra/core/mastra";
import { getOpenBoxRuntime, withOpenBox } from "@openbox-ai/openbox-mastra-sdk";
import { supportAgent } from "./agents/support-agent";
import { fileTool } from "./tools/file-tool";
import { supportWorkflow } from "./workflows/support-workflow";
const mastra = new Mastra({
agents: { supportAgent },
tools: { fileTool },
workflows: { supportWorkflow }
});
export const governedMastra = await withOpenBox(mastra, {
apiKey: process.env.OPENBOX_API_KEY,
apiUrl: process.env.OPENBOX_URL
});
process.on("SIGTERM", async () => {
await getOpenBoxRuntime(governedMastra)?.shutdown();
});
```
This is the preferred integration path. It:
- validates configuration
- creates the OpenBox runtime
- installs process-wide telemetry
- wraps existing tools, workflows, and agents
- patches future Mastra registrations
## Part 5: Decide If You Need Manual Wrappers
Most services do not. Use manual wrappers only when:
- another subsystem owns telemetry bootstrap
- you want selective adoption
- you need strict control over startup order
```ts
import {
OpenBoxClient,
OpenBoxSpanProcessor,
parseOpenBoxConfig,
setupOpenBoxOpenTelemetry,
wrapAgent,
wrapTool,
wrapWorkflow
} from "@openbox-ai/openbox-mastra-sdk";
```
That pattern lets you wire only the specific runtime surfaces you want governed.
## Part 6: Verify A Live Run
Trigger one real request through your Mastra service, then check OpenBox for:
- a run under your registered agent
- workflow lifecycle events
- tool or governed step activities
- approvals or guardrails where policy requires them
- agent signals such as `user_input` and `agent_output`
## What The Integration Captures
### Tools
Wrapped tools become governed activities with `ActivityStarted` and `ActivityCompleted`.
### Workflows
Wrapped workflows emit `WorkflowStarted`, `WorkflowCompleted`, and `WorkflowFailed`. Non-tool steps can also be governed as activities.
### Agents
Wrapped agents behave like workflow-like runs and emit:
- `SignalReceived(user_input)`
- `SignalReceived(resume)`
- `SignalReceived(agent_output)`
## What To Expect In The UI
- Tool calls show up as activities.
- Agent-only model work shows up on the agent signal and workflow summary path.
- Tool health appears only when tools actually run.
- A routing or orchestration layer may have no direct model usage of its own.
## Next Steps
- [Configuration](/developer-guide/mastra/configuration)
- [Error Handling](/developer-guide/mastra/error-handling)
- [Event Model](/developer-guide/mastra/event-model)# Event Model
Source: https://docs.openbox.ai/developer-guide/mastra/event-model
# Event Model
OpenBox receives both governed boundary events and operational telemetry from the Mastra SDK. Understanding that model is necessary for writing policy, configuring guardrails, and interpreting the dashboard correctly.
## Top-Level Event Types
| Event type | Emitted by | Primary use |
| ------------------- | -------------------------------------------------- | --------------------------------------- |
| `WorkflowStarted` | Wrapped workflows and agents | Start-of-run governance |
| `WorkflowCompleted` | Wrapped workflows and agents | Final outcome and summary telemetry |
| `WorkflowFailed` | Wrapped workflows and agents | Failure reporting |
| `SignalReceived` | Workflow resumes and agent lifecycle signals | Resume handling and agent-specific data |
| `ActivityStarted` | Wrapped tools and governed non-tool workflow steps | Input-time governance and approvals |
| `ActivityCompleted` | Wrapped tools and governed non-tool workflow steps | Output-time governance and approvals |
## Business Activities Versus Internal Telemetry
In the Mastra SDK, a business activity is:
- a wrapped tool execution
- a wrapped non-tool workflow step
These are not separate business activities:
- internal HTTP telemetry
- internal DB telemetry
- internal file telemetry
- internal traced-function telemetry
- agent-only model calls
Those appear as operational spans associated with a parent activity, signal, or workflow.
## How Agent Runs Appear
Wrapped agents are represented as workflow-like entities in OpenBox.
Agent identity is emitted as:
- `workflow_type = agent.id ?? agent.name`
- `workflow_id = "agent:" + workflow_type`
That is why an agent run appears as a workflow run in the dashboard.
## Signals
Agent runs emit these signals:
| Signal | When emitted | Purpose |
| -------------- | -------------------------------------- | --------------------------------------- |
| `user_input` | `generate()` or `stream()` start | Carry the initiating prompt or request |
| `resume` | `resumeGenerate()` or `resumeStream()` | Carry resume payload |
| `agent_output` | Completion or failure finalization | Carry agent output plus model telemetry |
Important implications:
- Agent prompts are signals, not `ActivityStarted` events.
- Agent-only model work is surfaced on `SignalReceived(agent_output)` and `WorkflowCompleted`, not as a tool activity.
## Activity Payload Shape Guidance
### `ActivityStarted`
For live guardrails and policy, `ActivityStarted` is the preferred place to inspect tool inputs.
Examples:
- `input.command` for `runCommand`
- `input.content` for `writeFile`
- `input.path` for path checks
### `ActivityCompleted`
`ActivityCompleted` retains a compatibility-oriented input shape for downstream systems. Correlate started and completed events with `activity_id` rather than assuming identical payload structure.
## Typical Event Sequences
### Tool Or Governed Step
```text
ActivityStarted
-> zero or more telemetry spans during execution
-> ActivityCompleted
```
### Agent Run
```text
WorkflowStarted
-> SignalReceived(user_input)
-> internal model and telemetry spans
-> SignalReceived(agent_output)
-> WorkflowCompleted
```
## Why You Might Not See Spans On `ActivityStarted`
This is expected for agent-only runs. If an agent is doing model work without executing tools, the model spans are attached to the agent signal path rather than a tool activity boundary.
## Model Usage And Tool Health In The UI
- Model and token usage are most relevant on agent runs.
- Tool health metrics only populate for agents that actually execute tools.
- A workflow or gateway that only orchestrates child agents may show runs without direct model usage of its own.
## Policy And Guardrail Guidance
Recommended approach:
1. Treat workflow and activity boundary events as governable business actions.
2. Treat hook-triggered telemetry as internal by default.
3. Match live tool input guardrails on `ActivityStarted`.
4. Remember that agent prompts are signals, not activities.# Approvals and Guardrails
Source: https://docs.openbox.ai/developer-guide/mastra/approvals-and-guardrails
# Approvals and Guardrails
OpenBox evaluates governed Mastra boundaries and returns verdicts that the SDK enforces at runtime.
## Verdicts
| Verdict | Meaning | Runtime effect |
| ------------------ | ---------------------------------- | ------------------------------------------------------------- |
| `allow` | Continue normally | Execution proceeds |
| `constrain` | Continue with advisory constraints | Execution proceeds with constraints available in the response |
| `require_approval` | Human review required | Execution suspends or polls for approval |
| `block` | Operation must not continue | Execution throws a stop-style error |
| `halt` | Workflow or agent run must stop | Execution throws a halt error |
## Enforcement Model
For governed activities:
1. `ActivityStarted` is evaluated first
2. Input-side guardrails may apply
3. The tool or step executes
4. `ActivityCompleted` is evaluated
5. Output-side guardrails may apply
6. Approval may be required on either side
For workflows and agents:
- `WorkflowStarted` can stop execution early
- `WorkflowCompleted` can still be evaluated for policy and telemetry
- `WorkflowFailed` records failure context
## Important Live-Run Behavior
In a standard OpenBox deployment, policy evaluates before guardrails for a given event.
Operational consequence:
- If policy returns a non-`allow` verdict such as `require_approval`, `block`, or `halt`, guardrails for that event may not run.
- If a guardrail UI test passes but the live run shows no guardrail result, inspect the policy verdict first.
## Guardrail Field Selection
For live activity guardrails, match on `ActivityStarted` whenever possible.
Recommended fields:
| Activity type | Field to check | Example use |
| ------------- | --------------- | -------------------------------------- |
| `writeFile` | `input.content` | Banned content or PII in file contents |
| `writeFile` | `input.path` | Path restrictions |
| `runCommand` | `input.command` | Banned shell commands |
Important:
- Agent prompts are emitted as `SignalReceived(user_input)`.
- If your deployment only evaluates guardrails on activity events, those prompts are not inspected as activity inputs.
## Approval Handling
When OpenBox returns `require_approval`, the SDK chooses the approval path based on execution context.
### Workflow-Backed Execution
Preferred behavior:
- approval state is created
- the workflow suspends through Mastra resume behavior
- later resume paths emit signals and continue after approval resolves
### Non-Workflow Execution
Fallback behavior:
- the SDK polls approval inline
- execution continues only after approval is granted
- timeout or rejection raises an approval error
## Output-Time Approval
Approval is not limited to requested action. `ActivityCompleted` can also return `require_approval`, which is useful when policy needs to review actual output instead of just the requested operation.
## Runtime Errors You Should Expect
| Error | Meaning |
| --------------------------- | -------------------------------------------------------------------------------------------- |
| `GovernanceHaltError` | OpenBox returned a stop or halt verdict, or fail-closed converted an API failure into a halt |
| `GuardrailsValidationError` | Guardrail validation failed |
| `ApprovalPendingError` | Approval is still pending or polling timed out |
| `ApprovalRejectedError` | Approval explicitly rejected the activity |
| `ApprovalExpiredError` | Approval expired before resolution |
## Production Recommendations
1. Keep approval policy focused on business boundaries.
2. Treat hook-triggered telemetry as internal by default.
3. Test live guardrails only after confirming policy returns `allow` for that event.
4. Use `ActivityStarted` selectors for tool-input guardrails.# Telemetry
Source: https://docs.openbox.ai/developer-guide/mastra/telemetry
# Telemetry
The Mastra SDK uses OpenTelemetry to attach operational evidence to governed runs. This is what lets OpenBox show HTTP calls, data access, file operations, and traced functions alongside workflow and activity events.
## Capture Surfaces
### HTTP
By default, the SDK captures:
- outbound HTTP requests
- status codes
- timing
- text request and response bodies
- relevant headers
This is the primary path for model provider traffic and external service calls.
### Databases
Database instrumentation is enabled by default for supported libraries. Use it to surface query behavior in operator timelines without writing custom tracing code.
### File I/O
File instrumentation is optional and disabled by default. Turn it on only when you have a concrete file-governance requirement.
### Custom Functions
For work that does not naturally appear as a tool or workflow boundary, use `traced()` to create a span that OpenBox can attach to the surrounding execution.
```ts
import { traced } from "@openbox-ai/openbox-mastra-sdk";
const sendEmail = traced(async function sendEmail(input: { to: string }) {
return { delivered: true, to: input.to };
});
```
## Where Telemetry Appears
Telemetry is attached to the surrounding activity, signal, or workflow context.
That means:
- tool-related telemetry is usually attached to the tool activity
- agent-only model telemetry is associated with `SignalReceived(agent_output)` and workflow summary events
- internal telemetry does not create a new business activity row by itself
## Why Tool Health Can Be Empty
Tool health is only meaningful for agents that actually execute tools. If an agent only orchestrates or only performs model generation, you should not expect tool health metrics for that run.
## Why Model Usage Can Differ By Run Type
- An orchestrator or gateway may have no direct model usage if it only routes work.
- Child agent runs can still carry model and token usage.
- Agent-only model work shows up on the agent signal and workflow path, not as a separate tool activity.
## Recommended Defaults
| Setting | Recommended value |
| ------------------------ | ------------------------------------------------ |
| HTTP capture | Enabled |
| Database instrumentation | Enabled |
| File I/O instrumentation | Disabled until needed |
| Traced functions | Use selectively for meaningful custom operations |
## Privacy And Noise Control
Use these levers when telemetry is too noisy or too sensitive:
- disable file instrumentation unless needed
- use skip lists for known low-value workflow or signal traffic
- avoid tracing helper functions that do not matter to operators
## Next Steps
- [Configuration](/developer-guide/mastra/configuration)
- [Event Model](/developer-guide/mastra/event-model)
- [Troubleshooting](/developer-guide/mastra/troubleshooting)# Troubleshooting
Source: https://docs.openbox.ai/developer-guide/mastra/troubleshooting
# Troubleshooting
Use this page to diagnose the most common startup, runtime, and UI interpretation issues with the OpenBox Mastra SDK.
## Startup Validation Fails
Typical causes:
- `OPENBOX_URL` is missing
- `OPENBOX_API_KEY` is missing or malformed
- the URL is not HTTPS outside localhost development
- the API key validation call fails
What to do:
1. Verify `OPENBOX_URL` and `OPENBOX_API_KEY`.
2. Confirm the service can reach OpenBox Core.
3. Use `validate: false` only for local mocks or tests.
## No Runs Appear In OpenBox
Check these first:
1. The service can reach `OPENBOX_URL` from its runtime environment.
2. The agent API key is valid for the intended OpenBox agent.
3. The service is using the governed Mastra instance returned by `withOpenBox()`.
4. The process was restarted after configuration changes.
## A Guardrail UI Test Passes But The Live Run Does Not Fire
This usually means policy returned a non-`allow` verdict first. In a standard deployment, policy evaluates before guardrails on the same event.
What to verify:
- the live event returns `allow` from policy
- the guardrail targets `ActivityStarted` when matching tool input
- the field selector matches the emitted payload shape, such as `input.command`
## I Do Not See Spans On `ActivityStarted` For Agent Runs
This can be expected. Agent-only model work is surfaced through:
- `SignalReceived(agent_output)`
- `WorkflowCompleted`
It is not always attached directly to `ActivityStarted`, especially when no tool executed.
## I See Runs But No Tool Health
Tool health only appears for agents that actually execute tools. An orchestrator, gateway, or agent that only performs model generation will not populate tool health metrics for that run.
## I See Runs But No Model Usage On The Parent Orchestrator
That can also be expected. If the parent runtime only routes work to child agents, the model usage belongs to the child agent runs, not the orchestrator.
## The Dashboard Shows `ActivityCompleted` But I Expected A Matching `ActivityStarted`
Check whether you are looking at a real business activity or at hook-triggered telemetry. OpenBox can attach internal span-derived telemetry around the same runtime path.
Recommended interpretation:
- tools and governed non-tool workflow steps are the business activities
- internal hook telemetry is operational evidence, not a second business step
- use `activity_id` to correlate started and completed boundaries
## Approvals Never Resolve
Check:
1. `OPENBOX_HITL_ENABLED` is still enabled.
2. The approval exists and is being acted on in OpenBox.
3. The service can still reach OpenBox during approval polling or resume.
## Configuration Changes Do Not Take Effect
After changing environment variables:
1. restart the process
2. confirm the service is not reusing an old environment file
3. verify the startup path is still calling `withOpenBox()` or the intended manual bootstrap
## Useful Debug Setting
Enable summarized SDK debug logs with:
```bash title=".env"
OPENBOX_DEBUG=true
```
This helps confirm evaluate requests, approval polling, and startup behavior without changing application code.# n8n Developer Guide
Source: https://docs.openbox.ai/developer-guide/n8n/
# n8n Developer Guide
:::info Docs coming soon
The OpenBox SDK for n8n is in development.
This page will be updated with SDK reference, integration guides, and configuration details when the integration is available.
:::
## What to expect
- SDK reference for wrapping n8n workflows with OpenBox governance
- Configuration options for trust scoring and policy enforcement
- Error handling patterns for governance decisions
- Code examples for common integration scenarios# OpenClaw Plugin
Source: https://docs.openbox.ai/developer-guide/openclaw/
# OpenClaw Plugin
:::info Docs coming soon
The OpenBox plugin for OpenClaw is in development.
This page will be updated with SDK reference, integration guides, and configuration details when the integration is available.
:::
## What to expect
- SDK reference for governing OpenClaw agents with OpenBox
- Configuration options for tool governance and LLM guardrails
- Error handling patterns for governance decisions
- Code examples for common integration scenarios# Temporal Plugin (Python)
Source: https://docs.openbox.ai/developer-guide/temporal-python/sdk-reference
# Temporal Plugin (Python)
`OpenBoxPlugin` is a drop-in Temporal plugin that adds governance and observability to your workers.
| Guide | Description |
| --------------------------------------------------------------------------------------- | --------------------------------------------------------- |
| **[Integration Walkthrough](/developer-guide/temporal-python/integration-walkthrough)** | Step-by-step guide for adding OpenBox to Temporal workers |
| **[Configuration](/developer-guide/temporal-python/configuration)** | Plugin options and environment variables |
| **[Error Handling](/developer-guide/temporal-python/error-handling)** | Handle governance decisions and failures in your code |
| **[Customizing the Demo](/developer-guide/temporal-python/customizing-the-demo)** | Tailor governance behavior to your agent's needs |
| **[Demo Architecture](/developer-guide/temporal-python/demo-architecture)** | Architecture of the reference demo application |
| **[Troubleshooting](/developer-guide/temporal-python/troubleshooting)** | Common issues and fixes for Temporal plugin setup |
:::info What the Plugin Does
The plugin's primary job is to **connect your Temporal worker to OpenBox** and send workflow/activity events to the platform. All trust logic, policies, and UI management happens on the platform — not in the plugin.
:::
## Philosophy
The plugin is intentionally minimal:
- **One plugin** added to your existing Worker — no import swaps or wrapper functions
- **Zero code changes** to workflow/activity logic
- **Automatic telemetry** — captures HTTP, database, and file I/O operations
- **Composable** — works alongside other Temporal plugins (e.g., `OpenTelemetryPlugin`)
## Supported Engines
| Engine | Language | Status |
| -------- | ---------- | ----------- |
| Temporal | Python | ✅ Supported |
| n8n | JavaScript | ✅ Supported |
## Installation and Setup
See:
1. **[Wrap an Existing Agent](/getting-started/temporal/wrap-an-existing-agent)** — Add OpenBox to an existing Temporal worker
2. **[Temporal (Python)](/developer-guide/temporal-python/integration-walkthrough)** — End-to-end setup from scratch
3. **[Configuration](/developer-guide/temporal-python/configuration)** — All plugin options
## Plugin Usage
```python
from openbox.plugin import OpenBoxPlugin
OpenBoxPlugin(
openbox_url: str,
openbox_api_key: str,
# + governance, instrumentation options
)
```
Add it to your Worker's `plugins` list:
```python
worker = Worker(
client,
task_queue="my-task-queue",
workflows=[MyWorkflow],
activities=[my_activity],
plugins=[OpenBoxPlugin(
openbox_url=os.getenv("OPENBOX_URL"),
openbox_api_key=os.getenv("OPENBOX_API_KEY"),
)],
)
```
The plugin automatically configures governance interceptors, OTel instrumentation, sandbox passthrough, and the `send_governance_event` activity.
See **[Configuration](/developer-guide/temporal-python/configuration)** for the full parameter list.
## What the Plugin Captures
The plugin automatically captures and sends to OpenBox:
### Workflow Events
- Workflow started/completed/failed
- Signal received
- Query executed
### Activity Events
- Activity started (with input)
- Activity completed (with output and duration)
- Activity failed (with error)
### HTTP Telemetry
- Request/response bodies (for LLM calls, external requests)
- Headers and status codes
- Request duration and timing
### Database Operations (Optional)
- SQL queries (PostgreSQL, MySQL)
- NoSQL operations (MongoDB, Redis)
### File I/O (Optional)
- File read/write operations
- File paths and sizes
All captured data is evaluated against your trust policies on the OpenBox platform.
## Tracing
The `@traced` decorator wraps any function in an OpenTelemetry span so it appears in session replay. It works on both sync and async functions.
### Import
```python
from openbox.tracing import traced
```
### Basic Usage
```python
@traced
def process_data(input_data):
return transform(input_data)
@traced
async def fetch_data(url):
return await http_get(url)
```
### With Options
```python
@traced(
name="custom-span-name",
capture_args=True, # Capture function arguments (default: True)
capture_result=True, # Capture return value (default: True)
capture_exception=True, # Capture exception details on error (default: True)
max_arg_length=2000, # Max length for serialized arguments (default: 2000)
)
async def process_sensitive_data(data):
return await handle(data)
```
### Manual Spans
For more control, use `create_span` as a context manager:
```python
from openbox.tracing import create_span
with create_span("my-operation", {"input": data}) as span:
result = do_something()
span.set_attribute("output", result)
```
## How It Works
```mermaid
flowchart TD
subgraph worker["Your Temporal Worker"]
workflow["Your Workflow
(unchanged)"]
activity["Your Activity
(unchanged)"]
sdk["OpenBox Plugin
Captures events
Collects HTTP/DB/File telemetry
Sends events to OpenBox"]
workflow --> sdk
activity --> sdk
end
sdk --> engine
engine["OpenBox Trust Engine
Verdicts:
ALLOW · REQUIRE_APPROVAL
BLOCK · HALT"]
```
## Configuration
See **[Configuration](/developer-guide/temporal-python/configuration)** for all options including:
- Environment variables
- Governance timeout and fail policies
- Event filtering (skip workflows/activities)
- Database and file I/O instrumentation
## Next Steps
1. **[Temporal Integration](/developer-guide/temporal-python/integration-walkthrough)** - Add OpenBox to an existing Temporal agent
2. **[Configuration](/developer-guide/temporal-python/configuration)** - Configure timeouts, fail policies, and exclusions
3. **[Error Handling](/developer-guide/temporal-python/error-handling)** - Handle governance decisions in your code# Configuration
Source: https://docs.openbox.ai/developer-guide/temporal-python/configuration
# Configuration
The plugin can be configured via environment variables or constructor parameters.
## Environment Variables
| Variable | Required | Default | Description |
| ----------------------------------- | -------- | ----------- | --------------------------------------------------------- |
| `OPENBOX_URL` | Yes | - | OpenBox Core API URL (HTTPS required for non-localhost) |
| `OPENBOX_API_KEY` | Yes | - | API key for authentication (`obx_live_*` or `obx_test_*`) |
| `OPENBOX_ENABLED` | No | `true` | Enable/disable governance |
| `OPENBOX_GOVERNANCE_TIMEOUT` | No | `30.0` | Seconds to wait for governance evaluation |
| `OPENBOX_GOVERNANCE_POLICY` | No | `fail_open` | Behavior when API unreachable |
| `OPENBOX_SEND_START_EVENT` | No | `true` | Send WorkflowStarted events |
| `OPENBOX_SEND_ACTIVITY_START_EVENT` | No | `true` | Send ActivityStarted events |
## Plugin Parameters
Parameters passed to `OpenBoxPlugin()` override environment variables:
See **[Example: Full Configuration](#example-full-configuration)** for a complete example.
## Configuration Options
### openbox_url
OpenBox Core API URL. HTTPS required for non-localhost.
```python
openbox_url="https://core.openbox.ai"
```
### openbox_api_key
Your API key (`obx_live_*` or `obx_test_*`). Always use environment variables in production:
```python
openbox_api_key=os.environ.get("OPENBOX_API_KEY")
```
### governance_timeout
Maximum seconds to wait for governance evaluation per operation.
```python
governance_timeout=30.0 # Default
governance_timeout=60.0 # For slower networks
governance_timeout=10.0 # For low-latency requirements
```
If timeout is exceeded, behavior follows `governance_policy`.
### governance_policy
What happens when OpenBox API is unreachable:
| Value | Behavior |
| ------------- | ---------------------------------------- |
| `fail_open` | Allow operation to proceed (log warning) |
| `fail_closed` | Block operation |
```python
governance_policy="fail_open" # Default - prioritize availability
governance_policy="fail_closed" # For high-security environments
```
### hitl_enabled
Enable Human-in-the-Loop approvals.
```python
hitl_enabled=True # Default - REQUIRE_APPROVAL triggers HITL
hitl_enabled=False # REQUIRE_APPROVAL treated as BLOCK
```
### send_start_event
Send `WORKFLOW_START` / WorkflowStarted events.
```python
send_start_event=True # Default
send_start_event=False
```
### send_activity_start_event
Send `ACTIVITY_START` / ActivityStarted events.
```python
send_activity_start_event=True # Default
send_activity_start_event=False
```
### skip_workflow_types
Workflow types to exclude from governance:
```python
skip_workflow_types={"UtilityWorkflow", "HealthCheckWorkflow"}
```
These workflows run without OpenBox interception.
### skip_activity_types
Activity types to exclude from governance:
```python
skip_activity_types={"internal_helper", "logging_activity"}
```
These activities run without governance evaluation.
### skip_signals
Signal names to exclude from governance:
```python
skip_signals={"heartbeat", "progress_update"}
```
These signals are not intercepted.
### instrument_databases
Enable automatic database operation instrumentation:
```python
instrument_databases=True # Default - capture database queries
instrument_databases=False
```
### db_libraries
Select which database libraries to instrument.
```python
db_libraries={"psycopg2", "redis"}
```
Supported values:
- `psycopg2`
- `asyncpg`
- `mysql`
- `pymysql`
- `pymongo`
- `redis`
- `sqlalchemy`
### instrument_file_io
Enable automatic file I/O instrumentation:
```python
instrument_file_io=False # Default
instrument_file_io=True # Capture file operations
```
## Configuration Precedence
1. Function parameters (highest priority)
2. Environment variables
3. Default values (lowest priority)
## Example: Full Configuration
```python
import asyncio
import os
from temporalio.client import Client
from temporalio.worker import Worker
from openbox.plugin import OpenBoxPlugin
async def main():
client = await Client.connect("localhost:7233")
worker = Worker(
client,
task_queue="production-queue",
workflows=[CustomerWorkflow, OrderWorkflow],
activities=[
process_order,
send_notification,
update_inventory,
],
plugins=[OpenBoxPlugin(
# OpenBox config from environment
openbox_url=os.environ.get("OPENBOX_URL"),
openbox_api_key=os.environ.get("OPENBOX_API_KEY"),
# Event filtering
send_start_event=True,
send_activity_start_event=True,
# Governance behavior
governance_timeout=45.0,
governance_policy="fail_closed", # High security
hitl_enabled=True,
# Exclude internal workflows
skip_workflow_types={"HealthCheck", "Metrics"},
skip_activity_types={"log_event"},
skip_signals={"heartbeat", "progress_update"},
# Full instrumentation
instrument_databases=True,
db_libraries={"psycopg2", "redis"},
instrument_file_io=False,
)],
)
await worker.run()
if __name__ == "__main__":
asyncio.run(main())
```
## Next Steps
1. **[Error Handling](/developer-guide/temporal-python/error-handling)** - Handle governance decisions in your code
2. **[Event Types](/developer-guide/event-types)** - Understand the semantic event types captured by the plugin
3. **[Approvals](/approvals)** - Review and act on HITL approval requests# Error Handling
Source: https://docs.openbox.ai/developer-guide/temporal-python/error-handling
# Error Handling
Trust decisions surface as Temporal `ApplicationError` exceptions in your activities. The plugin uses `ApplicationError.type` to distinguish between different governance outcomes.
## Governance Error Types
The plugin raises `ApplicationError` with one of these type strings:
| Error Type | Decision | Retryable | Description |
| -------------------- | ---------------------------- | --------- | -------------------------- |
| `"GovernanceStop"` | BLOCK or HALT | No | Operation blocked |
| `"ApprovalPending"` | REQUIRE_APPROVAL | Yes | Awaiting human review |
| `"ApprovalRejected"` | REQUIRE_APPROVAL (rejected) | No | Human rejected request |
| `"ApprovalExpired"` | REQUIRE_APPROVAL (timeout) | No | No response before timeout |
All governance errors are standard Temporal `ApplicationError` instances with these properties:
| Property | Type | Description |
| --------------- | ------ | ----------------------------------------------------------------------- |
| `message` | `str` | Human-readable description (e.g., `"Governance blocked: PII detected"`) |
| `type` | `str` | The governance type string from the table above |
| `non_retryable` | `bool` | If `True`, Temporal will not retry the activity |
## Import
```python
from temporalio.exceptions import ApplicationError
```
## Handling Each Type
These patterns apply inside your existing Temporal activity functions. The plugin intercepts activity execution automatically — you only need to add error handling if you want custom behavior beyond the default (which is to let the exception propagate and fail the activity).
### GovernanceStop
Raised when an operation is blocked (BLOCK) or the agent session is terminated (HALT).
```python
@activity.defn
async def sensitive_operation(data: dict) -> str:
try:
result = await perform_action(data)
return result
except ApplicationError as e:
if e.type == "GovernanceStop":
logger.error(f"Operation blocked: {e.message}")
# Option 1: Raise to fail the activity
raise
# Option 2: Return alternative result
return "Operation not permitted"
raise
```
### ApprovalPending
Raised when the operation requires human approval. Because `non_retryable=False`, Temporal automatically retries the activity — the plugin polls for an approval decision on each retry.
```python
@activity.defn
async def requires_approval_operation(data: dict) -> str:
# No special handling needed - plugin manages retries.
# Activity will retry until approved/rejected/expired.
result = await perform_action(data)
return result
```
If you need custom handling:
```python
@activity.defn
async def custom_approval_handling(data: dict) -> str:
try:
result = await perform_action(data)
return result
except ApplicationError as e:
if e.type == "ApprovalPending":
logger.info(f"Awaiting approval: {e.message}")
# Re-raise to trigger retry
raise
raise
```
### ApprovalRejected
Raised when a human rejects the approval request.
```python
@activity.defn
async def handle_rejection(data: dict) -> str:
try:
result = await perform_action(data)
return result
except ApplicationError as e:
if e.type == "ApprovalRejected":
logger.warning(f"Approval rejected: {e.message}")
# Option 1: Fail the activity
raise
# Option 2: Handle gracefully
return f"Operation rejected: {e.message}"
raise
```
### ApprovalExpired
Raised when approval times out without a decision.
```python
@activity.defn
async def handle_timeout(data: dict) -> str:
try:
result = await perform_action(data)
return result
except ApplicationError as e:
if e.type == "ApprovalExpired":
logger.warning(f"Approval timed out: {e.message}")
raise
raise
```
## Workflow-Level Handling
For workflow-level trust handling, catch `ApplicationError` and check the type:
```python
@workflow.defn
class MyAgentWorkflow:
@workflow.run
async def run(self, input: WorkflowInput) -> WorkflowOutput:
try:
result = await workflow.execute_activity(
sensitive_operation,
input.data,
start_to_close_timeout=timedelta(minutes=10),
)
return WorkflowOutput(result=result)
except ApplicationError as e:
if e.type == "GovernanceStop":
# Workflow is being blocked or terminated
await self.cleanup()
return WorkflowOutput(error=e.message)
if e.type == "ApprovalRejected":
# Human rejected - may want different handling
return WorkflowOutput(
status="rejected",
reason=e.message,
)
raise
```
## Best Practices
1. **Let ApprovalPending propagate** - The plugin handles retries
2. **Log GovernanceStop with context** - Helps debugging
3. **Consider fallback behavior** - Not all denials should crash
4. **Clean up on GovernanceStop** - Release resources before re-raising
5. **Don't catch and ignore** - These exceptions are intentional
## Configuration Exceptions
The plugin raises configuration exceptions from `openbox.config` during `OpenBoxPlugin()` initialization — not during activity execution. Handle these where you initialize your worker.
| Exception | Cause |
| ------------------------- | --------------------------------------- |
| `OpenBoxConfigError` | Base class for all configuration errors |
| `OpenBoxAuthError` | Invalid or missing API key |
| `OpenBoxNetworkError` | Cannot reach OpenBox Core |
| `OpenBoxInsecureURLError` | HTTP used for a non-localhost URL |
## Next Steps
Now that you understand how to handle trust decisions in code:
1. **[Event Types](/developer-guide/event-types)** - Understand the semantic event types that trigger these decisions
2. **[Troubleshooting](/developer-guide/temporal-python/troubleshooting)** - Common issues and solutions
3. **[Handle Approvals](/approvals)** - Review and process HITL requests in the dashboard# Temporal Integration Guide (Python)
Source: https://docs.openbox.ai/developer-guide/temporal-python/integration-walkthrough
# Temporal Integration Guide (Python)
This is the end-to-end guide for integrating OpenBox with a Temporal AI agent. You'll set up the demo repo, register your agent, run it with governance enabled, then walk through the integration architecture, available scenarios, human-in-the-loop approvals, and configuration options.
:::tip Skip ahead
- **Completed the demo?** Skip to the **[How the Integration Works](#how-the-integration-works) section**.
- **Already have an agent?** See the **[Wrap an Existing Agent](/getting-started/temporal/wrap-an-existing-agent)** page.
:::
## Prerequisites
- **[Tools & dependencies](/getting-started/temporal/run-the-demo#prerequisites)** — Python 3.11+, Node.js, uv, make, and the Temporal CLI
- **OpenBox Account** — Sign up at [platform.openbox.ai](https://platform.openbox.ai)
- **LLM API Key** — The demo uses [LiteLLM](https://docs.litellm.ai/docs/providers) for model routing. Set `LLM_MODEL` using the format `provider/model-name`:
- `openai/gpt-4o`
- `anthropic/claude-sonnet-4-5-20250929`
- `gemini/gemini-2.0-flash`
See [LiteLLM Supported Providers](https://docs.litellm.ai/docs/providers) for the full list.
## Part 1: Clone and Set Up the Demo
This guide uses the public demo repo:
```bash
git clone https://github.com/OpenBox-AI/poc-temporal-agent
cd poc-temporal-agent
```
### Install Dependencies
From the repo root:
```bash
make setup
```
## Part 2: Register Your Agent in OpenBox
1. **Log in** to the [OpenBox Dashboard](https://platform.openbox.ai)
2. Navigate to **Agents** → Click **Add Agent**
3. Configure the agent:
- **Workflow Engine**: Temporal
- **Agent Name**: Temporal AI Agent
- **Agent ID**: Auto-generated
- **Description** *(optional)*: Temporal AI agent demo
- **Teams** *(optional)*: assign the agent to one or more teams
- **Icon** *(optional)*: select an icon
4. **API Key Generation**:
- Click **Generate API Key**
- Copy and store the key (shown only once)
5. Configure platform settings:
- **Initial Risk Assessment** (**[Risk Profile](/trust-lifecycle/assess)**) - select a risk profile (Tier 1-4)
- **Attestation** (**[Execution Evidence](/administration/attestation-and-cryptographic-proof)**) - select an attestation provider
6. Click **Add Agent**
See **[Registering Agents](/dashboard/agents/registering-agents)** for a field-by-field walkthrough of the form.
## Part 3: Configure Environment
1. Copy `.env.example` to `.env`
2. Open `.env` in your editor and set your LLM and OpenBox values:
```bash
# LLM — use the format provider/model-name
LLM_MODEL=openai/gpt-4o
LLM_KEY=your-llm-api-key
# Temporal
TEMPORAL_ADDRESS=localhost:7233
# OpenBox (use the API key from Part 2)
OPENBOX_URL=https://core.openbox.ai
OPENBOX_API_KEY=your-openbox-api-key
OPENBOX_GOVERNANCE_ENABLED=true
OPENBOX_GOVERNANCE_TIMEOUT=30.0
OPENBOX_GOVERNANCE_MAX_RETRIES=1
OPENBOX_GOVERNANCE_POLICY=fail_open
```
## Part 4: Run the Demo
Start the Temporal development server:
```bash
temporal server start-dev
```
:::tip
Check the startup output for the Temporal Web UI URL — you can use it to verify the server is running and monitor workflows.
:::
In separate terminals, start each process:
```bash
make run-worker
```
```bash
make run-api
```
```bash
make run-frontend
```
You should see `OpenBox SDK initialized successfully` in the worker terminal.
Open the UI at :
1. Send a message to the agent — the default scenario is a travel booking assistant
2. Let it run through the workflow
3. Once it completes, move on to [See It in Action](#see-it-in-action)
## See It in Action
1. Open the **[OpenBox Dashboard](https://platform.openbox.ai)**
2. Navigate to **Agents** → Click your agent (the one you created in Part 2)
3. On the **Overview** tab, find the session that corresponds to your workflow run
4. Click **Details** to open it — you'll land on the **Overview** tab which shows the **Event Log Timeline**
5. Scroll through the timeline — you'll see every event the trust layer captured: workflow start/complete, each activity with its inputs and outputs, the HTTP requests to your LLM, and the governance decision OpenBox made for each one
6. Switch to the **Tree View** to see the same data as a hierarchy — workflows at the top, activities nested underneath, tool calls within those
7. Click **Watch Replay** to open [Session Replay](/trust-lifecycle/session-replay) — this plays back the entire session step-by-step, showing exactly what the agent did and how OpenBox evaluated it
## What Just Happened?
When you ran the demo, the OpenBox trust layer:
1. **Intercepted workflow and activity events** — every workflow start, activity execution, and signal was captured and sent to OpenBox for governance evaluation
2. **Captured HTTP calls automatically** — OpenTelemetry instrumentation recorded all outbound HTTP requests (LLM calls, external APIs) with full request/response bodies
3. **Evaluated governance policies** — each captured event was evaluated against your agent's configured governance policies in real-time
4. **Recorded a governance decision for every event** — approved, blocked, or flagged — giving you a complete audit trail
5. **Captured database operations and file I/O** — the demo configures `instrument_databases=True` and `instrument_file_io=True`, so SQL queries, NoSQL operations, and file read/write operations were also recorded
## How the Integration Works
The OpenBox integration point is the worker bootstrap script: `scripts/run_worker.py`. The only change is adding `OpenBoxPlugin` to the Worker's `plugins` list:
```python title="worker.py"
import asyncio
from temporalio.client import Client
from temporalio.worker import Worker
from your_workflows import YourWorkflow
from your_activities import your_activity
async def main():
client = await Client.connect("localhost:7233")
worker = Worker(
client,
task_queue="agent-task-queue",
workflows=[YourWorkflow],
activities=[your_activity],
)
await worker.run()
asyncio.run(main())
```
```python title="worker.py"
import os
import asyncio
from temporalio.client import Client
from temporalio.worker import Worker
from openbox.plugin import OpenBoxPlugin # Add OpenBox
from your_workflows import YourWorkflow
from your_activities import your_activity
async def main():
client = await Client.connect("localhost:7233")
worker = Worker(
client,
task_queue="agent-task-queue",
workflows=[YourWorkflow],
activities=[your_activity],
# Add OpenBox plugin
plugins=[OpenBoxPlugin(
openbox_url=os.getenv("OPENBOX_URL"),
openbox_api_key=os.getenv("OPENBOX_API_KEY"),
)],
)
await worker.run()
asyncio.run(main())
```
The agent's Temporal code is organized in:
- **`workflows/`** — [Workflows](https://docs.temporal.io/workflows) define the high-level orchestration logic. In this demo, `AgentGoalWorkflow` is the main workflow that coordinates the agent's execution — it receives a goal, plans a sequence of steps, and executes them. OpenBox intercepts workflow started, completed, and failed events for governance evaluation.
- **`activities/`** — [Activities](https://docs.temporal.io/activities) are the individual units of work that a workflow executes — things like calling an LLM, querying a database, or making an API request. OpenBox captures each activity's inputs, outputs, and duration, and evaluates them against your governance policies.
- **`tools/`** — Tools are the capabilities available to the agent (e.g., search flights, check balances, process payments). Each tool is implemented as a Temporal activity, so OpenBox automatically captures and governs tool usage.
- **`goals/`** — Goals define the scenarios the agent can handle (e.g., travel booking, banking assistant). Each goal configures the system prompt, available tools, and expected behavior for a specific use case.
See **[Extending the Demo Agent](/developer-guide/temporal-python/customizing-the-demo)** for a step-by-step guide to adding your own goals and tools to this structure, or the **[Demo Architecture Reference](/developer-guide/temporal-python/demo-architecture)** for a full breakdown of signals, activities, endpoints, and message flow.
## Explore Different Scenarios
The demo ships with a default travel booking scenario, but you can switch to other domains by changing `AGENT_GOAL` in your `.env` file. For example, to try the finance banking assistant:
```bash
AGENT_GOAL=goal_fin_banking_assistant
```
After changing the goal, restart the worker (`make run-worker`) to pick up the new value.
### Available Goals
- **HR**
- `goal_hr_check_pto` — Check your available PTO
- `goal_hr_check_paycheck_bank_integration_status` — Check employer/financial institution integration
- `goal_hr_schedule_pto` — Schedule PTO based on your available balance
- **E-commerce**
- `goal_ecomm_order_status` — Check order status
- `goal_ecomm_list_orders` — List all orders for a user
- **Finance**
- `goal_fin_check_account_balances` — Check balances across accounts
- `goal_fin_loan_application` — Start a loan application
- `goal_fin_move_money` — Initiate a money transfer
- `goal_fin_banking_assistant` — Full-service banking (combines balances, transfers, and loans)
- **Travel**
- `goal_event_flight_invoice` — Book a trip to Australia or New Zealand around local events (default)
- `goal_match_train_invoice` — Book a trip to a UK city around Premier League match dates
- **Food ordering**
- `goal_food_ordering` — Order food with Stripe payment processing
- **MCP Integrations**
- `goal_mcp_stripe` — Manage Stripe customer and product data
:::tip Add Your Own
These are the built-in scenarios. You can create your own goals with custom tools — see **[Extending the Demo Agent](/developer-guide/temporal-python/customizing-the-demo)**.
:::
## Human-in-the-Loop Approvals
Some operations are too sensitive to run without a human sign-off — for example, initiating a money transfer, processing a payment, or modifying a customer's account. You can configure governance policies in OpenBox to require approval for these kinds of activities. See **[Authorize](/trust-lifecycle/authorize)** to set up guardrails, policies, and behavioral rules.
When governance requires approval:
1. OpenBox creates an approval request
2. Approval request appears in the [OpenBox dashboard](/approvals)
3. Human approves/rejects
4. Temporal proceeds or fails based on the decision
While waiting for a human to approve or reject, the Temporal activity will retry. Set longer timeouts and more retries than usual to allow time for the decision:
```python
result = await workflow.execute_activity(
sensitive_operation,
data,
start_to_close_timeout=timedelta(minutes=10),
retry_policy=RetryPolicy(
initial_interval=timedelta(seconds=10),
maximum_interval=timedelta(minutes=5),
maximum_attempts=20, # Allow time for approval
),
)
```
## Configuration Options
### Governance Settings
| Option | Default | Description |
| -------------------- | ----------- | ---------------------------------------------------------------------- |
| `governance_timeout` | `30.0` | Max seconds to wait for governance evaluation |
| `governance_policy` | `fail_open` | `fail_open` = continue on API error, `fail_closed` = stop on API error |
### Event Filtering
Skip governance for specific workflows or activities:
```python
worker = Worker(
client,
task_queue="my-task-queue",
workflows=[AgentGoalWorkflow, UtilityWorkflow],
activities=[...],
plugins=[OpenBoxPlugin(
openbox_url=os.getenv("OPENBOX_URL"),
openbox_api_key=os.getenv("OPENBOX_API_KEY"),
# Skip these from governance
skip_workflow_types={"UtilityWorkflow"},
skip_activity_types={"internal_activity"},
skip_signals={"heartbeat"},
)],
)
```
### Optional Instrumentation
Enable additional telemetry capture:
```python
worker = Worker(
client,
task_queue="my-task-queue",
workflows=[AgentGoalWorkflow],
activities=[...],
plugins=[OpenBoxPlugin(
openbox_url=os.getenv("OPENBOX_URL"),
openbox_api_key=os.getenv("OPENBOX_API_KEY"),
# Optional: Capture database operations
instrument_databases=True,
db_libraries={"psycopg2", "redis"}, # Or None for all
# Optional: Capture file I/O
instrument_file_io=True,
)],
)
```
See **[Plugin Configuration](/developer-guide/temporal-python/configuration)** for the full list of options.
## Error Handling
In this demo, the plugin's role is to connect your Temporal worker to OpenBox and emit the events OpenBox needs to evaluate policies and record sessions. The recommended way to understand and respond to blocks, approvals, and validation failures is through the OpenBox dashboard UI.
To investigate failures, open a session in the dashboard using the same steps from [See It in Action](#see-it-in-action) and look for governance decisions that were blocked or flagged, failed activity outputs, and approval requests that were rejected.
## Next Steps
1. **[Extending the Demo Agent](/developer-guide/temporal-python/customizing-the-demo)** - Add your own goals, native tools, and MCP integrations
2. **[Plugin Configuration](/developer-guide/temporal-python/configuration)** - Fine-tune timeouts, fail policies, and filtering
3. **[Error Handling](/developer-guide/temporal-python/error-handling)** - Handle governance decisions in your code
4. **[Set Up Approvals](/approvals)** - Add human-in-the-loop for sensitive operations
5. **[Demo Architecture Reference](/developer-guide/temporal-python/demo-architecture)** - Signals, activities, endpoints, and message flow
Having issues? See the **[Troubleshooting](/developer-guide/temporal-python/troubleshooting)** guide for common problems and solutions.# Extending the Demo Agent
Source: https://docs.openbox.ai/developer-guide/temporal-python/customizing-the-demo
# Extending the Demo Agent
The demo agent ships with built-in scenarios like travel booking and banking, but you can add your own goals, tools, and integrations. This guide covers the extension points in the demo repo — how to define what your agent can do, wire up the tools it needs, and register everything so the system picks it up.
OpenBox automatically governs all tool calls regardless of type. You don't need any extra configuration to get governance coverage for new goals or tools.
:::tip Prerequisites
This guide assumes you've completed [Run the Demo](/getting-started/temporal/run-the-demo) or the [Temporal Integration Guide](/developer-guide/temporal-python/integration-walkthrough) and have the demo running locally. See the [Demo Architecture Reference](/developer-guide/temporal-python/demo-architecture) for a full breakdown of signals, activities, and endpoints.
:::
## How Goals and Tools Work
A **goal** is a scenario configuration that tells the agent what it's trying to accomplish and which tools it can use. Each goal defines a system prompt, a list of available tools, and an example conversation that helps the LLM understand the expected interaction pattern.
Tools come in two types:
- **Native tools** — Custom Python functions implemented directly in the codebase. Use these for business logic specific to your application.
- **MCP tools** — External tools accessed via [Model Context Protocol](https://modelcontextprotocol.io/) servers. Use these for third-party integrations (Stripe, databases, APIs) without writing custom code.
A goal declares which tools it needs — both native and MCP. The agent follows the goal's description to orchestrate tool calls in the right order. The workflow engine automatically detects whether a tool is native or MCP and routes it accordingly.
## Project Structure
These are the key files involved when adding goals and tools:
| Path | Purpose |
| ------------------------------- | ---------------------------------------------------------------------------------------------- |
| `goals/` | Goal definitions, one file per category (e.g., `hr.py`, `finance.py`) |
| `goals/__init__.py` | Aggregates all goal lists into a single registry |
| `tools/` | Native tool implementations, one file per tool |
| `tools/__init__.py` | Maps tool names to handler functions via `get_handler()` |
| `tools/tool_registry.py` | Tool definitions (name, description, arguments) for the LLM |
| `models/tool_definitions.py` | Dataclass definitions for `AgentGoal`, `ToolDefinition`, `ToolArgument`, `MCPServerDefinition` |
| `shared/mcp_config.py` | Predefined MCP server configurations |
| `workflows/workflow_helpers.py` | Routing logic that distinguishes native tools from MCP tools |
## Adding a Goal
### Define the Goal
Create a new file in `goals/` (e.g., `goals/support.py`). Each goal is an `AgentGoal` instance with these fields:
| Field | Type | Description |
| ------------------------------ | ---------------------- | ----------------------------------------------------------------------- |
| `id` | `str` | Unique identifier, must match the value used in `AGENT_GOAL` env var |
| `category_tag` | `str` | Category for grouping (e.g., `"hr"`, `"finance"`, `"travel"`) |
| `agent_name` | `str` | User-facing name shown in the chat UI |
| `agent_friendly_description` | `str` | User-facing description of what the agent does |
| `tools` | `List[ToolDefinition]` | Native tools available to this goal |
| `description` | `str` | LLM-facing instructions listing all tools by name and purpose, in order |
| `starter_prompt` | `str` | Initial prompt given to the LLM to begin the scenario |
| `example_conversation_history` | `str` | Sample interaction showing the expected flow |
| `mcp_server_definition` | `MCPServerDefinition` | *(Optional)* MCP server configuration for external tools |
Here's the simplest real goal in the demo — checking PTO balance, which uses a single native tool:
```python title="goals/hr.py"
from typing import List
import tools.tool_registry as tool_registry
from models.tool_definitions import AgentGoal
starter_prompt_generic = "Welcome me, give me a description of what you can do, then ask me for the details you need to do your job."
goal_hr_check_pto = AgentGoal(
id="goal_hr_check_pto",
category_tag="hr",
agent_name="Check PTO Amount",
agent_friendly_description="Check your available PTO.",
tools=[
tool_registry.current_pto_tool,
],
description="The user wants to check their paid time off (PTO) after today's date. To assist with that goal, help the user gather args for these tools in order: "
"1. CurrentPTO: Tell the user how much PTO they currently have ",
starter_prompt=starter_prompt_generic,
example_conversation_history="\n ".join(
[
"user: I'd like to check my time off amounts at the current time",
"agent: Sure! I can help you out with that. May I have your email address?",
"user: bob.johnson@emailzzz.com",
"agent: Great! I can tell you how much PTO you currently have accrued.",
"user_confirmed_tool_run: ",
"tool_result: { 'num_hours': 400, 'num_days': 50 }",
"agent: You have 400 hours, or 50 days, of PTO available.",
]
),
)
hr_goals: List[AgentGoal] = [goal_hr_check_pto]
```
### Register the Goal
Import your goal list in `goals/__init__.py` and extend the registry:
```python title="goals/__init__.py"
from goals.support import support_goals
goal_list.extend(support_goals)
```
Then set `AGENT_GOAL` in your `.env` file to the goal's `id`:
```bash title=".env"
AGENT_GOAL=goal_hr_check_pto
```
Restart the worker (`make run-worker`) to pick up the new value.
## Adding Native Tools
### Define the Tool
Add a `ToolDefinition` to `tools/tool_registry.py`. This tells the LLM what the tool does and what arguments it expects:
| Field | Type | Description |
| ------------- | -------------------- | -------------------------------------------- |
| `name` | `str` | Tool name as referenced in goal descriptions |
| `description` | `str` | LLM-facing explanation of what the tool does |
| `arguments` | `List[ToolArgument]` | Input arguments (can be empty `[]`) |
Each `ToolArgument` has:
| Field | Type | Description |
| ------------- | ----- | ----------------------------------------------------- |
| `name` | `str` | Argument name |
| `type` | `str` | Type hint (e.g., `"string"`, `"number"`, `"ISO8601"`) |
| `description` | `str` | LLM-facing explanation of the argument |
```python title="tools/tool_registry.py"
from models.tool_definitions import ToolArgument, ToolDefinition
current_pto_tool = ToolDefinition(
name="CurrentPTO",
description="Find how much PTO a user currently has accrued. "
"Returns the number of hours and (calculated) number of days of PTO. ",
arguments=[
ToolArgument(
name="email",
type="string",
description="email address of user",
),
],
)
```
### Implement the Tool
Create a file in `tools/` with a function that accepts `args: dict` and returns a `dict`. The file name and function name should match the tool name (without the `_tool` suffix):
```python title="tools/hr/current_pto.py"
import json
from pathlib import Path
def current_pto(args: dict) -> dict:
email = args.get("email")
file_path = (
Path(__file__).resolve().parent.parent / "data" / "employee_pto_data.json"
)
if not file_path.exists():
return {"error": "Data file not found."}
data = json.load(open(file_path))
employee_list = data["theCompany"]["employees"]
for employee in employee_list:
if employee["email"] == email:
num_hours = int(employee["currentPTOHrs"])
num_days = float(num_hours / 8)
return {
"num_hours": num_hours,
"num_days": num_days,
}
return_msg = "Employee not found with email address " + email
return {"error": return_msg}
```
The return dict should match the output format shown in the goal's `example_conversation_history`.
### Register the Handler
Two registration steps are required:
**1. Add to `tools/__init__.py`** — import the function and add a case to `get_handler()`:
```python title="tools/__init__.py"
from .hr.current_pto import current_pto
def get_handler(tool_name: str):
if tool_name == "CurrentPTO":
return current_pto
# ... other tools ...
raise ValueError(f"Unknown tool: {tool_name}")
```
**2. Add to `workflows/workflow_helpers.py`** — the `is_mcp_tool()` function in this file determines whether a tool is native or MCP. Native tools are identified by successfully looking them up in `get_handler()`. As long as your tool is registered in `tools/__init__.py`, routing works automatically.
## Adding MCP Tools
### Using a Predefined Server
The demo includes predefined MCP server configurations in `shared/mcp_config.py`. To use one, pass it as the `mcp_server_definition` in your goal:
```python title="goals/stripe_mcp.py"
from typing import List
from models.tool_definitions import AgentGoal
from shared.mcp_config import get_stripe_mcp_server_definition
starter_prompt_generic = "Welcome me, give me a description of what you can do, then ask me for the details you need to do your job."
goal_mcp_stripe = AgentGoal(
id="goal_mcp_stripe",
category_tag="mcp-integrations",
agent_name="Stripe MCP Agent",
agent_friendly_description="Manage Stripe operations via MCP",
tools=[], # Will be populated dynamically
mcp_server_definition=get_stripe_mcp_server_definition(included_tools=[]),
description="Help manage Stripe operations for customer and product data by using the customers.read and products.read tools.",
starter_prompt="Welcome! I can help you read Stripe customer and product information.",
example_conversation_history="\n ".join(
[
"agent: Welcome! I can help you read Stripe customer and product information. What would you like to do first?",
"user: what customers are there?",
"agent: I'll check for customers now.",
"user_confirmed_tool_run: ",
'tool_result: { "customers": [{"id": "cus_abc", "name": "Customer A"}, {"id": "cus_xyz", "name": "Customer B"}] }',
"agent: I found two customers: Customer A and Customer B. Can I help with anything else?",
"user: what products exist?",
"agent: Let me get the list of products for you.",
"user_confirmed_tool_run: ",
'tool_result: { "products": [{"id": "prod_123", "name": "Gold Plan"}, {"id": "prod_456", "name": "Silver Plan"}] }',
"agent: I found two products: Gold Plan and Silver Plan.",
]
),
)
mcp_goals: List[AgentGoal] = [
goal_mcp_stripe,
]
```
### Custom MCP Server
Define an `MCPServerDefinition` directly in your goal:
| Field | Type | Description |
| ----------------- | ---------------- | --------------------------------------------------------- |
| `name` | `str` | Identifier for the MCP server |
| `command` | `str` | Command to start the server (e.g., `"npx"`, `"python"`) |
| `args` | `List[str]` | Command-line arguments |
| `env` | `Dict[str, str]` | *(Optional)* Environment variables for the server process |
| `connection_type` | `str` | Connection type, defaults to `"stdio"` |
| `included_tools` | `List[str]` | *(Optional)* Specific tools to use; omit to include all |
```python title="goals/my_mcp_goal.py"
import os
from models.tool_definitions import AgentGoal, MCPServerDefinition
goal_my_mcp = AgentGoal(
id="goal_my_mcp_integration",
category_tag="integrations",
agent_name="My Integration",
agent_friendly_description="Interact with my external service.",
tools=[],
description="Help the user with these tools: ...",
starter_prompt="Greet the user and help them with the integration.",
example_conversation_history="...",
mcp_server_definition=MCPServerDefinition(
name="my-mcp-server",
command="npx",
args=["-y", "@my-org/mcp-server", f"--api-key={os.getenv('MY_API_KEY')}"],
env=None,
included_tools=["list_items", "create_item"],
),
)
```
### How MCP Tools Are Routed
MCP tools are loaded automatically when the workflow starts and converted to `ToolDefinition` objects. The `is_mcp_tool()` function in `workflows/workflow_helpers.py` distinguishes native tools from MCP tools by attempting a `get_handler()` lookup — if the lookup fails, the tool is routed to the MCP server. No additional wiring is needed.
## Tool Confirmation Patterns
The demo supports three approaches for confirming tool execution before it runs:
| Approach | How It Works | Best For |
| ------------------------------ | ----------------------------------------------------------------------------------------------------------------------------------- | ------------------------------ |
| **UI confirmation box** | User clicks a confirm button before tool runs. Controlled by `SHOW_CONFIRM` env var. | General demo use |
| **Soft prompt** | Goal description instructs the LLM to ask for confirmation in conversation (e.g., "Are you ready to proceed?"). | Low-risk informational actions |
| **Hard confirmation argument** | Add a `userConfirmation` `ToolArgument` to the tool definition. The LLM must collect explicit user consent before calling the tool. | Sensitive or write operations |
For tools that take action or write data, use the hard confirmation pattern:
```python title="tools/tool_registry.py"
book_pto_tool = ToolDefinition(
name="BookPTO",
description="Book PTO start and end date. Either 1) makes calendar item, or 2) sends calendar invite to self and boss? "
"Returns a success indicator. ",
arguments=[
ToolArgument(
name="start_date",
type="string",
description="Start date of proposed PTO, sent in the form yyyy-mm-dd",
),
ToolArgument(
name="end_date",
type="string",
description="End date of proposed PTO, sent in the form yyyy-mm-dd",
),
ToolArgument(
name="email",
type="string",
description="Email address of user, used to look up current PTO",
),
ToolArgument(
name="userConfirmation",
type="string",
description="Indication of user's desire to book PTO",
),
],
)
```
## Checklist
### Adding a Goal
1. Create a goal file in `goals/` (e.g., `goals/support.py`)
2. Define the `AgentGoal` with all required fields
3. Export a list variable (e.g., `support_goals = [goal_support_ticket]`)
4. Import and extend the goal list in `goals/__init__.py`
5. Set `AGENT_GOAL` in `.env` to the goal's `id`
### Adding Native Tools
1. Define the `ToolDefinition` in `tools/tool_registry.py`
2. Implement the tool function in `tools/` (accepts `args: dict`, returns `dict`)
3. Import and add the handler to `get_handler()` in `tools/__init__.py`
4. Reference the tool in your goal's `tools` list and `description`
### Adding MCP Tools
1. Add `mcp_server_definition` to your goal (use `shared/mcp_config.py` for common servers or define a custom `MCPServerDefinition`)
2. Set any required environment variables (API keys, etc.)
3. List the MCP tools in your goal's `description` so the LLM knows about them
4. If creating reusable MCP server configs, add them to `shared/mcp_config.py`
## Next Steps
- **[Plugin Configuration](/developer-guide/temporal-python/configuration)** — Fine-tune timeouts, fail policies, and event filtering
- **[Error Handling](/developer-guide/temporal-python/error-handling)** — Handle governance decisions in your code
- **[Configure Trust Controls](/trust-lifecycle/authorize)** — Set up guardrails, policies, and behavioral rules
- **[Available Goals](/developer-guide/temporal-python/integration-walkthrough#available-goals)** — See the full list of built-in scenarios# Demo Architecture Reference
Source: https://docs.openbox.ai/developer-guide/temporal-python/demo-architecture
# Demo Architecture Reference
Quick reference for the [demo agent](https://github.com/OpenBox-AI/poc-temporal-agent) architecture. For setup, see the [Temporal Integration Guide](/developer-guide/temporal-python/integration-walkthrough). For customization, see [Extending the Demo Agent](/developer-guide/temporal-python/customizing-the-demo).
## System Layers
```mermaid
graph TB
subgraph "Client Layer"
UI[React Frontend]
end
subgraph "API Layer"
API[FastAPI Backend]
end
subgraph "Orchestration Layer"
TEMPORAL[Temporal Server]
WF[AgentGoalWorkflow]
ACT[Activities]
end
subgraph "Integration Layer"
LLM[LiteLLM]
MCP[MCP Servers]
end
subgraph "Governance Layer"
OBX[OpenBox Plugin]
end
subgraph "External Services"
PROVIDERS[LLM Providers]
APIS[Third-Party APIs]
end
UI -->|HTTP| API
API -->|Signals / Queries| TEMPORAL
TEMPORAL --> WF
WF -->|Execute| ACT
ACT -->|LLM Calls| LLM
ACT -->|Tool Calls| MCP
LLM --> PROVIDERS
MCP --> APIS
ACT --> APIS
OBX -.->|Intercepts| WF
OBX -.->|Intercepts| ACT
```
| Layer | Technology | Role |
| ----------------- | ------------------------------- | ------------------------------------------------------------- |
| **Client** | React, Vite, Tailwind | Sends messages, displays responses, shows tool confirmations |
| **API** | FastAPI | Translates HTTP requests into Temporal signals and queries |
| **Orchestration** | Temporal | Runs the agent loop, executes tools via activities |
| **Integration** | LiteLLM, MCP | Multi-provider LLM calls, external tool servers |
| **Governance** | OpenBox Plugin | Intercepts workflow and activity events for policy evaluation |
| **External** | OpenAI, Anthropic, Stripe, etc. | LLM providers and third-party APIs |
## Message Flow
1. User sends message → frontend POSTs to `/send-prompt`
2. FastAPI signals the Temporal workflow with `user_prompt`
3. Workflow calls `agent_validatePrompt` activity → LLM checks relevance to current goal
4. `generate_genai_prompt()` builds the system prompt (runs in workflow, no I/O)
5. Workflow calls `agent_toolPlanner` activity → LLM returns structured JSON
6. `next` field determines the path: `question`, `confirm`, `done`, or `pick-new-goal`
7. If `confirm` → frontend shows confirmation dialog → user clicks → POSTs to `/confirm`
8. Workflow calls `dynamic_tool_activity` → native handler or MCP server
9. Tool result added to conversation history → loop back to step 4
```mermaid
sequenceDiagram
participant U as User
participant F as Frontend
participant A as FastAPI
participant W as Workflow
participant Act as Activity
participant L as LLM
U->>F: Type message
F->>A: POST /send-prompt
A->>W: signal(user_prompt)
W->>Act: validate_prompt()
Act->>L: Is this relevant?
L-->>Act: Valid
W->>Act: tool_planner()
Act->>L: What should we do?
L-->>Act: {next: "confirm", tool: "CurrentPTO", args: {...}}
W->>W: Update conversation history
F->>A: GET /get-conversation-history
A->>W: query(get_conversation_history)
W-->>F: History with agent response
F-->>U: Display response + confirm button
U->>F: Click confirm
F->>A: POST /confirm
A->>W: signal(confirm)
W->>Act: execute_tool("CurrentPTO", args)
Act-->>W: Tool result
W->>W: Add result to history, loop back to planner
```
## Workflow
`AgentGoalWorkflow` in `workflows/agent_goal_workflow.py` — the main state machine that drives the agent.
### Signals
| Signal | Purpose |
| ------------- | ------------------------------------------------ |
| `user_prompt` | Delivers the user's message to the workflow |
| `confirm` | Tells the workflow the user approved a tool call |
| `end_chat` | Terminates the conversation |
### Queries
| Query | Returns |
| -------------------------- | --------------------------------------------- |
| `get_conversation_history` | Full conversation as `ConversationHistory` |
| `get_agent_goal` | Current goal configuration as `AgentGoal` |
| `get_latest_tool_data` | Pending tool call data (if any) as `ToolData` |
### Continue-as-New
After 250 turns (`MAX_TURNS_BEFORE_CONTINUE`), the workflow starts a fresh execution, passing along the conversation summary and current state.
## Activities
Temporal requires workflow code to be deterministic — no network calls, randomness, or clock reads. All I/O runs as activities.
| Activity | File | Purpose |
| ----------------------- | ------------------------------- | --------------------------------------------------------------------------- |
| `agent_toolPlanner` | `activities/tool_activities.py` | Calls LLM via LiteLLM, returns structured JSON with the agent's next action |
| `agent_validatePrompt` | `activities/tool_activities.py` | Calls LLM to check if the user's message is relevant to the current goal |
| `dynamic_tool_activity` | `activities/tool_activities.py` | Dispatches tool calls to native handlers or MCP servers |
## LLM Response Format
`agent_toolPlanner` returns a structured JSON response from the LLM:
```json
{
"response": "I'll look up your PTO balance. Can you confirm?",
"next": "confirm",
"tool": "CurrentPTO",
"args": { "email": "bob@example.com" }
}
```
| Field | Type | Description |
| ---------- | ---------------- | ------------------------------- |
| `response` | `string` | Agent's message to the user |
| `next` | `string` | Next step — see values below |
| `tool` | `string | null` | Tool to execute (if applicable) |
| `args` | `object | null` | Tool arguments (if applicable) |
### `next` Values
| Value | Meaning |
| --------------- | ---------------------------------------------------------- |
| `question` | Agent needs more information — waits for next user message |
| `confirm` | Agent wants to run a tool — waits for user confirmation |
| `done` | Task complete — agent gives a final response |
| `pick-new-goal` | User wants to switch to a different agent/scenario |
## Prompt Generation
`generate_genai_prompt()` in `prompts/agent_prompt_generators.py` builds the system prompt. Runs directly in the workflow (deterministic, no I/O).
| Component | Source |
| ---------------------- | ---------------------------------------------------------- |
| Agent role and persona | Hardcoded in prompt template |
| Goal description | `agent_goal.description` |
| Tool definitions | `agent_goal.tools` — name, description, arguments per tool |
| Conversation history | `conversation_history` — full message list |
| Response format schema | JSON schema enforcing `{response, next, tool, args}` |
| Example interactions | `agent_goal.example_conversation_history` |
## Tool Dispatch
`dynamic_tool_activity` routes tool calls based on handler lookup:
| Step | Logic |
| --------------- | ---------------------------------------------------------------------------------------------------------------------- |
| 1. Native check | `get_handler(tool_name)` in `tools/__init__.py` — if found, call handler directly |
| 2. MCP fallback | If `get_handler()` raises `ValueError`, start MCP server as stdio subprocess → `ClientSession` → `session.call_tool()` |
Both paths execute as Temporal activities — OpenBox automatically intercepts and governs them.
## API Endpoints
FastAPI layer in `api/main.py`:
| Method | Endpoint | Purpose |
| ------ | --------------------------- | -------------------------------------------------------------------- |
| `POST` | `/send-prompt` | Send a user message — starts the workflow if needed, then signals it |
| `POST` | `/confirm` | Signal tool confirmation |
| `POST` | `/end-chat` | Signal chat end |
| `POST` | `/start-workflow` | Start the workflow with the goal's starter prompt |
| `GET` | `/get-conversation-history` | Query conversation history from the running workflow |
| `GET` | `/tool-data` | Query current pending tool call data |
| `GET` | `/agent-goal` | Query current goal configuration |
The frontend polls `/get-conversation-history` to pick up new messages.
## OpenBox Governance
`OpenBoxPlugin` in `scripts/run_worker.py` adds governance interceptors to the Temporal worker.
| Capability | Detail |
| ------------------ | ------------------------------------------------------------------------ |
| Workflow events | Intercepts start, complete, fail, and signal events |
| Activity execution | Captures inputs and outputs of every activity |
| HTTP capture | OpenTelemetry instrumentation records outbound requests with full bodies |
| Policy evaluation | Each event evaluated against configured policies on the platform |
| Decisions | Every event gets a governance decision — approved, blocked, or flagged |
:::tip Zero agent-side code
All governance evaluation happens on the platform side, not in the agent code. The agent is unaware of what policies are configured — it just runs, and OpenBox observes and enforces.
:::
## Key Files
| Path | Purpose |
| ------------------------------------ | --------------------------------------------------------------------------------- |
| `scripts/run_worker.py` | Worker bootstrap — `OpenBoxPlugin` integration point |
| `api/main.py` | FastAPI endpoints — HTTP bridge to Temporal |
| `workflows/agent_goal_workflow.py` | `AgentGoalWorkflow` — main state machine |
| `workflows/workflow_helpers.py` | `is_mcp_tool()`, continue-as-new logic, tool dispatch helpers |
| `activities/tool_activities.py` | LLM activities, tool execution, MCP dispatch |
| `prompts/agent_prompt_generators.py` | `generate_genai_prompt()` — system prompt builder |
| `tools/__init__.py` | `get_handler()` — native tool registry |
| `tools/tool_registry.py` | `ToolDefinition` instances for each native tool |
| `goals/` | Goal definitions — one file per category |
| `goals/__init__.py` | Aggregates all goals into a single registry |
| `models/tool_definitions.py` | Dataclasses: `AgentGoal`, `ToolDefinition`, `ToolArgument`, `MCPServerDefinition` |
| `shared/mcp_config.py` | Predefined MCP server configurations |# Troubleshooting
Source: https://docs.openbox.ai/developer-guide/temporal-python/troubleshooting
# Troubleshooting
Common issues and solutions when integrating with OpenBox.
---
## Worker Not Connecting to OpenBox
Check that your environment variables are set:
```bash
[ -n "$OPENBOX_URL" ] && echo "OPENBOX_URL is set" || echo "OPENBOX_URL is NOT set"
[ -n "$OPENBOX_API_KEY" ] && echo "OPENBOX_API_KEY is set" || echo "OPENBOX_API_KEY is NOT set"
```
Verify step by step:
1. Confirm `OPENBOX_URL` and `OPENBOX_API_KEY` are set in the worker environment
2. Start the worker and check logs for OpenBox initialization errors
3. Trigger a workflow and confirm a session appears in the OpenBox dashboard
---
## No Sessions in Dashboard
If sessions don't appear after running a workflow:
1. Ensure the worker is running and connected to OpenBox (check for `OpenBox SDK initialized successfully` in the worker logs)
2. Confirm the workflow completed — check the Temporal UI at
3. Verify the API key matches the agent registered in OpenBox
---
## Governance Blocks or Stops Your Agent
When a behavioral rule or policy triggers, the plugin raises a `GovernanceStop` exception. This is expected — it means governance is working.
To investigate:
1. Open the [OpenBox Dashboard](https://platform.openbox.ai)
2. Go to your agent → **Overview** tab
3. Open the session to see which rule triggered the block
See **[Error Handling](/developer-guide/temporal-python/error-handling)** for how to handle `GovernanceStop` and other trust exceptions in your code.
---
## Approval Requests Not Appearing
If your agent is paused waiting for approval but nothing shows in the **Approvals** page:
1. Confirm the behavioral rule is set to **Require Approval** (not Block)
2. Check that the agent's trust tier matches the rule conditions
3. Verify the approval timeout hasn't already expired
See **[Approvals](/approvals)** for how the approval queue works.
---
## LLM API Errors
The demo uses [LiteLLM](https://docs.litellm.ai/docs/providers) for model routing. The `LLM_MODEL` format is `provider/model-name`.
Common models:
| Provider | Example `LLM_MODEL` value |
| --------- | -------------------------------------- |
| OpenAI | `openai/gpt-4o` |
| Anthropic | `anthropic/claude-sonnet-4-5-20250929` |
| Google AI | `gemini/gemini-2.0-flash` |
If you're seeing LLM errors, check that `LLM_MODEL` and `LLM_KEY` are correct in your `.env`.
To test your LLM configuration, run this from your project directory:
```bash
uv run python3 -c "
import os
from dotenv import load_dotenv
load_dotenv()
from litellm import completion
response = completion(
model=os.getenv('LLM_MODEL'),
api_key=os.getenv('LLM_KEY'),
messages=[{'role': 'user', 'content': 'test'}]
)
print(response.choices[0].message.content)
"
```
```bash
# Activate your virtual environment first
# source .venv/bin/activate
python3 -c "
import os
from dotenv import load_dotenv
load_dotenv()
from litellm import completion
response = completion(
model=os.getenv('LLM_MODEL'),
api_key=os.getenv('LLM_KEY'),
messages=[{'role': 'user', 'content': 'test'}]
)
print(response.choices[0].message.content)
"
```
Use the `LLM_MODEL` and `LLM_KEY` values from your `.env`. See the [LiteLLM providers list](https://docs.litellm.ai/docs/providers) for supported models and formats.
---
## Temporal Server Not Running
If the worker can't connect to Temporal:
```
Connection refused: localhost:7233
```
Start the Temporal dev server:
```bash
temporal server start-dev
```
The Temporal UI will be available at .# Event Types
Source: https://docs.openbox.ai/developer-guide/event-types
# Event Types
OpenBox classifies agent operations into 24 semantic event types. These types enable precise policy writing and meaningful analytics.
## Event Categories
### LLM Operations
| Type | Description | Risk Level |
| --------------- | ------------------------------------------ | ---------- |
| `LLM_CALL` | Call to language model for completion/chat | Medium |
| `LLM_EMBEDDING` | Generate embeddings from text | Low |
### Data Operations
| Type | Description | Risk Level |
| ---------------- | ------------------------------------ | ----------- |
| `DATABASE_READ` | Read from database | Low-Medium |
| `DATABASE_WRITE` | Write/update/delete database records | Medium-High |
| `FILE_READ` | Read from filesystem | Low-Medium |
| `FILE_WRITE` | Write to filesystem | Medium-High |
| `CACHE_READ` | Read from cache layer | Low |
| `CACHE_WRITE` | Write to cache layer | Low |
### External Operations
| Type | Description | Risk Level |
| ------------------- | ------------------------------- | ----------- |
| `EXTERNAL_API_CALL` | Call to external API | Medium-High |
| `WEBHOOK_SEND` | Send webhook to external system | Medium-High |
| `EMAIL_SEND` | Send email | Medium |
### Messaging Operations
| Type | Description | Risk Level |
| ----------------------- | -------------------------- | ---------- |
| `MESSAGE_QUEUE_SEND` | Publish to message queue | Medium |
| `MESSAGE_QUEUE_RECEIVE` | Consume from message queue | Low |
### Authentication Operations
| Type | Description | Risk Level |
| -------------- | ------------------------------------ | ---------- |
| `AUTH_REQUEST` | Request authentication/authorization | Low |
| `AUTH_GRANT` | Authentication granted | Low |
| `AUTH_DENY` | Authentication denied | Low |
### Workflow Operations
| Type | Description | Risk Level |
| ------------------- | ------------------------- | ---------- |
| `WORKFLOW_START` | Workflow execution begins | Low |
| `WORKFLOW_COMPLETE` | Workflow execution ends | Low |
| `ACTIVITY_START` | Activity execution begins | Low |
| `ACTIVITY_COMPLETE` | Activity execution ends | Low |
### Agent Operations
| Type | Description | Risk Level |
| ------------------- | ------------------------------- | ---------- |
| `AGENT_GOAL_SET` | Agent goal defined | Low |
| `AGENT_GOAL_UPDATE` | Agent goal modified | Medium |
| `AGENT_DECISION` | Agent makes autonomous decision | Medium |
| `AGENT_ACTION` | Agent takes action | Variable |
## Using Event Types
### In Policies
Reference event types in OPA policies:
```rego
package openbox
import rego.v1
default result := {"decision": "CONTINUE", "reason": ""}
# Allow all read operations
result := {"decision": "CONTINUE", "reason": "Database read allowed"} if {
input.operation.type == "DATABASE_READ"
}
# Require approval for external calls
result := {"decision": "REQUIRE_APPROVAL", "reason": "External API calls require review"} if {
input.operation.type == "EXTERNAL_API_CALL"
}
# Block file writes for low-trust agents
result := {"decision": "BLOCK", "reason": "File writes blocked for lower-tier agents"} if {
input.operation.type == "FILE_WRITE"
input.agent.trust_tier >= 3
}
```
### In Monitoring
Filter sessions by event type:
- View all `EXTERNAL_API_CALL` events
- Track `DATABASE_WRITE` frequency
- Alert on `AUTH_DENY` spikes
## Event Metadata
Each event includes:
```json
{
"event_id": "evt_abc123",
"type": "DATABASE_WRITE",
"timestamp": "2026-02-26T09:14:32.001Z",
"session_id": "ses_xyz789",
"agent_id": "agt_def456",
"target": "customers.update",
"parameters": {
"table": "customers",
"operation": "update",
"record_count": 1
},
"governance": {
"decision": "ALLOW",
"policies_evaluated": ["default", "customer-data"],
"trust_score_at_time": 87
},
"telemetry": {
"duration_ms": 45,
"trace_id": "abc123def456"
}
}
```
## Related
- **[Troubleshooting](/developer-guide/temporal-python/troubleshooting)** - Common issues and solutions when integrating
- **[Governance Decisions](/core-concepts/governance-decisions)** - What decisions can be made for each event
- **[Authorize Phase](/trust-lifecycle/authorize)** - Write policies that reference event types# Working with llms.txt
Source: https://docs.openbox.ai/developer-guide/llms-txt
# Working with llms.txt
OpenBox publishes its documentation in machine-readable formats following the [llms.txt specification](https://llmstxt.org/). If you're building AI agents, coding assistants, or tooling that needs to understand OpenBox, these files give you structured access to everything without scraping HTML.
## Why llms.txt Matters
Traditional documentation is designed for human consumption — rendered HTML pages filled with navigation, JavaScript-powered tabs, and collapsed sections. LLMs and AI tools work better with structured, complete text they can process directly. The llms.txt format addresses several key challenges:
- **Context optimization** — Get complete documentation in a single request, no multi-page scraping or API orchestration required
- **Accuracy** — Give your LLM authoritative source material to reference, reducing hallucinations about OpenBox concepts and APIs
- **Efficiency** — Pre-processed markdown means fewer tokens wasted on HTML artifacts, navigation chrome, and formatting noise
- **Consistency** — Every request returns the same up-to-date content, so your AI tools always work from the latest documentation
## Available Resources
| Resource | URL | Purpose |
| --------------- | --------------------------------------------- | ------------------------------------------------------- |
| `llms.txt` | [`/llms.txt`](pathname:///llms.txt) | Discover what's available, find the right page to fetch |
| `llms-full.txt` | [`/llms-full.txt`](pathname:///llms-full.txt) | Load the entire documentation corpus at once |
| `llms-ctx.txt` | [`/llms-ctx.txt`](pathname:///llms-ctx.txt) | Load core docs into a single LLM context window |
| `*.md` files | Append `.md` to any doc URL | Fetch a single page as plain text markdown |
### llms.txt — The Index
The [`llms.txt`](pathname:///llms.txt) file is a structured table of contents with a short description after each link, so an LLM can decide whether to fetch the full page:
```
## Core Concepts
- [Trust Scores](https://docs.openbox.ai/core-concepts/trust-scores.md): How OpenBox quantifies agent trustworthiness
- [Trust Tiers](https://docs.openbox.ai/core-concepts/trust-tiers.md): Tiered classification of agent trust levels
```
It opens with a platform summary that gives an LLM enough context to answer basic questions about OpenBox without fetching any additional pages.
### llms-full.txt — The Full Corpus
The [`llms-full.txt`](pathname:///llms-full.txt) file contains every documentation page in a single markdown file. Each section includes a source URL for attribution. All HTML, JSX, and frontmatter is stripped — what remains is clean, parseable markdown.
Use this when you want to load everything at once: populating a vector store, building a RAG pipeline, or giving an agent complete context about the platform.
### llms-ctx.txt — Context-Sized Corpus
The [`llms-ctx.txt`](pathname:///llms-ctx.txt) file packages the core documentation into a single structured file sized for an LLM context window. Use it when you want an LLM to have broad knowledge of OpenBox without fetching individual pages.
It covers Getting Started, Core Concepts, Trust Lifecycle, Developer Guide, and Dashboard. If you need the complete corpus including administration and reference material, use [`llms-full.txt`](pathname:///llms-full.txt) instead. To selectively fetch individual pages, start with [`llms.txt`](pathname:///llms.txt).
### Plain Text Markdown Files
Every documentation page is available as plain text markdown by appending `.md` to its URL:
| HTML page | Plain text |
| ------------------------------------------------ | --------------------------------------------------- |
| `/core-concepts/trust-scores` | `/core-concepts/trust-scores.md` |
| `/developer-guide/temporal-python/sdk-reference` | `/developer-guide/temporal-python/sdk-reference.md` |
These are the files linked from `llms.txt`. This format is preferable to scraping or copying from the rendered HTML pages because:
- **Fewer tokens** — No navigation, script tags, or styling markup
- **Complete content** — Tabbed panels and collapsed sections are fully expanded in the markdown
- **Preserved structure** — Headings, lists, and tables remain intact, helping LLMs understand context and hierarchy
## Integrating with AI Tools
### IDE Assistants
Add `https://docs.openbox.ai/llms.txt` as a documentation source in Cursor, Windsurf, or any IDE tool that supports the llms.txt standard. The tool will use the index to pull relevant pages into context as you work.
### Custom Agents
For agents that need to answer questions about OpenBox:
1. Fetch [`/llms.txt`](pathname:///llms.txt) to get the index
2. Match the user's question against the link descriptions
3. Fetch the individual `.md` files for the most relevant pages
This two-step approach keeps token usage low while still giving the agent access to the full documentation when needed.
## Learn More
- [llms.txt specification](https://llmstxt.org/) — The community standard behind the format# Dashboard
Source: https://docs.openbox.ai/dashboard/
# Dashboard
The Dashboard provides a real-time overview of your organization's AI governance health. Access it from the sidebar by clicking **Dashboard**.
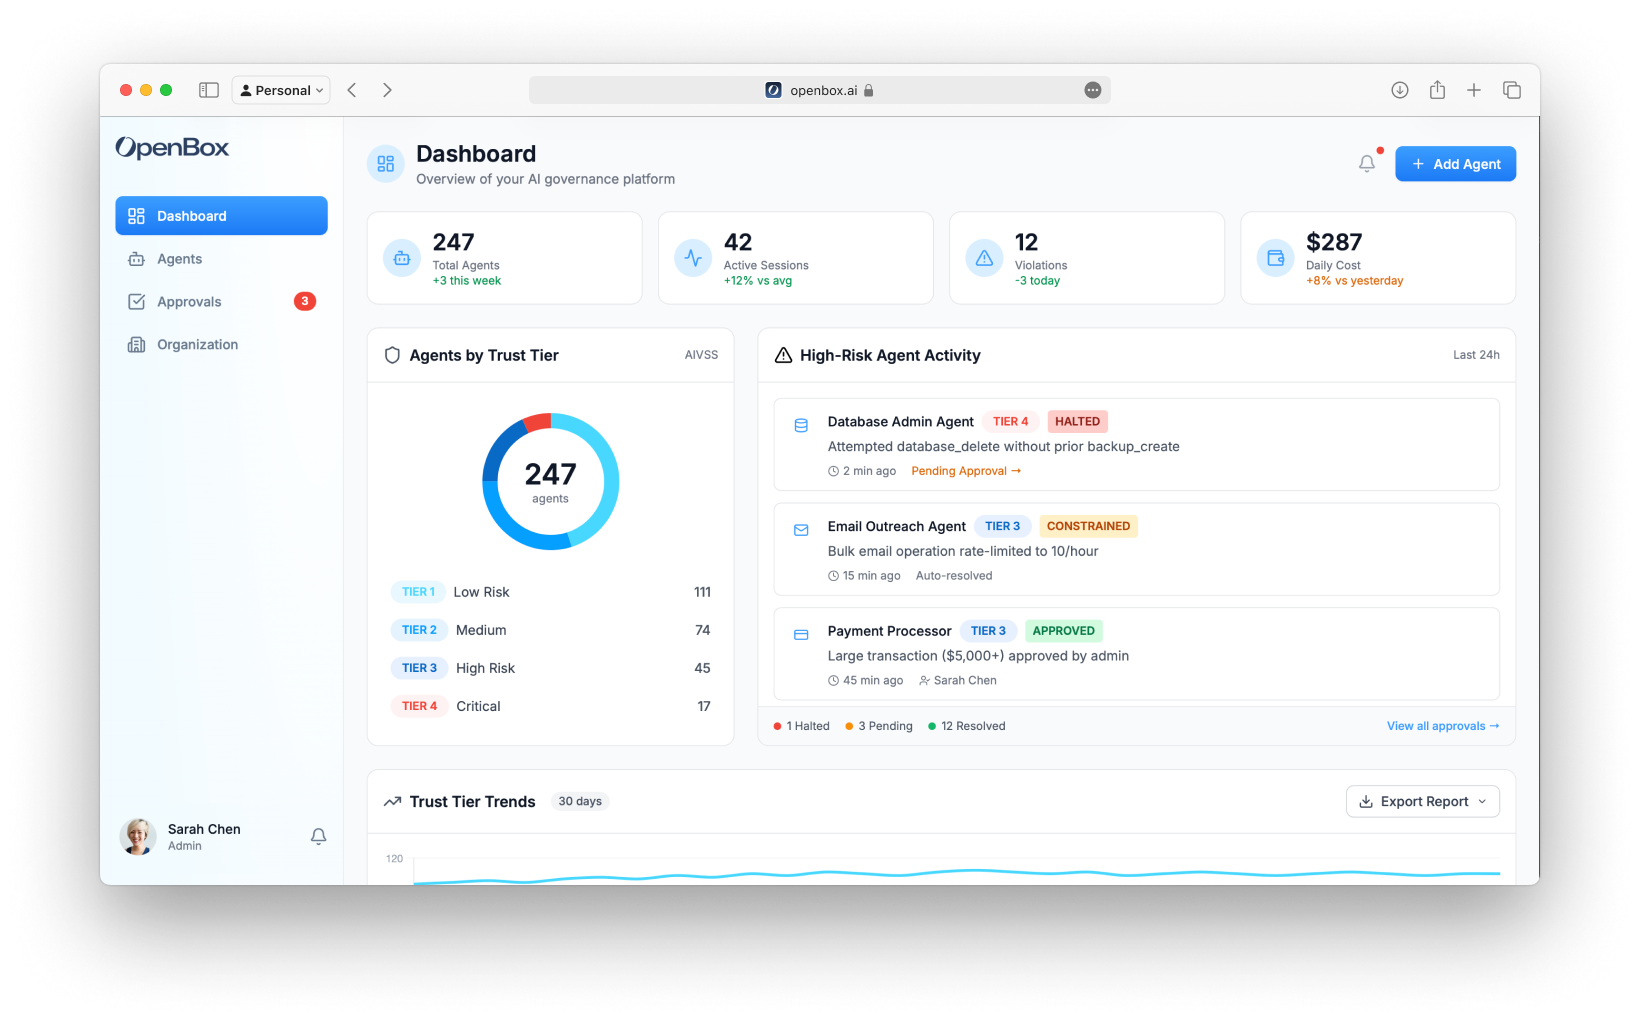
## Navigation
The sidebar navigation includes:
- **Dashboard** - Organization overview (this page)
- **Agents** - Manage and monitor agents
- **Approvals** - Human-in-the-loop queue (shows pending count badge)
- **Organization** - Teams, members, API keys, settings
## Hero Stats
The top of the dashboard displays four key performance indicators:
| Metric | Description |
| ------------------- | ---------------------------------------------- |
| **Total Agents** | Number of registered agents with weekly change |
| **Active Sessions** | Currently running workflow sessions |
| **Violations** | Policy violations in the selected time period |
| **Daily Cost** | Estimated daily token/API usage costs |
## Agents by Trust Tier
A donut chart showing the distribution of agents across Trust Tiers:
| Tier | Risk Level | Description |
| ---------------------------------------- | ---------- | ------------------------------------- |
| **Tier 1 (0% – 24%): Trusted - Green** | Low | Highly trusted, minimal constraints |
| **Tier 2 (25% – 49%): Confident - Blue** | Medium | Standard policies, normal monitoring |
| **Tier 3 (50% – 74%): Monitor - Orange** | High | Enhanced controls, some HITL required |
| **Tier 4 (75% – 100%): Restrict - Red** | Critical | Strict governance, frequent HITL |
Click any tier in the legend to filter the agents list.
## High-Risk Agent Activity
A timeline of recent governance events from Tier 3 and Tier 4 agents:
Each activity shows:
- **Agent name and icon**
- **Trust Tier badge** (TIER 3, TIER 4)
- **Verdict badge** (ALLOWED, HALTED, APPROVED)
- **Description** of what triggered the governance event
- **Timestamp**
- **Link to approvals** (if pending)
Example events:
- "Attempted database_delete without prior backup_create" → HALTED
- "Large transaction ($5,000+) approved by admin" → APPROVED
## Trust Tier Trends
A 30-day line chart showing how your trust tier distribution has changed over time. Use this to identify:
- Improving governance (more agents moving to Tier 1/2)
- Emerging risks (agents moving to Tier 3/4)
- Seasonal patterns in agent behavior
### Export Reports
Click **Export Report** to download:
- **CSV** - Raw data for analysis
- **PDF** - Formatted report for stakeholders
## Adding Agents
Click the **Add Agent** button (top right) to register a new agent.
The agent creation form includes:
- **Teams** and **Icon** selection
- **API Key Generation** (copy once)
- **Initial Risk Assessment** (**[Risk Profile](/trust-lifecycle/assess)**)
- **Attestation** (**[Execution Evidence](/administration/attestation-and-cryptographic-proof)**)
See **[Registering Agents](/dashboard/agents/registering-agents)** for a field-by-field walkthrough.
## Next Steps
From the Dashboard, you'll typically:
1. **[View Agents](/dashboard/agents)** - Click an agent to see its details and configure trust controls
2. **[Handle Approvals](/approvals)** - Review pending HITL requests when the badge shows pending items
3. **[Add a New Agent](/dashboard/agents/registering-agents)** - Register another agent to bring under the trust layer# Agents
Source: https://docs.openbox.ai/dashboard/agents/
# Agents
Agents are the core entity in OpenBox. Each agent represents an AI system (workflow, assistant, or autonomous process) that OpenBox governs.
Access the agent list from the sidebar by clicking **Agents**.
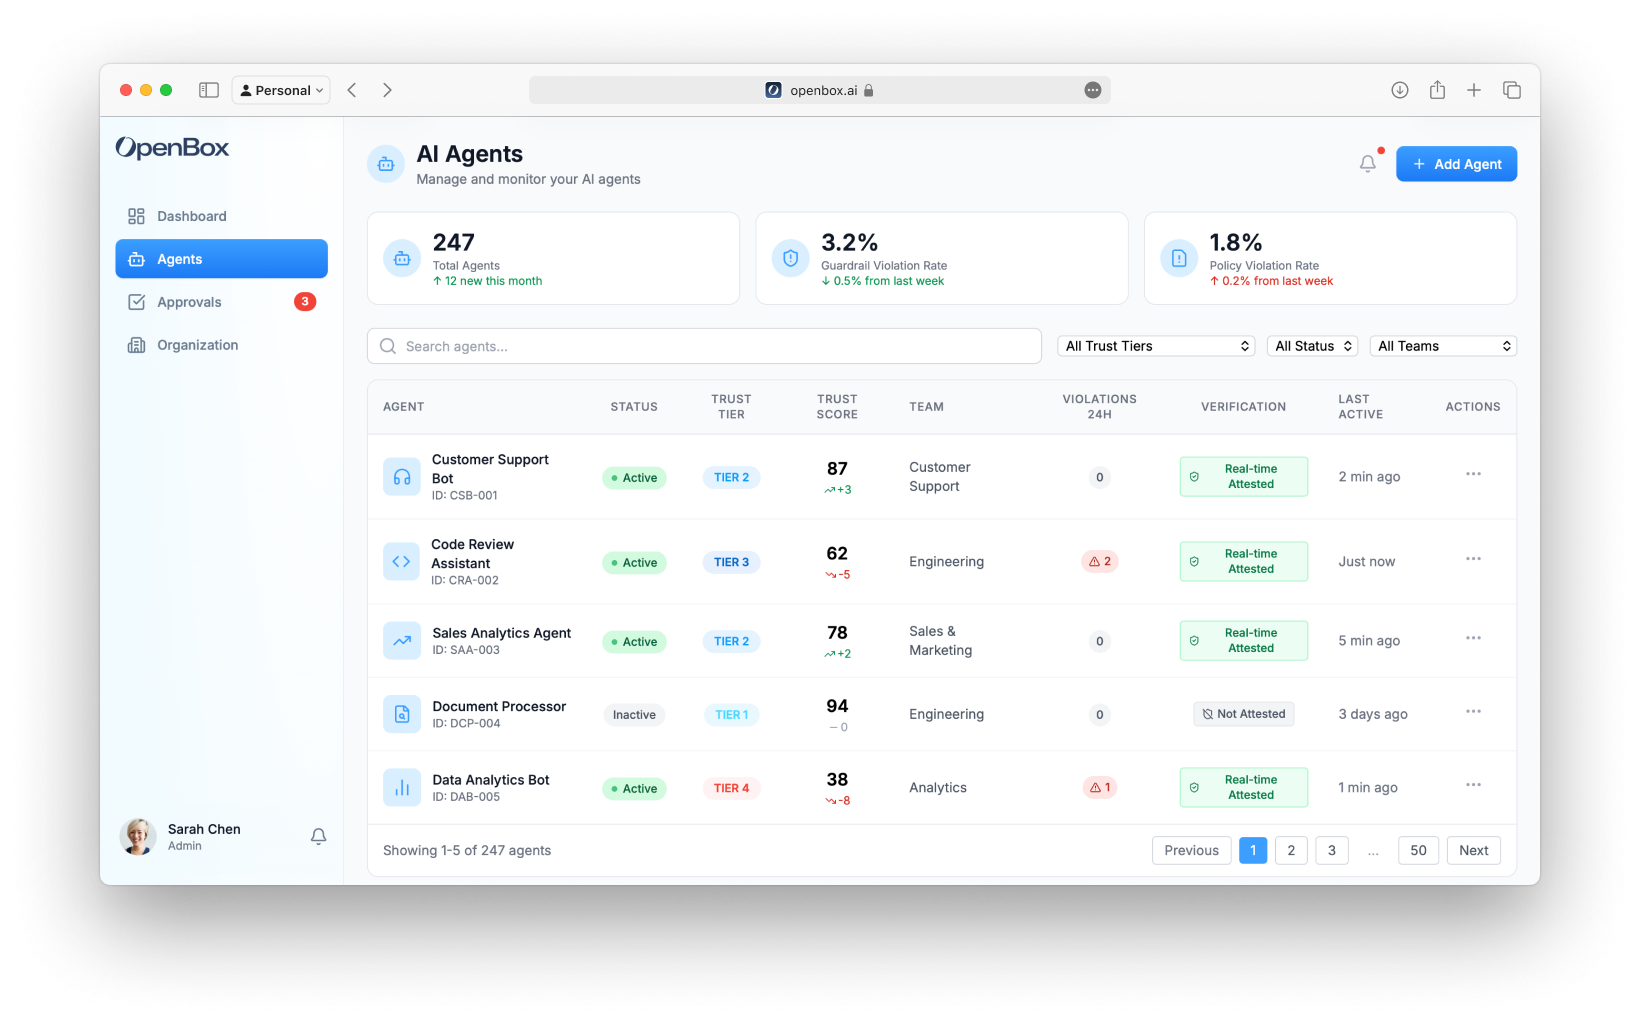
## Stats Cards
The top of the page shows three key metrics:
| Metric | Description |
| ---------------------------- | ---------------------------------------------- |
| **Total Agents** | Total registered agents with monthly change |
| **Guardrail Violation Rate** | Percentage of operations blocked by guardrails |
| **Policy Violation Rate** | Percentage of operations blocked by policies |
## Search and Filters
Filter the agent list using:
- **Search** - Find agents by name or ID
- **Trust Tier** - Filter by Tier 1, 2, 3, or 4
- **Status** - Active, Inactive, or Revoked
- **Team** - Filter by owning team
## Agent Table
The main table displays:
| Column | Description |
| ------------------ | ---------------------------------------------- |
| **Agent** | Name, icon, and ID |
| **Status** | Active (green pulse), Inactive, or Revoked |
| **Trust Tier** | TIER 1, TIER 2, TIER 3, or TIER 4 badge |
| **Trust Score** | Current 0-100 score with trend indicator (↑/↓) |
| **Team** | Owning team |
| **Violations 24h** | Number of violations in the last 24 hours |
| **Verification** | Real-time attestation status |
| **Last Active** | Time since last activity |
| **Actions** | Menu for View Details, Settings |
### Status Indicators
| Status | Indicator |
| ------------ | ---------------------------- |
| **Active** | Green badge with pulsing dot |
| **Inactive** | Gray badge |
| **Revoked** | Red badge |
### Trust Tier Badges
| Tier | Color | Description |
| ---------- | ------ | ----------------------------------------------------------------------------- |
| **TIER 1** | Green | Tier 1 (0% – 24%): Trusted — Minimal oversight, broad permissions |
| **TIER 2** | Blue | Tier 2 (25% – 49%): Confident — Standard controls, approval for sensitive ops |
| **TIER 3** | Orange | Tier 3 (50% – 74%): Monitor — Strict controls, monitoring required |
| **TIER 4** | Red | Tier 4 (75% – 100%): Restrict — Minimal permissions, approval for most ops |
## Agent Actions
Click the **⋮** menu on any row to:
- **View Details** - Navigate to agent detail page
- **[Settings](/dashboard/agents/agent-settings)** - Go directly to agent settings
Or click anywhere on the row to view the agent detail.
## Adding Agents
Click the **Add Agent** button (top right) to register a new agent. See [Registering Agents](/dashboard/agents/registering-agents) for details.
## Agent Detail Page
Click any agent to view its detail page with these tabs:
- **[Overview](/trust-lifecycle/overview)** - Active sessions, completed, failed, and halted sessions
- **[Assess](/trust-lifecycle/assess)** - Risk profile configuration
- **[Authorize](/trust-lifecycle/authorize)** - Guardrails, policies, and behavioral rules
- **[Monitor](/trust-lifecycle/monitor)** - Operational dashboard and telemetry
- **[Verify](/trust-lifecycle/verify)** - Goal alignment and drift detection
- **[Adapt](/trust-lifecycle/adapt)** - Trust evolution and policy suggestions
- **[Settings](/dashboard/agents/agent-settings)** - Agent configuration, risk profile, API keys, and lifecycle management
## Next Steps
1. **[Register a New Agent](/dashboard/agents/registering-agents)** - Add a new agent to OpenBox
2. **[Trust Overview](/dashboard/trust-overview)** - View trust scores and trends across all agents# Registering Agents
Source: https://docs.openbox.ai/dashboard/agents/registering-agents
# Registering Agents
Every AI agent you want to govern with OpenBox needs to be registered first. Registration creates the agent entity in the platform, generates an API key for SDK authentication, and sets the initial risk profile that determines how strictly OpenBox governs the agent's behavior.
## Quick Steps
1. **Log in** to the [OpenBox Dashboard](https://platform.openbox.ai)
2. Navigate to **Agents** → Click **Add Agent**
3. Configure the agent:
- **Workflow Engine**: Temporal
- **Agent Name**: Your agent name (e.g., "Customer Support Agent")
- **Description**: What your agent does
- **Teams**: Assign to one or more teams
- **Icon**: Select an icon
4. **Generate API Key** — Click **Generate API Key**, copy and store it (shown only once)
5. Configure **Initial Risk Assessment** and **Attestation** (see details below)
6. Click **Add Agent**
:::tip
Your API key format: `obx_live_xxxxxxxxxxxx` — store it securely, you won't see it again.
:::
## Detailed Configuration
Navigate to **Agents** and click the **Add Agent** button in the top right corner.
### Workflow Engine
Select the workflow engine your agent uses:
| Engine | Status |
| ------------- | ----------- |
| **Temporal** | Available |
| **n8n** | Coming soon |
| **LangChain** | Coming soon |
### Agent Information
| Field | Required | Description |
| --------------- | -------- | ------------------------------------------------------------------- |
| **Agent Name** | Yes | Human-readable name (e.g., "Customer Support Agent") |
| **Agent ID** | Auto | Auto-generated unique identifier (e.g., "CSB-001") |
| **Description** | No | What does this agent do? |
| **Teams** | No | Assign to teams for access control |
| **Icon** | No | Visual identifier (headphones, code, trending-up, file-search, bot) |
:::tip
All of these fields can be edited after creation from the [Agent Settings](/dashboard/agents/agent-settings#general-settings) page.
:::
### API Key Generation
Every agent needs an API key to authenticate with OpenBox:
1. Click **Generate API Key**
2. Copy the key immediately
3. Store it securely — you won't see it again
The key format is: `obx_live_xxxxxxxxxxxx`
### Initial Risk Assessment
Expand the **Initial Risk Assessment** section and configure your agent's risk profile parameters
#### Risk Profile Presets
Select a preset that matches your agent's intended use:
| Risk Tier | Risk Level | Risk Profile Score | Use Cases | Default Governance |
| ---------- | ---------- | ------------------ | ------------------------------------- | -------------------------- |
| **Tier 1** | Low | 0% – 24% | Read-only, public data access | Fully autonomous |
| **Tier 2** | Medium | 25% – 49% | Internal data, non-critical actions | Mostly autonomous |
| **Tier 3** | High | 50% – 74% | PII, financial data, critical actions | Approval for sensitive ops |
| **Tier 4** | Critical | 75% – 100% | System admin, destructive actions | HITL for most operations |
#### Risk Profile Parameters
The Risk Profile evaluates risk across three categories:
##### Base Security (25% weight)
| Parameter | Options |
| ----------------------- | -------------------------------------------------- |
| **Attack Vector** | Network (1), Adjacent (2), Local (3), Physical (4) |
| **Attack Complexity** | Low (1), High (2) |
| **Privileges Required** | None (1), Low (2), High (3) |
| **User Interaction** | None (1), Required (2) |
| **Scope** | Unchanged (1), Changed (2) |
##### AI-Specific (45% weight)
| Parameter | Options |
| ------------------------ | ---------------------------------------------------------- |
| **Model Robustness** | Very High (1), High (2), Medium (3), Low (4), Very Low (5) |
| **Data Sensitivity** | Very High (1), High (2), Medium (3), Low (4), Very Low (5) |
| **Ethical Impact** | Very High (1), High (2), Medium (3), Low (4), Very Low (5) |
| **Decision Criticality** | Very High (1), High (2), Medium (3), Low (4), Very Low (5) |
| **Adaptability** | Very High (1), High (2), Medium (3), Low (4), Very Low (5) |
##### Impact (30% weight)
| Parameter | Options |
| -------------------------- | ----------------------------------------------------- |
| **Confidentiality Impact** | None (1), Low (2), Medium (3), High (4), Critical (5) |
| **Integrity Impact** | None (1), Low (2), Medium (3), High (4), Critical (5) |
| **Availability Impact** | None (1), Low (2), Medium (3), High (4), Critical (5) |
| **Safety Impact** | None (1), Low (2), Medium (3), High (4), Critical (5) |
#### Predicted Risk Tier
As you configure Risk Profile parameters, the form shows a real-time prediction:
```
Predicted Risk Tier: TIER 2
Based on current configuration
```
See **[Assess](/trust-lifecycle/assess)** for how the Risk Profile impacts Trust Score.
### Attestation
In the **Attestation** section, configure cryptographic signing for audit-grade evidence.
For now, use **AWS KMS** (recommended/default):
1. Select **AWS KMS**
2. Keep the default settings
See **[Attestation](/administration/attestation-and-cryptographic-proof)** for how execution evidence is produced and verified.
### Creating the Agent
1. Review all fields
2. Ensure you've copied the API key
3. Click **Add Agent**
You'll be redirected to the new agent's detail page.
## Next Steps
Now that you have an agent and API key:
- **[Wrap an Existing Agent](/getting-started/temporal/wrap-an-existing-agent)** — Already have a Temporal agent? Add the OpenBox trust layer
- **[Run the Demo](/getting-started/temporal/run-the-demo)** — Clone the demo repo and see governance in action
- **[Agents](/dashboard/agents)** — View and manage all registered agents# Agent Settings
Source: https://docs.openbox.ai/dashboard/agents/agent-settings
# Agent Settings
The **Settings** tab on an agent's detail page lets you manage every aspect of the agent after it has been registered. Open it by navigating to **Agents → select an agent → Settings**, or by choosing **Settings** from the **⋮** actions menu in the agent table.
Settings is divided into four sections: [General](#general-settings), [Risk Configuration](#risk-configuration), [API Access](#api-access), and [Danger Zone](#danger-zone).
## General Settings
Use this section to update the core identity and organizational assignment of the agent.
| Field | Description |
| --------------- | --------------------------------------------------------------------------- |
| **Agent Icon** | Change the icon from the built-in library or upload a custom image |
| **Agent Name** | Editable display name shown throughout the dashboard |
| **Description** | Free-text summary of what the agent does |
| **Teams** | Multi-select dropdown to assign the agent to one or more teams |
| **Agent DID** | Read-only decentralized identifier (`did:openbox:agent:...`). Click to copy |
| **Tags** | Add freeform tags for filtering and organization |
Click **Save Changes** to persist any edits.
:::tip
You can reassign an agent to different teams at any time from this section — you are not limited to the team chosen during [registration](/dashboard/agents/registering-agents).
:::
## Risk Configuration
This section displays the agent's current risk posture as determined by the [Risk Profile](/trust-lifecycle/assess) parameters.
At a glance you can see:
- **Trust Tier badge** — the agent's current tier (e.g. TIER 2)
- **Risk Level label** — human-readable level (e.g. Medium)
- **Trust Score** — the calculated 0–100 score
Expand **View All Parameters** to inspect the full set of Base Security, AI-Specific, and Impact parameter values that produced the current score.
### Recalculate Trust Score
Click **Recalculate Trust Score** to trigger a fresh calculation based on the current parameter values. The panel shows a **Last calculated** timestamp so you can see when the score was last updated.
### Adjust Risk Level
Click **Adjust Risk Level** to modify the underlying risk profile parameters. See the [Assess](/trust-lifecycle/assess) documentation for a full description of each parameter and how it influences the trust score.
## API Access
Manage the API key that the agent uses to authenticate with the OpenBox SDK.
The panel shows:
| Detail | Description |
| ------------------- | -------------------------------------------------------- |
| **Primary API Key** | Masked key value with an **Active** status badge |
| **Created** | Date the key was generated |
| **Last used** | Timestamp of the most recent API call made with this key |
### Rotate Key
Click **Rotate Key** to generate a new API key. The previous key is immediately invalidated. Copy the new key when prompted — it is only displayed once.
:::warning
Rotating a key invalidates the old key immediately. Any running agent instances using the old key will fail to authenticate until they are updated with the new key.
:::
### Revoke Key
Click **Revoke Key** to permanently revoke the API key. This is a destructive action — the agent will no longer be able to authenticate and a new key must be generated before it can resume operations.
## Danger Zone

Actions in this section have significant impact on the agent's operational status and cannot always be easily undone.
The current agent status is displayed at the top of the section (e.g. **Active**, **Paused**, or **Revoked**).
### Pause Agent
Temporarily stops the agent from processing requests. While paused:
- The agent cannot start new sessions
- Existing in-flight sessions will complete but no new work is accepted
- The agent can be **resumed** at any time to restore normal operation
### Revoke Agent Access
Immediately revokes all API keys and disconnects any active integrations. This is a permanent action:
- All API keys are invalidated
- Active integrations are disconnected
- The agent's data and history are preserved for audit purposes
- The agent cannot be reactivated — a new agent must be registered to replace it
:::danger
Revoking an agent is irreversible. Use **Pause** if you only need to temporarily disable the agent.
:::
### Recent Administrative Actions
An audit trail at the bottom of the Danger Zone shows a chronological log of key changes made to the agent, including:
- API key rotations and revocations
- Rate limit updates
- Status changes (paused, resumed, revoked)
- Agent creation event
Each entry shows the action, timestamp, and the user who performed it.
## Next Steps
- **[Wrap an Existing Agent](/getting-started/temporal/wrap-an-existing-agent)** — Already have a Temporal agent? Add the OpenBox trust layer
- **[Run the Demo](/getting-started/temporal/run-the-demo)** — Clone the demo repo and see governance in action
- **[Agents](/dashboard/agents)** — View and manage all registered agents# Trust Overview
Source: https://docs.openbox.ai/dashboard/trust-overview
# Trust Overview
The Trust Overview is the primary dashboard view, showing aggregate governance health across all agents.
## Trust Score Components
The organization Trust Score is calculated from individual agent scores:
```
Agent Trust Score = (Risk Profile Score × 40%) + (Behavioral × 35%) + (Alignment × 25%)
```
| Component | Weight | Source |
| ---------------- | ------ | ------------------------------------------------------ |
| **Risk Profile** | 40% | Initial risk assessment (configured at agent creation) |
| **Behavioral** | 35% | Runtime compliance with policies and rules |
| **Alignment** | 25% | Goal alignment consistency (Verify phase) |
## Trend Indicators
Each metric shows directional trends:
- **↑** Improving - trust scores rising
- **↓** Degrading - trust scores falling
- **→** Stable - no significant change
## Filtering
Filter the dashboard by:
- **Team** - View specific team's agents
- **Trust Tier** - Focus on specific tier
- **Status** - Active, inactive, or blocked agents
## Exporting
Export dashboard data for reporting:
- **PDF Report** - Formatted for stakeholders
- **CSV** - Raw data for analysis
- **Compliance Report** - Formatted for auditors (see [Compliance](/administration/compliance-and-audit))
## Next Steps
1. **[View Alerts](/dashboard/alerts)** - See agents that need attention
2. **[Drill into Agents](/dashboard/agents)** - Click any agent to view details and configure trust controls# Alerts
Source: https://docs.openbox.ai/dashboard/alerts
# Alerts
The Alerts section highlights agents that need review. Access it from the dashboard's "Agents Requiring Attention" panel.
## Alert Types
### Trust Tier Changes
Triggered when an agent's Trust Score crosses a tier boundary:
- **Downgrade** (e.g., Tier 2 → Tier 3): May indicate policy violations or goal drift
- **Upgrade** (e.g., Tier 3 → Tier 2): Agent demonstrating improved compliance
### Goal Drift Detected
Triggered when the Verify phase detects misalignment:
- Alignment score dropped below threshold (default: 70%)
- Agent actions diverging from stated goals
- Requires investigation in **Agent Detail → Verify** tab
### Policy Violations
Triggered when governance blocks an operation:
- **BLOCK** - Action rejected, agent continues
- **HALT** - Terminates entire agent session
- Review details in **Agent Detail → Adapt → Insights**
### Approval Timeouts
Triggered when HITL requests expire without action:
- Default timeout: 24 hours
- Expired approvals result in operation denial
- Review queue in **[Approvals](/approvals)**
### Behavioral Rule Matches
Triggered when multi-step patterns are detected:
- Sensitive data access followed by external API call
- Repeated failed authentication attempts
- Custom patterns defined in behavioral rules
## Alert Actions
For each alert, you can:
| Action | Description |
| --------------- | ------------------------------------------------ |
| **View Agent** | Navigate to agent detail page |
| **Acknowledge** | Mark as reviewed (stays in history) |
| **Create Rule** | Pre-fill a behavioral rule to prevent recurrence |
| **Dismiss** | Remove from active alerts |
## Next Steps
When you see an alert:
1. **[View Agent Details](/dashboard/agents)** - Click the agent to investigate
2. **[Check Goal Alignment (Verify)](/trust-lifecycle/verify)** - If drift is detected
3. **[Review Approvals](/approvals)** - If approvals have timed out